You might think that installing blowers in a wood stove appears complex. However, I can guarantee that it’s simpler than you would anticipate.
In this article, I’ll guide you step-by-step on how to connect blowers to your wood stove, ensuring optimal heat distribution and increased efficiency. With the right tools and materials, along with some simple adjustments, you’ll have your blower system up and running in no time.
Let’s get started!
Key Takeaways
- Consider reliability, performance, and customer reviews when choosing a blower brand.
- Determine the appropriate blower size by measuring the dimensions of your stove and consulting the manufacturer’s guidelines.
- Clean the designated connection points and remove any debris before installing the blower.
- Test and adjust the blower system for optimal performance, monitoring air circulation and adjusting settings as needed.
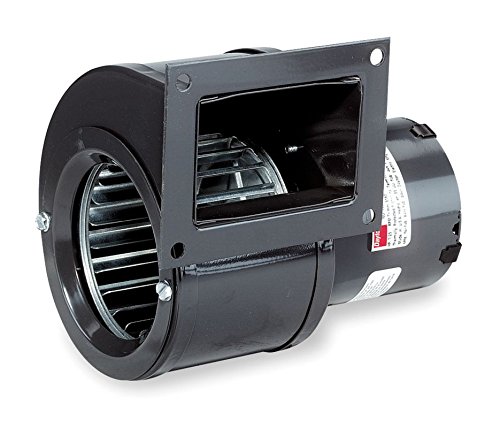
DAYTON 1TDP7 PSC Blower, Black, Draft Fan, 115 Volt, 146 CFM, Outdoor Wood Furnace Fan
- Voltage: 115 VAC
- Type: OEM Specialty Blower
- Certifications: UL and CE Recognized
As an affiliate, we earn on qualifying purchases.
As an affiliate, we earn on qualifying purchases.
Choosing the Right Blower for Your Wood Stove
I’m currently researching the best blower for my wood stove, hoping to find one that will efficiently distribute heat throughout my home. When choosing the right blower brand, it’s important to consider factors like reliability, performance, and customer reviews.
Some reputable brands known for their quality blowers include Napoleon, Drolet, and Osburn. It’s also crucial to determine the appropriate blower size for your wood stove. This is typically done by measuring the dimensions of your stove and consulting the manufacturer’s guidelines.
A blower that’s too small may not effectively distribute heat, while one that’s too large may cause excessive noise or airflow. Taking the time to choose the right blower brand and size will ensure optimal heat distribution and performance for your wood stove.
Gathering the Necessary Tools and Materials
To properly connect the blowers to my wood stove, I’ll need a screwdriver, pliers, and a set of screws for securing the blower assembly. Before starting the installation process, it is important to gather all the necessary tools and materials to ensure a smooth and efficient connection.
| Tools/Materials Needed |
|---|
| Screwdriver |
| Pliers |
| Set of screws |
Once you have gathered these items, you can begin the process of connecting the blowers to your wood stove. Start by carefully removing the blower assembly cover using the screwdriver. Then, locate the designated connection points on the stove and attach the blower assembly using the screws. Make sure to tighten the screws securely to avoid any loose connections.
When troubleshooting blowers, it is essential to check all the connections and ensure they are properly secured. Loose connections can lead to inefficient airflow and reduced performance. Additionally, inspect the blower motor for any signs of damage or wear. If necessary, replace any faulty components to maintain optimal functionality.
Preparing Your Wood Stove for Blower Installation
Before connecting the blowers, it’s important to properly prepare your wood stove by cleaning the designated connection points and removing any debris. This ensures a secure and efficient connection between the blower and the stove.
Start by cleaning the surface where the blower will be attached. Use a brush or vacuum to remove any dirt, dust, or debris. Next, inspect the connection points on the stove and ensure they’re clear of any obstructions. This includes removing any leftover adhesive or sealant from previous installations.
Once the surface is clean, you can begin connecting the blower to the ductwork. Align the blower with the designated connection point on the stove and secure it in place with screws or clamps, ensuring a tight seal.
Now that the wood stove is prepared, let’s move on to installing the blower system.
Installing the Blower System
I have already connected two blowers to the wood stove, and now I need to install the blower system.
To properly install the blower system, follow these steps:
-
Identify the optimal locations for installing the blower ducts. Consider the layout of your space and ensure that the ducts will distribute the warm air effectively.
-
Measure and cut the ducts to the desired lengths. Use appropriate tools and techniques to ensure clean and accurate cuts.
-
Connect the ducts to the blowers using duct connectors. Make sure the connections are secure to prevent air leaks.
-
Attach the other end of the ducts to the designated areas where you want the warm air to be distributed. Use appropriate connectors or vents for a secure connection.
Once the blower system is installed, it’s essential to test and adjust it for optimal performance. This process involves troubleshooting any issues that may arise, such as uneven air distribution or excessive noise. By addressing these concerns, you can ensure that your blower system operates efficiently and effectively, providing you with the desired warmth and comfort.
Testing and Adjusting the Blower for Optimal Performance
After connecting the ducts and attaching the blowers, it is important to test and adjust the blower system for optimal performance. Testing the blower settings ensures that the air circulation is efficient and effective. It also helps in troubleshooting common blower issues that may arise during operation.
To test the blower system, start by turning on the wood stove and setting it to the desired temperature. Monitor the air circulation and adjust the blower settings accordingly. It is important to note the sound and speed of the blowers to ensure they are functioning properly. If there are any issues, such as weak airflow or excessive noise, troubleshooting may be required. This can involve checking for blockages in the ducts, cleaning or replacing the blowers, or adjusting the blower speed.
Here is a table summarizing the blower settings and possible troubleshooting steps:
| Blower Setting | Description | Troubleshooting |
|---|---|---|
| Low Speed | Provides gentle airflow | – Check for blockages in the ducts – Clean or replace the blowers |
| Medium Speed | Provides moderate airflow | – Ensure proper power supply to the blowers – Adjust blower speed settings |
| High Speed | Provides maximum airflow | – Check for loose connections – Adjust blower angle for optimal air circulation |
Conclusion
In conclusion, connecting blowers to a wood stove is a simple and effective way to enhance its performance and heat distribution. By choosing the right blower, gathering the necessary tools and materials, preparing the wood stove, and installing the blower system correctly, you can ensure optimal performance.
Testing and adjusting the blower will further optimize its functionality. So, take the necessary steps and enjoy the benefits of a well-connected blower system for your wood stove.