Connect with us

Wood Stove

How To Build A Wood Stove Hearth

Published

on


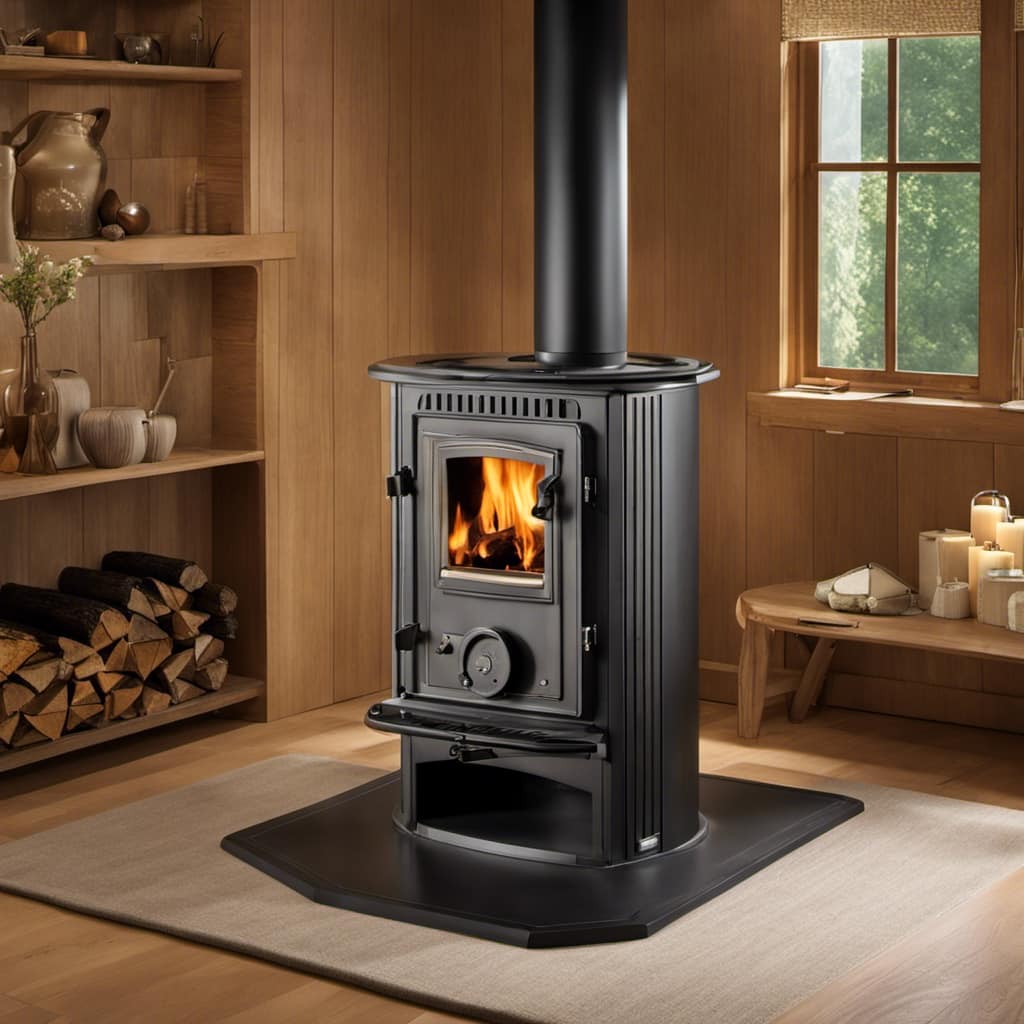
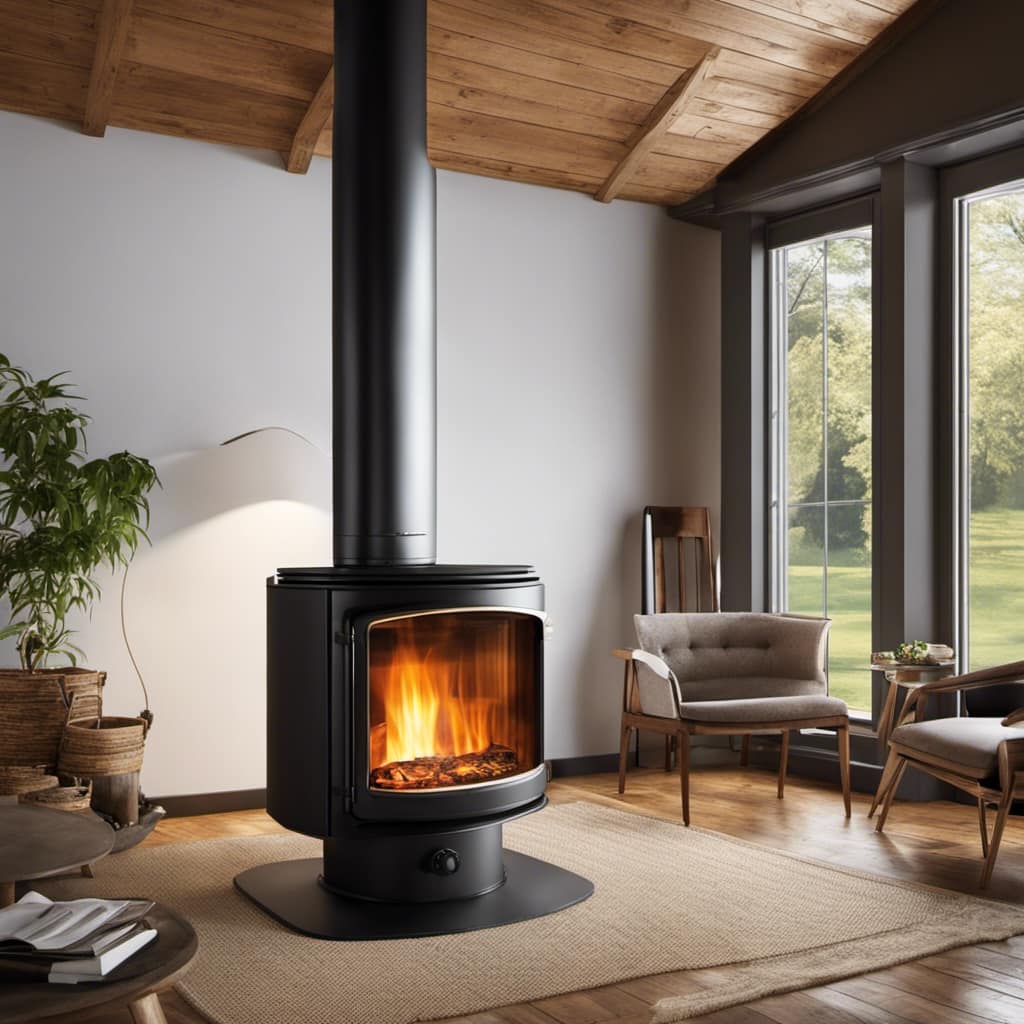
I’ve consistently been drawn to the comforting warmth emanating from a crackling fire. The undeniable magic of gathering close to a wood stove, particularly when it sits atop an exquisitely built fireplace, is something I deeply cherish.

In this article, I’ll guide you through the step-by-step process of creating your own wood stove hearth. From selecting the perfect location to adding the final touches, you’ll learn everything you need to know to create a safe and inviting space for your wood stove.

Let’s get started!

Key Takeaways

  • Safety is the top priority when choosing a location for the wood stove hearth.
  • Consider materials that can withstand high temperatures, such as ceramic tiles or stone.
  • Ensure there is enough clearance around the stove to prevent fire hazards.
  • Choose natural stone or heat-resistant tiles for the best finish options.

Selecting the Right Location for Your Wood Stove Hearth

I’m considering the best location for my wood stove hearth. When it comes to selecting the right location for your wood stove hearth, there are a few important factors to consider.wood stove insert with blower

First and foremost, safety should be your top priority. You want to choose a location that’s away from any flammable materials, such as curtains or furniture, and ensure that there’s enough clearance around the stove to prevent any potential fire hazards.

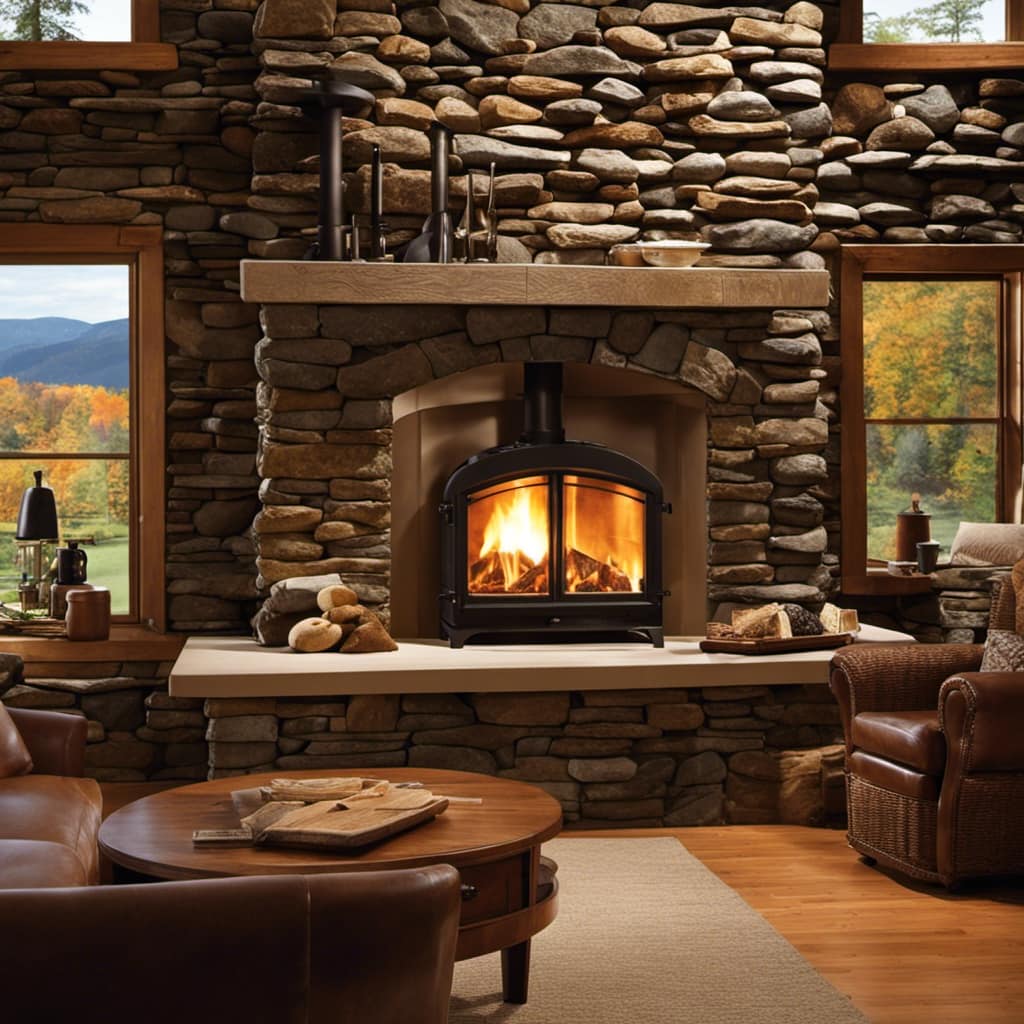
Another important aspect to consider is the materials you choose for your hearth. It’s crucial to select appropriate materials that can withstand the high temperatures generated by the wood stove. Non-combustible materials such as ceramic tiles, stone, or brick are commonly used for hearths due to their heat-resistant properties.

In addition to safety and appropriate materials, you should also consider the practicality of the location. It’s recommended to place the wood stove hearth in a central location in the room, allowing for maximum heat distribution. This way, you can ensure that the warmth from the stove reaches all corners of the space.

Advertisement

Gathering the Necessary Tools and Materials

To create the perfect foundation for my new wood stove, I need to gather all the tools and materials necessary. Selecting the appropriate tools and gathering the necessary materials are crucial steps in building a wood stove hearth.wood burning stove

First, I’ll need a measuring tape to accurately determine the dimensions of the hearth. This will ensure that it fits perfectly in the designated area.

Next, I’ll require a level to ensure that the hearth is installed correctly and is perfectly level. It’s also important to have a good quality masonry trowel to apply the mortar for the hearth foundation. Additionally, I’ll need a wheelbarrow or bucket to mix the mortar and a trowel to spread it.

For the materials, I’ll need fire-resistant bricks or tiles to build the hearth structure. These bricks or tiles should be able to withstand high temperatures without cracking or breaking. Mortar mix is essential to hold the bricks or tiles together and create a strong foundation.

Lastly, I’ll need a brush or broom to clean the area and remove any debris before starting the construction process. By selecting the appropriate tools and gathering the necessary materials, I can ensure a successful wood stove hearth installation.wood burner stove

Measuring and Marking Out the Hearth Area

Using a measuring tape, I accurately determine the dimensions of the designated area for the foundation. Measuring techniques are crucial in ensuring the wood stove hearth is built to the correct specifications. To start, I measure the length and width of the area, ensuring that there is enough space to accommodate the stove and provide ample clearance for safety purposes. Additionally, I take into account any local building codes or regulations that may dictate specific dimensions for the hearth.

Once the measurements are obtained, I mark out the area using a pencil or chalk. This helps me visualize the layout of the hearth and ensures precise construction. Safety precautions are essential during this process. I make sure to wear protective goggles and gloves to prevent any injuries while using the measuring tape and marking tools.

Advertisement

To further illustrate the importance of accurate measurements and safety precautions, here is a table showcasing common measuring techniques and corresponding safety precautions:

Measuring Technique Safety Precautions
Using a measuring tape Wear protective goggles and gloves
Marking with a pencil or chalk Ensure proper ventilation in the workspace
Checking for levelness Use a level tool and work on a stable surface
Measuring angles Avoid sharp or pointed objects

Preparing the Foundation for the Hearth

After measuring and marking out the hearth area, I begin preparing the foundation for it. The foundation preparation is a crucial step in the hearth construction process as it ensures stability and durability.cast iron wood stove

To start, I clear the area of any debris or vegetation, ensuring a clean and level surface. Next, I excavate the soil to a depth of at least 6 inches, removing any loose or unstable soil. This allows me to create a solid base for the hearth.

Once the excavation is complete, I compact the soil using a hand tamper or a plate compactor. This helps to prevent any settling or shifting of the foundation over time. After compaction, I lay down a layer of gravel or crushed stone, about 4 inches thick. This provides additional stability and drainage for the hearth.

To ensure proper alignment and support, I use a level and a string line to check the foundation’s slope and levelness. Adjustments can be made by adding or removing gravel as necessary. Once the foundation is perfectly level, I compact the gravel layer using the tamper or compactor.

With the foundation prepared, I’m now ready to move on to the next step: building the base and frame of the hearth. This involves constructing a sturdy framework that will hold the weight of the hearth materials and provide a solid base for the wood stove.

Advertisement
log wood stove

Building the Base and Frame of the Hearth

I construct a strong and sturdy framework to support the weight of the materials and provide a solid base for the fireplace. Building the base and frame of the hearth is a crucial step in ensuring the stability and longevity of your wood stove hearth. It requires careful planning, precise measurements, and the use of proper building techniques. Safety precautions should also be taken into consideration throughout the construction process.

To start, gather the necessary materials such as pressure-treated lumber, plywood, screws, and a circular saw. Begin by measuring the desired dimensions of your hearth and mark them on the floor. Cut the pressure-treated lumber to size and create a rectangular frame that matches the dimensions. Secure the frame to the floor using screws, ensuring it’s level and square.

Next, reinforce the frame by adding cross supports. These supports will provide additional strength and prevent the frame from sagging over time. Cut pieces of pressure-treated lumber to fit between the longer sides of the frame and attach them using screws.

Once the frame is complete, it’s time to create the top surface of the hearth. Cut a piece of plywood to fit the dimensions of the frame and attach it securely using screws. This will serve as the base for the decorative materials that will be added later.wood stoves for sale craigslist

Building the base and frame of the hearth requires attention to detail and adherence to safety precautions. Always wear protective gear such as gloves and safety goggles when handling tools and materials. Ensure that all measurements are accurate and the frame is level before proceeding.

Installing Heat-Resistant Backer Board or Tiles

When it comes to installing heat-resistant backer board or tiles for your wood stove hearth, it’s important to choose the right materials and follow proper installation techniques. This will ensure the longevity and effectiveness of your hearth.

In the following points, I’ll discuss the key considerations and provide helpful tips and tricks for a successful installation.

Advertisement

Choosing the Right Materials

I’m going to research the best materials for building a wood stove hearth.wood stoves for sale in maine

When it comes to fireplace design, choosing the right materials is crucial. Not only do you want a hearth that complements the overall aesthetic of your home, but you also need to consider cost considerations.

Here are four important factors to keep in mind:

  1. Fire-resistant materials: Opt for materials like firebrick, which can withstand high temperatures without cracking or crumbling.

  2. Heat insulation: Look for materials that offer good heat insulation properties, such as refractory cement or fireproof tiles, to protect the surrounding floor.defiant 1910 wood stove

  3. Durability: Choose materials that are sturdy and long-lasting, ensuring your hearth can withstand the test of time and frequent use.

  4. Cost-effectiveness: Consider the cost of the materials and installation, balancing quality and affordability to achieve the best value for your budget.

Installation Tips and Tricks

To ensure a successful installation, it’s important to carefully follow the manufacturer’s instructions and consult with a professional if needed.

When it comes to installing a wood stove hearth, there are a few key techniques to keep in mind.cast iron wood stove

First, make sure the hearth is properly positioned and level. Use shims or adjustable feet if necessary.

Next, secure the hearth to the floor using screws or anchors, ensuring it’s stable and secure.

Advertisement

When troubleshooting common issues, such as uneven tiles or gaps between the hearth and the wall, consider using a leveling compound or caulk to correct the problem.

Remember, the goal is to create a safe and functional hearth that will protect your home from the heat of the wood stove.wood stove hand tools

Speaking of protection, let’s now discuss applying a protective finish to the hearth.

Applying a Protective Finish to the Hearth

To protect the wood stove hearth and enhance its durability, applying a protective finish is crucial. There are several options to consider, including sealants, varnishes, or heat-resistant paints.

When applying the protective finish, it’s essential to follow the manufacturer’s instructions, ensuring even coverage and allowing for adequate drying time.

Best Finish Options

For my wood stove hearth, the best finish options would be a natural stone or a heat-resistant tile. These materials not only provide a beautiful and durable surface, but they also offer excellent heat resistance, ensuring the longevity of the hearth.

Advertisement
wood burning stove indoor

Here are four reasons why these options are the best for sealing and maintaining your wood stove hearth:

  1. Superior heat resistance: Natural stone and heat-resistant tiles are specifically designed to withstand high temperatures without cracking or discoloration, making them ideal for use around a wood stove.

  2. Easy to clean and maintain: Both natural stone and heat-resistant tiles are non-porous, which means they’re resistant to stains and spills. Regular cleaning with a mild detergent is all that’s needed to keep them looking pristine.

  3. Long-lasting durability: These materials are known for their strength and durability, ensuring that your wood stove hearth will remain in great condition for years to come.wood stove for 800 sq ft

  4. Aesthetic appeal: Natural stone and heat-resistant tiles come in a variety of colors and patterns, allowing you to choose a finish that complements your home decor.

Application Tips and Tricks

When it comes to applying insulation for your wood stove hearth, there are a few tips and tricks that can ensure proper insulation and enhance the overall design. Here are some ideas to consider:

Tip Description
1 Use high-quality insulation materials to maximize heat retention and prevent heat loss.
2 Seal any gaps or cracks in the hearth with fire-resistant caulk to prevent the escape of hot air.
3 Consider using decorative tiles or stone veneer to add a unique and visually appealing touch to your hearth.
4 Incorporate a heat shield behind the stove to protect the surrounding walls from excessive heat.

Ensuring Proper Ventilation and Clearances

I need to make sure there’s enough space around the wood stove for proper ventilation and clearances. This is crucial for the safety and efficiency of your wood stove installation.

Here are some important considerations to keep in mind:wood pellet stove

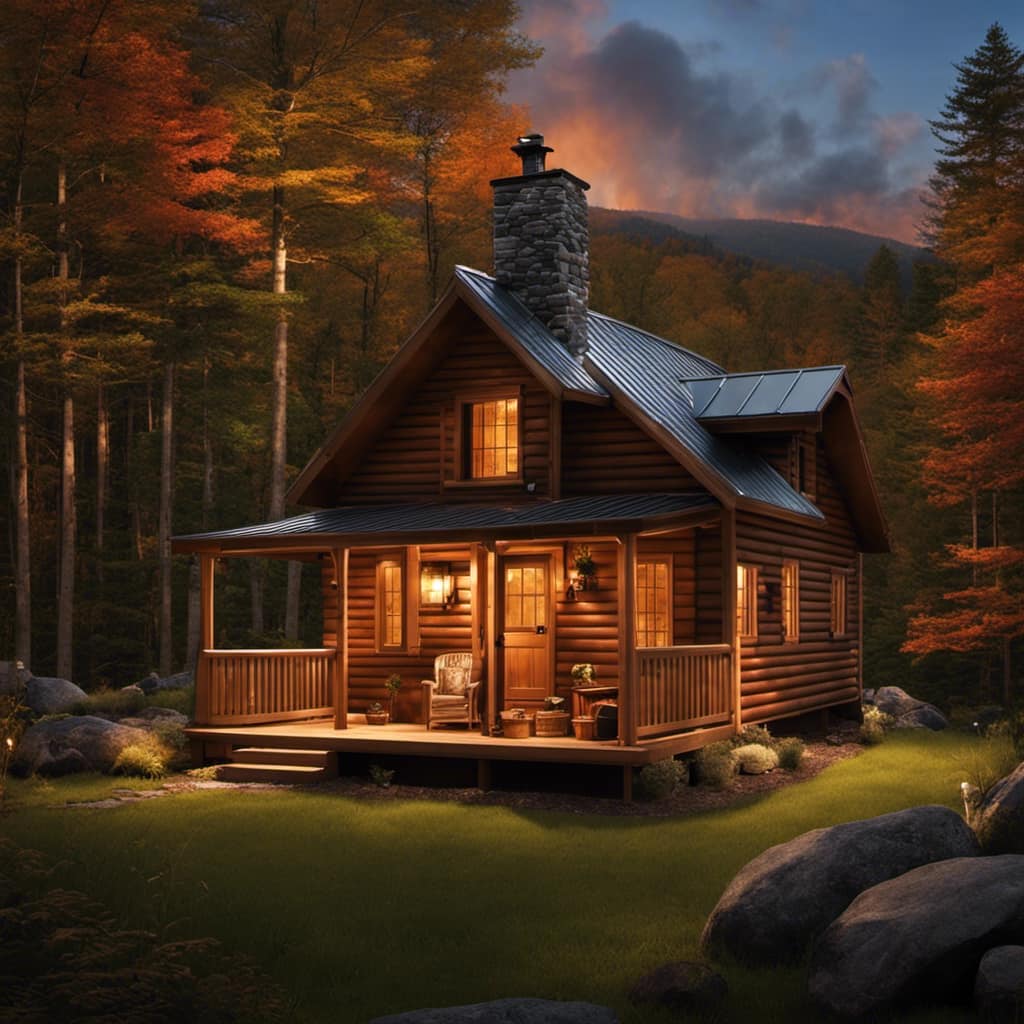
  1. Proper venting: Ensure that your wood stove is properly vented to allow for the safe removal of combustion byproducts. This can be achieved through a chimney or a vent pipe system. Make sure to follow the manufacturer’s guidelines for venting requirements.

  2. Clearance to combustibles: Maintain the required clearance distances between the wood stove and any combustible materials such as walls, furniture, and flooring. These clearances help prevent fires and ensure the heat can dissipate properly.

  3. Fireproof floor protection: Install a non-combustible hearth pad or floor protector underneath your wood stove. This will protect your flooring from the intense heat generated by the stove and prevent any accidental fires.

  4. Air flow and circulation: Allow for adequate air flow around the wood stove to promote proper combustion and heat distribution. Avoid blocking vents or placing furniture near the stove that may obstruct air circulation.vogelzang wood stove

Adding the Final Touches and Safety Measures to Your Wood Stove Hearth

To ensure safety and add a finishing touch, I’ll install a fireproof hearth pad underneath the stove. Safety precautions are crucial when it comes to wood stove hearths. One of the most important steps is to install a fireproof hearth pad, which acts as a barrier between the stove and the floor. This pad is made from non-combustible materials and is designed to withstand high temperatures.

When choosing a hearth pad, there are several factors to consider. First, make sure it meets the requirements of your local building codes. Look for a pad that’s at least 1 inch thick and extends at least 18 inches beyond the sides and front of the stove. This will provide adequate protection against heat transfer.

In addition to safety, the hearth pad can also enhance the overall design of your wood stove area. There are various hearth design ideas to choose from, such as traditional brick or stone, or more modern materials like ceramic tiles or concrete. Consider the style of your home and the aesthetic you want to achieve when selecting the material for your hearth pad.

Advertisement

What Is The Difference Between A Wood Stove Hearth and a Wood Stove Hearth Pad?

A wood stove hearth pad is a protective barrier between the wood stove and the floor. It is made of non-combustible materials to prevent heat transfer and potential fire hazards. On the other hand, a wood stove hearth is the area directly in front of the wood stove, which can be made of various materials.

Frequently Asked Questions

When it comes to wood stove hearths, it’s crucial to consider the clearance requirements for safety reasons. The recommended clearances depend on various factors, such as the size of the stove and the type of materials used.lopi wood stove for sale craigslist

It’s important to consult the manufacturer’s guidelines or local building codes to ensure proper clearances. Additionally, there are alternative materials available, such as tile, brick, or stone, that can be used for the hearth construction while still meeting the necessary clearance requirements.

How Do I Ensure Proper Ventilation for My Wood Stove Hearth?

To ensure proper ventilation for a wood stove hearth, it’s crucial to prioritize air circulation. This allows for efficient burning and prevents the buildup of harmful gases.

By incorporating vents or openings in strategic locations, you can create a flow of fresh air and allow for the escape of smoke and fumes.

Proper ventilation is essential for maintaining a safe and healthy environment when using a wood stove.

Advertisement
wood stove indoor

Can I Use Regular Tiles Instead of Heat-Resistant Backer Board?

Sure, you can use regular tiles instead of heat-resistant backer board for a wood stove hearth. However, there are pros and cons to consider.

Regular tiles may be more cost-effective, but they aren’t as heat resistant as backer board. Heat-resistant backer board is specifically designed to withstand high temperatures, reducing the risk of cracking or damage.

Ultimately, it’s important to prioritize safety and choose the appropriate materials that will ensure proper ventilation and protection for your wood stove hearth.

What Is the Best Protective Finish for a Wood Stove Hearth?

In my experience, the best finishes for a wood stove hearth are those specifically designed to withstand high temperatures. These heat-resistant finishes provide excellent protection against heat and potential fire hazards.wood stoves for heating garage

When applying finishes, it’s important to follow the manufacturer’s instructions carefully to ensure proper adhesion and durability. Additionally, consider using a finish that’s easy to clean and maintain, as a wood stove hearth can accumulate ash and soot over time.

Are There Any Safety Regulations or Codes That I Need to Follow When Building a Wood Stove Hearth?

When building a wood stove hearth, it’s crucial to adhere to safety regulations and building codes. These guidelines are in place to ensure the proper installation and usage of wood stoves, reducing the risk of fire hazards and carbon monoxide poisoning.

Safety regulations may vary depending on your location, so it’s essential to consult local authorities or building codes to ensure compliance.

Advertisement

Conclusion

In conclusion, building a wood stove hearth is a worthwhile project that requires careful planning and attention to detail.vogelzang wood stove

One interesting statistic to note is that according to the National Fire Protection Association, heating equipment, including wood stoves, accounted for 15% of home structure fires in the United States in 2019.

This highlights the importance of following proper safety measures and ensuring proper ventilation and clearances when building and using a wood stove hearth.

Growing up surrounded by the vast beauty of nature, Sierra was always drawn to the call of the wild. While others sought the comfort of the familiar, she ventured out, embracing the unpredictable and finding stories in the heartbeat of nature.   At the epicenter of every remarkable venture lies a dynamic team—a fusion of diverse talents, visions, and passions. The essence of Best Small Wood Stoves is crafted and refined by such a trio: Sierra, Logan, and Terra. Their collective expertise has transformed the platform into a leading authority on small wood stoves, radiating warmth and knowledge in equal measure.

Continue Reading
Advertisement

Wood Stove

How Long Does It Take Wood To Ignite Aftee Being Put In A Wood Stove

Published

on

By

An image capturing the mesmerizing scene of a wood stove, with a bed of glowing embers beneath carefully stacked logs, as tendrils of thin smoke gracefully curl upwards, depicting the anticipation of wood slowly igniting

I must admit, the wait for wood to catch fire in a wood stove can seem never-ending. However, do not worry, as in this article, I will share some strategies and tips to speed up the process.

From understanding the temperature and moisture content of the wood to choosing the right type and preparing it efficiently, we’ll explore all the factors that affect wood ignition time.

So let’s dive in and get that fire blazing in no time!

Key Takeaways

  • Weather conditions and moisture content of the wood can affect the ignition time.
  • Properly seasoned wood with around 20% moisture content ignites more easily.
  • Smaller wood logs and softer woods tend to ignite faster than larger and harder woods.
  • Proper wood storage and preparation, such as keeping it off the ground, using fire starters, and maintaining airflow, can help ensure faster ignition in a wood stove.

Factors Affecting Wood Ignition Time

I’m curious about the factors that can affect the time it takes for wood to ignite in a wood stove.

One of the key factors is the weather conditions. Cold and damp weather can make it harder for the wood to catch fire, as moisture content in the wood can be high. It’s important to ensure that the wood is properly seasoned and has a moisture content of around 20% for optimal ignition.

Another factor to consider is the size of the wood logs. Smaller logs tend to ignite more quickly as they’ve a larger surface area exposed to the heat source.

Advertisement

Additionally, the type of wood being used can also affect ignition time, with softer woods igniting faster than harder woods.

Temperature and Moisture Content of Wood

The optimal moisture content for wood is around 20%, which ensures efficient ignition in a wood stove. The wood ignition process is influenced by various factors, and the moisture content plays a critical role in determining how quickly the wood will ignite.

When wood is too wet, it requires more energy to burn off the excess moisture before it can reach its ignition point. On the other hand, if the wood is too dry, it may ignite too quickly and burn too rapidly, leading to inefficient combustion and wasted energy.

Therefore, it’s essential to properly store wood to maintain its moisture content within the optimal range. Proper wood storage involves keeping the wood off the ground, covering it to protect it from rain or snow, and allowing for proper airflow to prevent excessive moisture buildup.

Type of Wood and Its Density

I prefer using hardwoods like oak or maple due to their density and their ability to burn longer and provide more heat. When it comes to wood species selection, it’s important to consider the impact of wood moisture content. Here are three key points to keep in mind:

Advertisement

  1. Moisture content affects combustion efficiency: Wet wood contains a higher moisture content, which leads to incomplete combustion and the production of more smoke and pollutants. Dry hardwoods, on the other hand, burn more efficiently and produce less smoke.

  2. Heat output is influenced by wood density: Hardwoods have a higher density compared to softwoods, resulting in a higher heat output. This means that hardwoods like oak and maple can provide more warmth and keep your space cozy for a longer period of time.

  3. Longer burn time with hardwoods: Due to their density, hardwoods burn at a slower rate, allowing for a longer burn time per log. This means less frequent refueling and a more consistent heat source.

Preparing Wood for Efficient Ignition

To ensure efficient ignition, I always make sure to properly split and dry my firewood. Proper wood storage is essential for achieving this. It’s important to store the firewood in a well-ventilated area, off the ground and protected from moisture. This allows the wood to dry properly and reduces the risk of it being damp or rotting.

When it comes to igniting the wood in a wood stove, using fire starters or kindling can greatly speed up the process. These small pieces of flammable material help create a hot and sustained flame, which in turn ignites the larger pieces of wood.

By incorporating these techniques, you can ensure a faster and more efficient ignition in your wood stove.

Now, let’s move on to some tips for faster wood ignition in a wood stove.

Tips for Faster Wood Ignition in a Wood Stove

Using kindling and ensuring proper airflow are key to achieving faster wood ignition in a wood stove. When it comes to stubborn wood that’s difficult to ignite, there are several ignition techniques that can be employed:

Advertisement

  1. Preparation: Properly seasoned wood with a moisture content below 20% is essential for efficient ignition. This ensures that the wood is dry enough to catch fire quickly.

  2. Kindling: Creating a bed of small, dry kindling underneath the larger logs helps to ignite the fire faster. Kindling acts as a fuel source that ignites easily and produces enough heat to catch the larger logs on fire.

  3. Airflow: Adequate airflow is crucial for wood ignition. By opening the damper or adjusting the air vents, you can ensure that enough oxygen is getting to the fire, promoting faster ignition.

While some may consider using accelerants to speed up wood ignition, it’s important to note that this can be dangerous and may result in uncontrollable fires or the release of harmful chemicals. It’s recommended to rely on proper ignition techniques and patience for a safe and efficient wood ignition process.

Frequently Asked Questions

Can I Use Treated Wood in My Wood Stove?

Using pressure treated wood in a wood stove is not recommended due to the chemicals it releases when burned. It is safer to use untreated wood or other alternatives for faster ignition.

What Is the Best Type of Wood to Use for Faster Ignition in a Wood Stove?

Fast burning woods like pine or fir can ignite in a wood stove within minutes. To ensure efficient wood stove usage, it’s important to choose dry, seasoned firewood and properly maintain the stove.

Are There Any Safety Precautions I Should Take When Igniting Wood in a Wood Stove?

When igniting wood in a wood stove, it is important to take safety precautions. Keep a fire extinguisher nearby and ensure proper ventilation. Additionally, the moisture content of the wood can affect its ignition time.

Can I Use Wood Chips or Sawdust for Ignition in a Wood Stove?

I can use wood chips or sawdust for ignition in a wood stove. They are effective fire starters for faster ignition. The small size and high surface area make them ignite quickly, reducing the time needed for the wood to catch fire.

Advertisement

How Does the Size of the Wood Affect Its Ignition Time in a Wood Stove?

Moisture content significantly affects wood ignition in a wood stove. Smaller pieces of wood ignite faster due to increased surface area. However, larger pieces provide longer burn times. Consider the advantages and disadvantages of each for efficient use in a wood stove.

Conclusion

After careful analysis of the factors affecting wood ignition time, it’s safe to say that wood doesn’t ignite instantly in a wood stove. Contrary to popular belief, wood requires time to reach its ignition point, which is influenced by factors such as temperature, moisture content, and wood density.

To expedite the process, it’s crucial to choose the right type of wood and ensure it’s properly prepared. So, if you were expecting an immediate burst of flames, you might’ve to wait a little longer.

Continue Reading

Wood Stove

Why Does Your Wood Stove Smoke

Published

on

By

An image capturing a rustic, cozy living room

Dealing with the smoke from your wood stove can be a real nuisance. But don’t worry, I’m here to provide some tips on how to manage it.

Understanding the root causes of this predicament is crucial. Insufficient airflow, improper wood selection, damaged chimney, inadequate maintenance, and incorrect installation are the major culprits.

Let’s delve into each of these factors to uncover the secrets behind why your wood stove may be producing that bothersome smoke.

Key Takeaways

  • Blocked vents disrupt combustion process and lead to incomplete burning and smoke generation.
  • Burning wet or high-moisture wood results in inefficient burning and increased creosote buildup.
  • Cracked or deteriorating chimney can cause leaks and smoke entry.
  • Inadequate stove maintenance, including dirty burners and clogged flue, can lead to smoke issues.

Insufficient Airflow

I’m having trouble with my wood stove smoking because there’s not enough airflow. A common cause of insufficient airflow is blocked vents. When the vents are blocked, the combustion process is disrupted, leading to incomplete burning of the wood and the generation of smoke.

To ensure efficient combustion and minimize smoke, it’s crucial to maintain clear and unobstructed vents. Blocked vents can result from a buildup of creosote or debris, so regular cleaning is essential.

Additionally, proper placement of the stove is crucial to ensure adequate airflow. Make sure that the stove is positioned away from any obstructions, such as furniture or curtains, that might impede the flow of air.

Advertisement

Improper Wood Selection

To prevent excessive smoke and poor combustion, it’s important to avoid burning wet wood or wood with high moisture content, as it can result in inefficient burning and increased creosote buildup. When burning seasoned firewood, which has a moisture content of around 20% or less, the wood burns more efficiently, producing less smoke and providing more heat output. Seasoned firewood has been properly dried for at least six months, allowing the moisture content to decrease significantly. This ensures that the wood burns cleanly and effectively in your wood stove. However, if you burn wood with high moisture content, it will create more smoke and reduce the overall efficiency of your stove. This can also lead to a higher risk of creosote buildup in your chimney, which can be dangerous and increase the chance of a chimney fire. Therefore, it’s crucial to always use dry, seasoned firewood to prevent excessive smoke and maintain proper combustion in your wood stove.

Now, let’s discuss another potential reason for excessive smoke: a damaged or leaky chimney.

Damaged or Leaky Chimney

A damaged or leaky chimney can cause smoke to enter your home, which can be hazardous to your health and safety. It’s important to address any issues with your chimney promptly to ensure the proper functioning of your wood stove.

Here are three signs of a damaged chimney that you should be aware of:

  1. Cracked or crumbling mortar: If you notice any cracks or crumbling in the mortar joints of your chimney, it could indicate water damage or structural issues. This can lead to leaks and smoke entering your home.

  2. Rusty or deteriorating chimney cap: The chimney cap plays a crucial role in keeping out rain, snow, debris, and animals. If it’s rusty or deteriorating, it may not be able to perform its function effectively, allowing smoke to escape into your living space.

  3. Smoke stains or odors: If you notice smoke stains on the walls or ceilings near your chimney or detect a persistent smoky odor in your home, it could be a sign of a leaky chimney. This should be addressed promptly to prevent further damage and potential health risks.

When faced with a damaged chimney, there are various repair options available, such as chimney relining, chimney crown repair, and chimney flashing repair. It’s important to consult with a professional chimney technician to determine the best course of action for your specific situation.

Advertisement

Inadequate Stove Maintenance

One of the main causes of smoke in your home can be the result of inadequate stove maintenance. A dirty stove and a clogged flue are two common culprits that can lead to smoke issues. When the stove isn’t properly cleaned, a buildup of soot and debris can occur on the burners, causing incomplete combustion and the production of smoke.

Additionally, a clogged flue prevents the proper ventilation of smoke, leading to its accumulation inside your home. Regular cleaning and maintenance of your stove, including cleaning the burners and ensuring the flue is clear, is crucial in preventing smoke issues.

It’s recommended to schedule annual professional maintenance to ensure your stove is in optimal condition and to avoid the inconvenience and potential health hazards associated with smoke in your home.

Incorrect Stove Installation

I regret not hiring a professional for my stove installation, as it has caused numerous issues and potential hazards. When it comes to installing a wood stove, proper positioning and sizing are crucial factors that shouldn’t be taken lightly.

Here are three key reasons why improper stove positioning and incorrect flue size can lead to problems:

Advertisement
  1. Inadequate clearance: Placing the stove too close to combustible materials can increase the risk of fire. It’s essential to follow the manufacturer’s guidelines for proper clearances to ensure the safe operation of the stove.

  2. Inefficient heating: Incorrect positioning can hinder the stove’s ability to distribute heat effectively throughout the room. This can result in uneven temperatures and wasted energy, leading to discomfort and higher heating costs.

  3. Insufficient draft: Using an incorrect flue size can impede the stove’s ability to expel smoke and gases properly. This can lead to backdrafting, where smoke enters the room instead of being directed outside. Aside from the health hazards, backdrafting can damage the stove and cause indoor air quality issues.

To avoid these problems, it’s essential to consult a professional for the proper installation of your wood stove. They’ll ensure that the stove is positioned correctly and the flue size is appropriate for efficient and safe operation.

Frequently Asked Questions

Can Smoking Occur if There Is Sufficient Airflow in the Wood Stove?

Yes, smoking can still occur in a wood stove even with sufficient airflow. Factors like improper wood placement, damp or unseasoned wood, or a clogged chimney can all contribute to smoking issues. Proper troubleshooting can resolve these problems and improve wood stove performance.

What Are Some Common Wood Types That Should Be Avoided to Prevent Smoking in a Wood Stove?

To prevent smoking in a wood stove, it is important to avoid using wood types like pine, as they contain high levels of resin. Additionally, properly seasoning firewood is crucial to reduce smoke production.

How Can I Identify if My Chimney Is Damaged or Leaking?

To identify chimney damage or leaks, conduct a thorough chimney inspection. Look for cracks, loose bricks, or crumbling mortar. Additionally, consider installing a smoke detector near the stove to quickly detect any smoke issues.

Besides Regular Cleaning, What Other Maintenance Practices Can Help Prevent Smoking in a Wood Stove?

Other maintenance practices, such as ensuring proper airflow and avoiding certain wood types, can help prevent smoking in a wood stove. Identifying chimney damage or leaks and checking for correct stove installation are also crucial.

Advertisement

What Are Some Signs of Incorrect Stove Installation That May Lead to Smoking?

Installing a wood stove improperly can lead to frustrating smoke issues. One key sign is if the chimney height is too short. Another is using unseasoned wood, which can cause excessive smoke.

What Are Some Wood Stove Brands That Have Smoke-Reducing Features?

Looking for the best wood stove brands with smoke-reducing features? Look no further. With increasing concerns about air pollution, several brands are innovating their wood stoves to minimize smoke emissions. Some notable options include Vermont Castings, Jøtul, and Blaze King. These brands prioritize efficiency and clean burning, ensuring you can enjoy the warmth of a wood stove while minimizing environmental impact.

Conclusion

In conclusion, when your wood stove smokes, it’s often due to factors such as:

  • Insufficient airflow
  • Improper wood selection
  • A damaged or leaky chimney
  • Inadequate stove maintenance
  • Incorrect installation

To prevent this, you should:

  • Ensure proper ventilation
  • Use seasoned and dry wood
  • Inspect and repair your chimney regularly
  • Maintain your stove diligently
  • Ensure professional installation

By addressing these issues, you can enjoy a smoke-free and efficient wood stove experience, creating a cozy and inviting atmosphere in your home.

Continue Reading

Wood Stove

How To Build A Wood Stove From A Jerry Can

Published

on

By

An image showcasing the step-by-step process of transforming a jerry can into a wood stove

I have always been fascinated by the concept of transforming ordinary objects into useful tools.

So when I came across an old jerry can in my garage, I knew I had the perfect opportunity to create my own wood stove.

In this article, I’ll guide you through the process of transforming a jerry can into a functional and efficient wood stove, complete with ventilation, legs, and a base.

Get ready to unleash your inner DIY enthusiast and start enjoying the warmth of your homemade wood stove.

Key Takeaways

  • Consider the capacity and dimensions of the jerry can
  • Compare different materials for jerry cans
  • Prepare and clean the jerry can properly
  • Take safety precautions and use the right tools when modifying the jerry can

Selecting the Right Jerry Can for Your Wood Stove

I’m trying to figure out which jerry can is the best option for my wood stove.

When it comes to choosing the right size jerry can for your wood stove, it’s important to consider the capacity and dimensions. A larger can will hold more fuel, but it may be too bulky for your space. On the other hand, a smaller can may require more frequent refills.

Advertisement

Additionally, it’s crucial to compare different materials for jerry cans to ensure optimal wood stove performance. Metal cans are durable and resistant to heat, but they can also be heavy. Plastic cans, on the other hand, are lightweight and easier to handle, but may not withstand high temperatures as well.

Ultimately, finding the perfect jerry can for your wood stove is about balancing capacity, dimensions, and material for efficient and safe operation.

Preparing and Cleaning the Jerry Can

Before starting to use the jerry can, it’s crucial to properly clean and prepare it by removing any dirt or residue, and then ensuring it’s completely dry. Here is the cleaning process and safety precautions to follow:

  1. Rinse the jerry can with warm water and a mild detergent to remove any dirt or debris. Use a sponge or brush to scrub the inside and outside of the can thoroughly.

  2. Rinse the can again with clean water to remove any soap residue. Make sure to rinse it multiple times to ensure all the soap is gone.

  3. After rinsing, allow the jerry can to air dry completely. This is important to prevent any moisture from causing rust or corrosion.

By following these cleaning steps, you can ensure that your jerry can is ready for modification.

Now, let’s discuss cutting open and modifying the jerry can for ventilation.

Advertisement

Cutting Open and Modifying the Jerry Can for Ventilation

I’ll explain how to use a few small holes in the jerry can to provide adequate ventilation for the wood stove. When modifying the jerry can for ventilation, it is important to take safety precautions and use the right tools. Here is a table outlining the necessary steps:

Step Safety Precautions Tools Needed
1 Wear protective gloves and goggles Drill
2 Work in a well-ventilated area Marker
3 Ensure the jerry can is empty and clean Metal file
4 Mark the desired ventilation holes on the can Safety glasses
5 Use the drill to create the holes Protective gloves
6 Smooth the edges of the holes with the metal file Goggles
7 Clean any metal shavings from the can Clean cloth

Adding Legs and a Base to the Wood Stove

I can attach some sturdy legs and a stable base to the wood stove to ensure it stands securely on any surface. Achieving stove stability is crucial to prevent accidents and maintain proper functioning.

When choosing materials for the legs and base, it’s important to consider their strength, durability, and heat resistance. Here are three essential elements to consider:

  1. Material Selection: Opt for materials that can withstand high temperatures, such as stainless steel or cast iron. These materials are known for their strength and ability to withstand the intense heat generated by the wood stove.

  2. Design and Construction: The design of the legs should provide sufficient support and stability. Consider a tripod or four-leg design for optimal balance. Additionally, ensure the legs are securely attached to the stove body to prevent any wobbling or instability.

  3. Base Size and Shape: The base of the wood stove should be wide and flat enough to distribute the weight evenly, ensuring stability on various surfaces. A larger base will provide better stability, especially when using the stove on uneven or soft ground.

Testing and Using Your DIY Wood Stove

I’ve successfully tested and now use my DIY wood stove to cook meals while camping. It’s a simple yet effective solution for outdoor cooking. However, before using it, I took several testing techniques and safety precautions to ensure its efficiency and my own well-being.

Firstly, I conducted a leak test to ensure there were no air or gas leaks that could potentially cause a fire hazard. This involved pressurizing the stove and checking for any signs of leakage. I also tested its heat distribution by placing a pot of water on the stove and monitoring how evenly the heat was dispersed.

Advertisement

To further ensure safety, I implemented safety precautions such as maintaining a safe distance between the stove and any flammable objects, using heat-resistant gloves when handling the stove, and having a fire extinguisher nearby.

Using my DIY wood stove has been a game-changer for my camping trips. Not only does it provide a reliable cooking source, but it also allows me to enjoy the natural surroundings without relying on traditional campfire cooking methods. By following proper testing techniques and safety precautions, I can confidently cook my meals and enjoy the great outdoors.

Frequently Asked Questions

How Long Does It Take to Build a Wood Stove From a Jerry Can?

It takes about 2 hours to build a wood stove from a jerry can. The benefits of using a wood stove include cost-effective heating and a sustainable fuel source. Regular cleaning and maintenance ensure optimal performance.

Can I Use Any Type of Wood for the Base of the Wood Stove?

I can use different types of wood for the base of the wood stove, but it’s important to consider safety precautions when using it indoors. Proper ventilation and non-flammable materials are crucial.

Is It Safe to Use the Wood Stove Indoors?

Oh, using a wood stove indoors, what a brilliant idea! Let me enlighten you on the potential health hazards and share some precise tips for safely using one. Shall we begin?

Advertisement

Can I Paint the Jerry Can After Modifying It?

Yes, you can paint the modified jerry can using various painting techniques. It is important to choose a paint that can withstand high temperatures and adhere well to metal surfaces. Make sure to consider alternative fuel sources when painting for safety.

What Tools Do I Need to Build a Wood Stove From a Jerry Can?

To build a wood stove from a jerry can, I need a few tools like a jigsaw, drill, and metal file. Safety precautions are crucial, and alternative materials can be used if necessary.

Can I Use a Wood Stove Insert in a DIY Jerry Can Wood Stove?

When considering building a wood stove fireplace, it’s crucial to factor in the cost of materials and construction. However, if you’re planning to use a wood stove insert in a DIY Jerry Can Wood Stove, the cost of building a wood stove fireplace may decrease significantly. This alternative method combines affordability and practicality, making it an excellent choice for those seeking an alternative heating solution.

Can Duraflame Logs Be Used in a Wood Stove Made from a Jerry Can?

Can Duraflame logs be used in a wood stove made from a jerry can? Many DIY enthusiasts wonder about using Duraflame logs in a wood stove. While Duraflame logs are commonly used in traditional fireplaces, their use in a jerry can wood stove may not be ideal. It’s important to consider the safety and compatibility aspects of using duraflame logs in wood stoves specifically designed for them.

Conclusion

After carefully selecting the right jerry can, preparing and modifying it for ventilation, and adding sturdy legs and a stable base, your DIY wood stove is ready for testing and use.

Advertisement

With its compact design and efficient functionality, this wood stove provides a practical and cost-effective heating solution for outdoor activities or emergency situations.

Embrace the warmth and convenience of this homemade creation, bringing comfort and coziness wherever you go.

Continue Reading

Trending