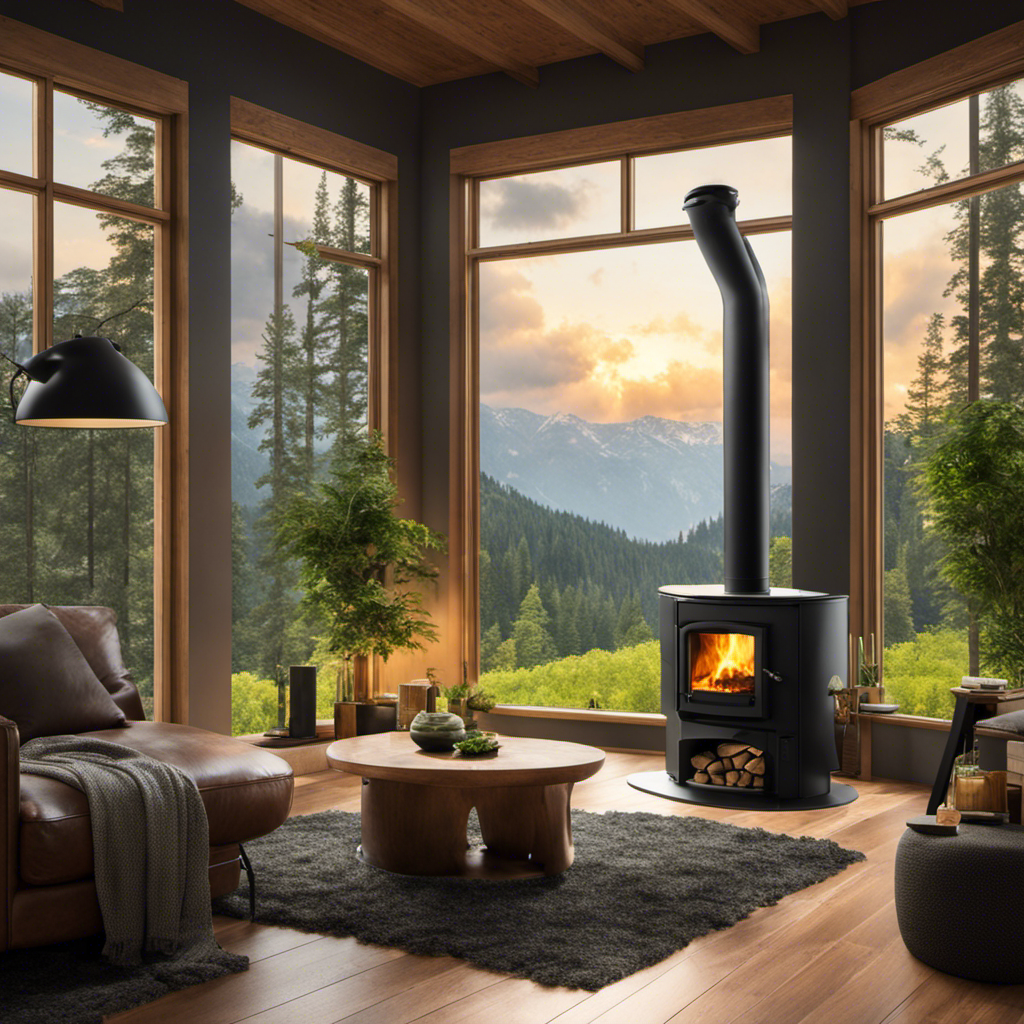
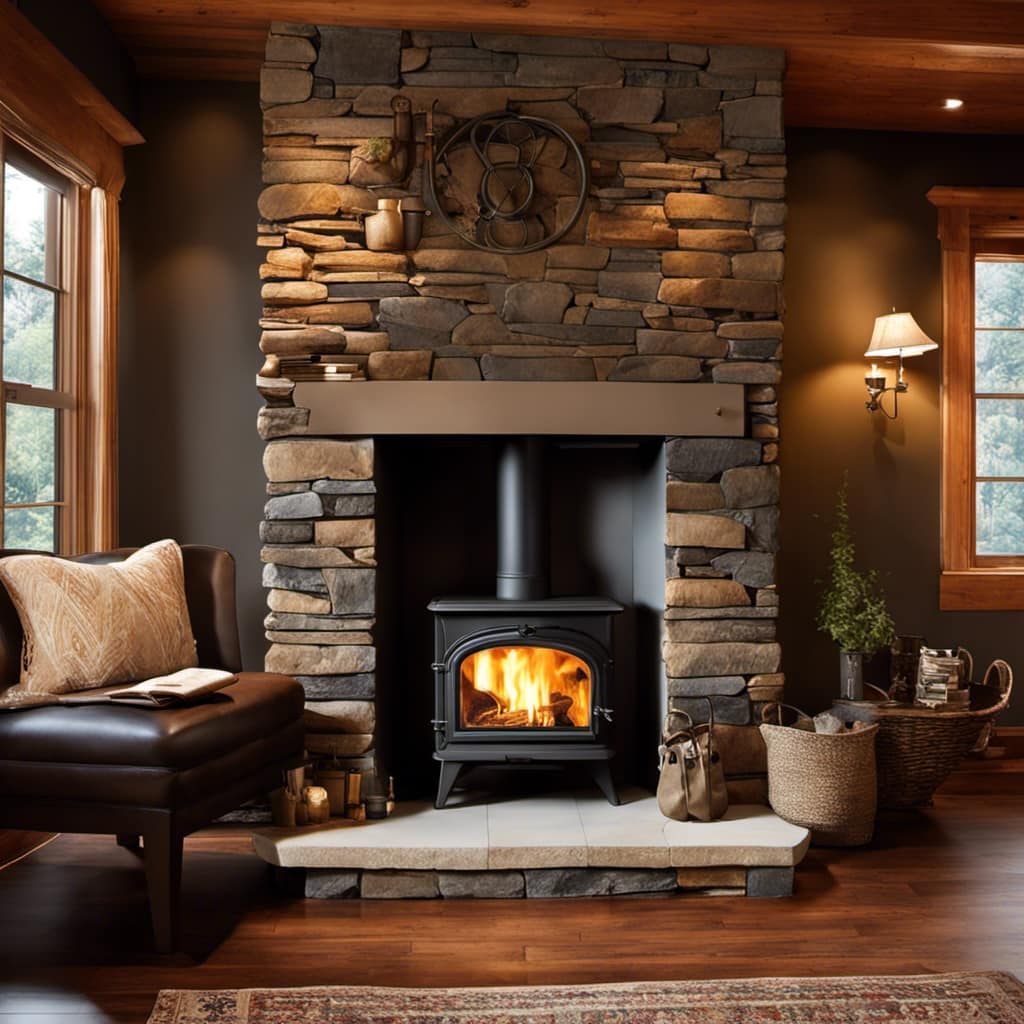
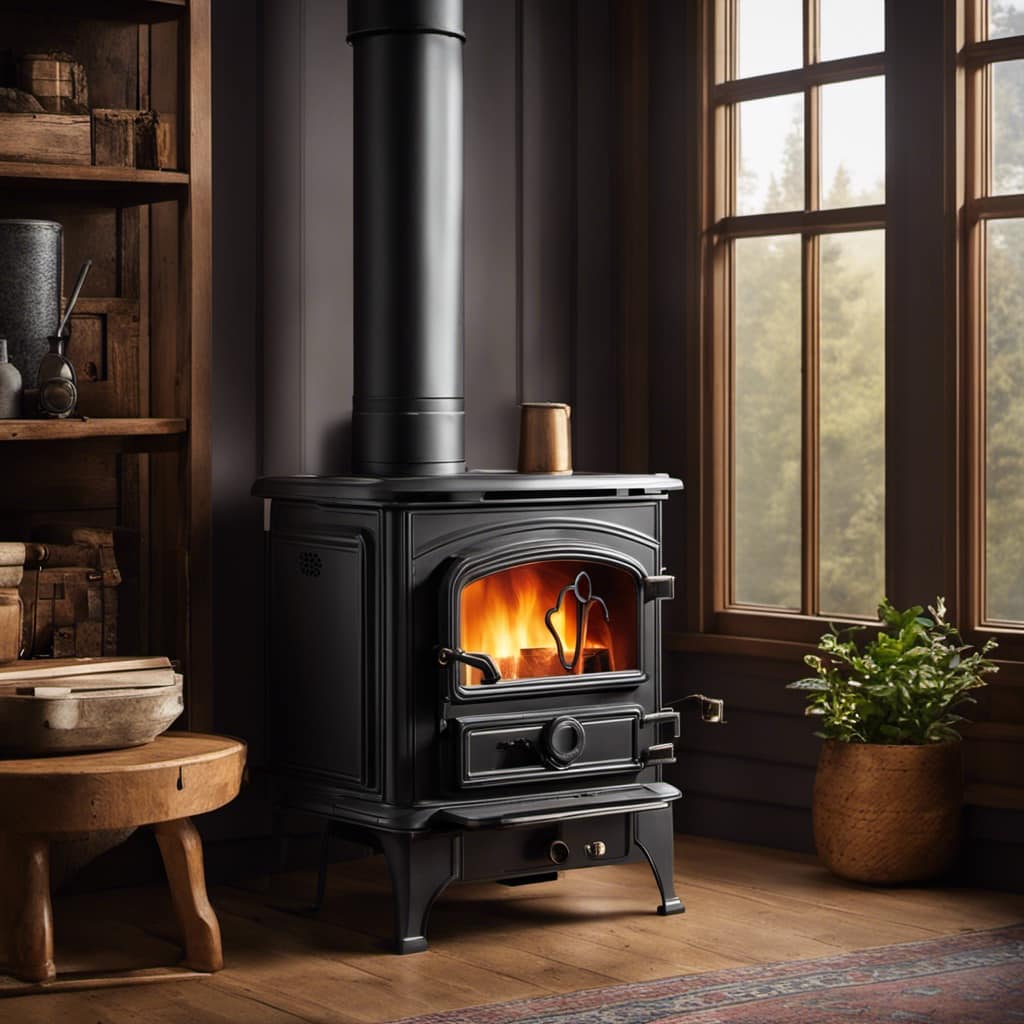
Connect with us

Wood Stove

How To Build A Chimney For A Wood Stove

Published

on

As a DIY enthusiast, I’ve always loved the challenge of building things from scratch. And when it comes to keeping my home cozy during the winter, there’s nothing quite like a wood stove.

But to ensure efficient ventilation and proper safety, a sturdy chimney is a must. In this article, I’ll guide you through the step-by-step process of building your own chimney for a wood stove.

So grab your tools and let’s get started on this rewarding project.

Key Takeaways

  • Stainless steel chimney liners are the most affordable and durable option for a wood stove chimney.
  • The proper chimney height should be determined by factors such as fuel type, building size, and local regulations.
  • Factors like roof height, nearby structures, and weather conditions can affect chimney performance.
  • Adhering to safety regulations for chimney height, clearance, and draft is crucial for proper ventilation and fire hazard prevention.

Choosing the Right Chimney Materials

I think the stainless steel chimney liner would be the best choice for my wood stove. When it comes to choosing chimney materials, there are several factors to consider, including cost and durability.

small wood stove

Stainless steel is a popular choice due to its affordability and longevity. It’s resistant to corrosion, which makes it a reliable option for a chimney. Additionally, stainless steel liners are easy to install and maintain.

Other common chimney material types include clay, cast iron, and aluminum. Clay chimneys are traditional and provide excellent insulation, but they can be prone to cracking over time. Cast iron chimneys are durable and heat resistant, but they can be expensive and require regular maintenance. Aluminum chimneys are lightweight and affordable, but they aren’t as durable as stainless steel.

In terms of cost, stainless steel chimney liners are often the most budget-friendly option. They offer long-term value due to their durability and low maintenance requirements. When considering the overall cost of building a chimney for my wood stove, the stainless steel chimney liner seems like the best choice. It provides the necessary durability and affordability that I’m looking for.

Determining the Proper Chimney Height

Determining the proper chimney height is crucial for the efficient operation of a chimney system.

vermont castings wood stove parts

Several factors come into play when determining the optimal chimney height for your specific application.

These factors include the type of fuel being burned, the size and layout of the building, and local safety regulations.

Optimal Chimney Height

In my experience, the optimal height for a chimney is typically determined by the height of the roof and the distance to nearby structures.

When it comes to chimney height requirements, there are regulations in place to ensure safety and efficient operation of the wood stove. Building codes often specify a minimum chimney height above the roofline, typically ranging from 2 to 3 feet. This ensures that the chimney can effectively disperse the smoke and prevent downdrafts.

wood stove fan repair

Additionally, there may be chimney height restrictions based on the proximity of nearby buildings. This is to prevent smoke and emissions from affecting neighboring properties.

It’s important to check with local authorities and consult a professional to ensure compliance with these regulations and to determine the optimal height for your chimney.

Factors Affecting Chimney Height

Based on my research, factors such as roof height and nearby structures play a significant role in determining the ideal chimney height.

The height of the roof directly affects the draft of the chimney, as a taller roof allows for better air circulation and improved chimney performance.

jotul wood stove for sale craigslist

Additionally, nearby structures, such as trees or other buildings, can create obstructions that disrupt the airflow and diminish the chimney’s efficiency.

Weather conditions also impact the chimney’s performance. Wind speed and direction can affect the draft, causing downdrafts or poor ventilation.

Rain or snow can also hinder the chimney’s operation by blocking the flue or creating moisture-related issues.

Considering these factors is crucial to ensure proper chimney function and maximize the stove’s efficiency.

regency wood stove reviews

Now, let’s explore the safety regulations for chimney height.

Safety Regulations for Height?

After reviewing the safety regulations, I found that the height of a chimney must adhere to specific guidelines to ensure proper ventilation and minimize the risk of fire hazards. One important factor to consider is chimney clearance, which refers to the distance between the chimney and any combustible materials. The minimum clearance requirements vary depending on the type of chimney and the surrounding materials. Additionally, chimney draft, or the flow of air through the chimney, is crucial for efficient operation and to prevent smoke and gases from entering the room. To ensure sufficient draft, the height of the chimney should be tall enough to create a strong upward flow of air. A 2 column, 5 row table is provided below to illustrate the minimum clearance requirements for different types of chimneys:

Chimney Type Minimum Clearance (inches)
Masonry 2 inches
Metal 1 inch
Insulated 0 inches

With the proper understanding of safety regulations and chimney clearance, we can now move on to calculating the necessary chimney diameter.

Calculating the Necessary Chimney Diameter

To ensure proper ventilation and efficient operation of a wood stove, calculating the necessary chimney diameter is essential.

jotul wood stoves

The optimal chimney size is determined by various factors, such as the type of fuel used, the stove’s heat output, and the overall layout of the flue system.

Optimal Chimney Size

I think the optimal chimney size for a wood stove is determined by the size and type of the stove. It’s crucial to consider the importance of chimney clearance when determining the size of the chimney.

Here are some common chimney sizing mistakes to avoid:

  • Incorrectly sized chimney: Choosing a chimney that’s too small can lead to poor ventilation and increased risk of chimney fires. On the other hand, a chimney that’s too large can result in excessive heat loss and reduced efficiency.

    wood stove insert reviews

  • Insufficient clearance: It’s essential to maintain proper clearance between the stove and the chimney to prevent overheating and potential fire hazards. Failure to do so can lead to structural damage and compromise the safety of your home.

  • Ignoring local building codes: Each jurisdiction may have specific regulations regarding chimney size and clearance. It’s vital to adhere to these codes to ensure compliance and safety.

Proper Diameter Calculations

Taking into account the size and type of my heating appliance, I need to calculate the proper diameter for the chimney. This calculation is crucial for ensuring efficient airflow and a strong chimney draft.

To begin, I must determine the BTU rating of my wood stove. This information can be found in the manufacturer’s specifications or on the stove itself.

wood stove pipe

Next, I need to consult the National Fire Protection Association (NFPA) guidelines to determine the recommended minimum chimney diameter for my BTU rating. The NFPA provides a table that correlates BTU rating with chimney diameter. By cross-referencing these values, I can accurately determine the proper diameter for my chimney.

Once this calculation is complete, I’m ready to move on to installing the chimney base.

Installing the Chimney Base

As I secure the chimney base, I can already envision the warm glow of the wood stove filling my living room. The chimney base foundation is a crucial element in ensuring the stability and safety of the entire chimney structure.

Here are the key steps I follow to install the chimney base:

wood stove insert

  • Prepare the foundation: Before securing the chimney base, I make sure the foundation is solid and stable. This involves clearing the area of any debris or obstacles and ensuring the ground is level.

  • Position the chimney base: Once the foundation is ready, I position the chimney base at the desired location. It should be placed near the wood stove and close to the exterior wall where the chimney will be connected.

  • Secure the chimney base to the structure: To ensure the chimney base is securely attached to the structure, I use heavy-duty screws or bolts to fasten it to the floor or wall. This helps prevent any movement or instability, especially when the chimney is in use.

Constructing the Chimney Walls

With the foundation prepared, I position the blocks for the chimney walls in a sturdy and level arrangement. Constructing the chimney walls requires careful attention to detail and the use of proper techniques. One important aspect of chimney wall construction is ensuring that the blocks are properly aligned and secured together. This can be achieved by using mortar to bond the blocks together and create a strong, durable wall.

wood stoves for heating garage

Another crucial consideration is the insulation of the chimney walls. Insulation helps to prevent heat loss and improve the efficiency of the chimney. There are several insulation options available for chimney walls, such as insulating concrete blocks or adding a layer of insulation on the inside of the walls.

Insulating concrete blocks are designed to provide thermal insulation and structural support. These blocks have hollow cores that can be filled with insulation material, such as expanded polystyrene foam. The insulation helps to minimize heat transfer through the walls and keep the chimney warm.

Another option is to add insulation on the inside of the chimney walls. This can be done by attaching insulation boards or blankets to the walls. These insulation materials help to create a barrier that prevents heat from escaping.

Adding Insulation to the Chimney

Now that the chimney walls are constructed, the next step is to add insulation. Insulation plays a crucial role in maintaining the efficiency and safety of the wood stove chimney. There are several benefits to insulating the chimney, including improved draft, reduced condensation, and increased heat retention.

lopi wood stove dealers

Improved draft: Insulation helps to create a consistent and strong draft, ensuring that smoke is efficiently drawn out of the chimney.

Reduced condensation: Insulation prevents the formation of condensation inside the chimney, which can lead to corrosion and damage over time.

Increased heat retention: Insulating the chimney helps to keep the heat inside, allowing for better heating efficiency and reducing heat loss.

When it comes to choosing insulation for the chimney, there are a few options to consider. Some common types of insulation used for chimneys include ceramic fiber insulation, mineral wool insulation, and vermiculite insulation.

wood pellet stove

Ceramic fiber insulation: This type of insulation is lightweight and has excellent insulating properties. It’s easy to install and can withstand high temperatures.

Mineral wool insulation: Made from natural mineral fibers, this insulation is fire-resistant and provides good thermal insulation.

Vermiculite insulation: Vermiculite is a natural mineral that expands when heated. It’s often used as loose-fill insulation for chimneys.

Now that the chimney walls are insulated, the next step is to create a smoke chamber for efficient ventilation.

wood stoves for heating garage

Creating a Smoke Chamber for Efficient Ventilation

I’ll focus on creating a smoke chamber to ensure efficient ventilation. When it comes to building a chimney for a wood stove, it’s crucial to establish a proper smoke chamber. This chamber serves as a passage for the smoke to exit the stove and enter the chimney. To achieve efficient ventilation, it’s essential to create an airtight seal between the smoke chamber and the chimney.

To begin, it’s important to thoroughly clean the chimney before constructing the smoke chamber. Any debris or creosote buildup can hinder the proper functioning of the chimney. Regular chimney cleaning is vital to maintain optimal airflow and prevent potential hazards such as chimney fires.

Once the chimney is clean, the next step is to create a smoke chamber that allows for smooth airflow. This can be achieved by using fire-resistant materials such as bricks or concrete blocks. The smoke chamber should be designed to promote a steady upward flow of smoke, preventing any stagnation or backdraft.

Furthermore, it’s crucial to ensure an airtight seal between the smoke chamber and the chimney. This can be achieved by using high-temperature sealants or metal flanges. An airtight seal prevents any smoke from escaping into the living space and ensures that all the smoke is directed towards the chimney.

wood stoves for sale

Installing the Chimney Cap and Spark Arrestor

To ensure proper ventilation and prevent sparks from escaping, I installed a chimney cap and spark arrestor. The chimney cap is essential for maintaining the efficiency and safety of the wood stove. Here are three key points to consider when it comes to chimney cap maintenance:

  • Regular Inspection: It’s important to inspect the chimney cap periodically for any signs of damage or corrosion. Look for cracks, loose screws or bolts, and ensure that the cap is securely attached to the chimney. If any issues are found, immediate repairs or replacements should be made to prevent further damage.

  • Cleaning: Over time, the chimney cap can accumulate debris such as leaves, twigs, or bird nests. Regular cleaning is necessary to maintain proper airflow and prevent blockages. Use a brush or vacuum to remove any debris from the cap, ensuring that the openings are clear and unobstructed.

  • Weatherproofing: The chimney cap should be weatherproofed to protect it from the elements. Apply a weather-resistant sealant or paint to the cap to prevent rust and corrosion. Additionally, check for any gaps or cracks that may allow water to enter the chimney, and seal them accordingly.

    wood stove meaning

When troubleshooting spark arrestor issues, there are a few key things to consider:

  • Blockages: A common issue with spark arrestors is blockages caused by soot, creosote, or debris. Regular cleaning and maintenance are necessary to prevent blockages and maintain proper airflow.

  • Damage: Inspect the spark arrestor for any signs of damage, such as dents or holes. Damaged spark arrestors may not effectively prevent sparks from escaping, and should be repaired or replaced as needed.

  • Proper Installation: Ensure that the spark arrestor is properly installed and securely attached to the chimney. Loose or improperly installed spark arrestors may not function effectively and could pose a fire hazard.

    mini wood burning stove

Proper Maintenance and Cleaning of the Chimney

Maintaining and cleaning the chimney is essential for ensuring proper ventilation and preventing any potential hazards.

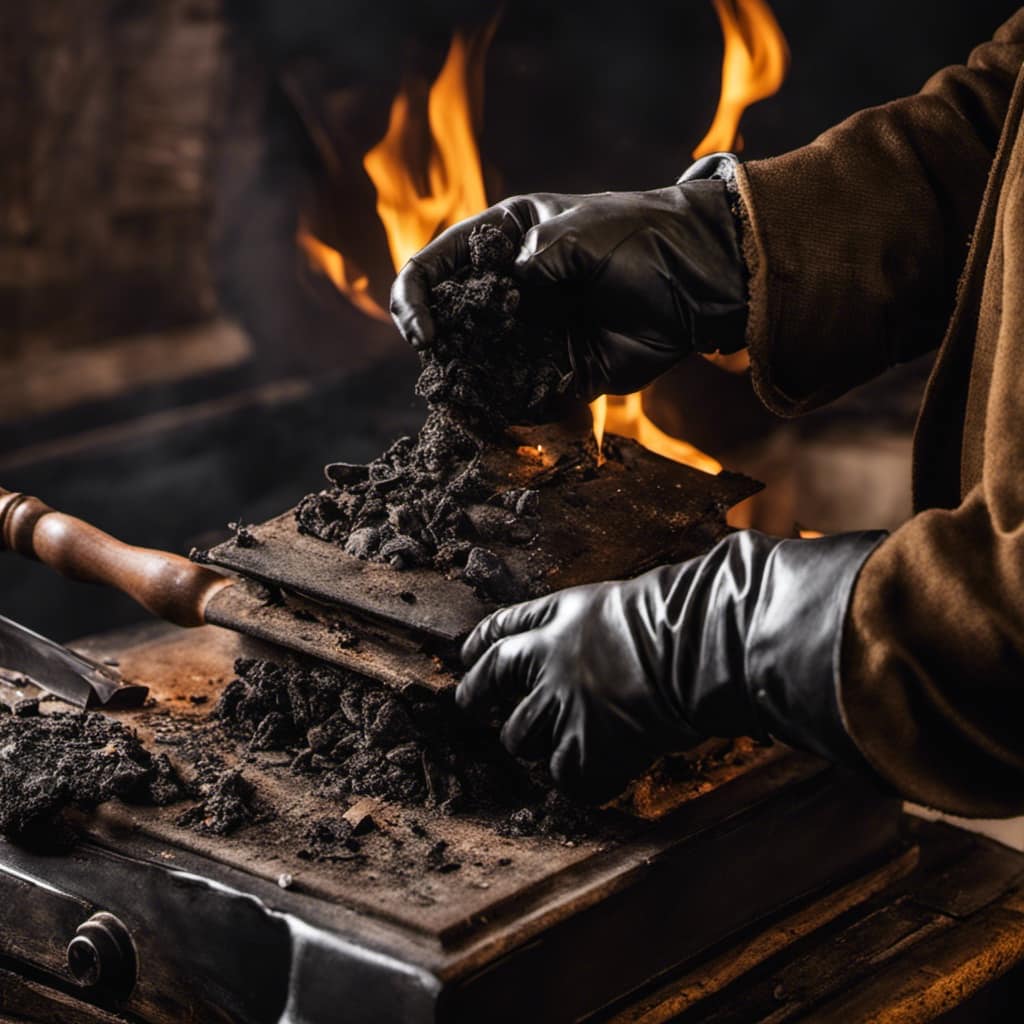
Regular cleaning helps remove creosote buildup, which is a highly flammable substance that can lead to chimney fires.

To clean the chimney, there are a few techniques I use. First, I inspect the chimney for any blockages or debris. Then, I use a chimney brush attached to a flexible rod to remove any soot or creosote.

I start from the bottom and work my way up, making sure to scrub all the walls thoroughly. It’s important to wear protective gear, such as gloves and goggles, to prevent any contact with harmful substances.

lowes summer heat wood stove

After cleaning, I check the chimney for any cracks or damage, as these can lead to dangerous carbon monoxide leaks. It’s crucial to address any issues promptly to avoid potential dangers.

Overall, regular maintenance and cleaning of the chimney are vital for ensuring proper ventilation and minimizing the risk of chimney fires or carbon monoxide poisoning.

Frequently Asked Questions

How Do I Ensure Proper Airflow in My Chimney?

To ensure proper airflow in a chimney, there are a few key factors to consider.

First, ensure chimney stability by using the right materials. A solid construction will prevent air leaks and promote efficient airflow.

wood cook stove for sale

Additionally, choose the right chimney materials, such as insulated stainless steel or double-wall pipes, to maintain a consistent temperature inside the chimney.

Proper airflow is crucial for efficient wood stove operation, preventing smoke buildup, and minimizing creosote buildup.

What Are Some Common Chimney Problems and How Can I Prevent Them?

Common chimney problems can be prevented with regular maintenance and troubleshooting tips.

It’s important to inspect the chimney for creosote buildup, which can lead to chimney fires.

wood stove fan repair

Installing a chimney cap can prevent animals and debris from entering the chimney.

Additionally, checking for cracks or leaks in the chimney liner is crucial to prevent carbon monoxide leakage.

Regular cleaning and inspection by a professional can help identify and address any potential issues before they become major problems.

Can I Use My Existing Chimney for a Wood Stove?

Can I use my existing chimney for a wood stove?

wood stove hand tools

Well, it depends. Before you start, make sure to check if your chimney meets the relining options and sizing requirements for a wood stove.

It’s crucial to ensure that the chimney is in good condition and properly sized to handle the heat and smoke generated by the wood stove.

If it doesn’t meet these criteria, you may need to consider building a new chimney or making necessary modifications.

How Often Should I Clean My Chimney?

Cleaning your chimney regularly is crucial for the safe and efficient operation of your wood stove. It’s recommended to clean your chimney at least once a year, but it may need more frequent cleaning if you use your wood stove heavily.

jotul wood stoves

Signs of chimney blockage include difficulty in starting fires, excessive smoke, and a strong odor. Regular cleaning will prevent creosote buildup and reduce the risk of chimney fires.

Are There Any Safety Precautions I Should Take When Using a Wood Stove and Chimney?

When it comes to using a wood stove and chimney, safety precautions are of utmost importance. It’s crucial to follow proper maintenance tips to ensure the safe operation of your wood stove. Regularly inspecting and cleaning the chimney, using proper ventilation, and keeping flammable materials away from the stove are some essential safety precautions.

Additionally, installing carbon monoxide detectors and having a fire extinguisher nearby are recommended for added safety.

Conclusion

In conclusion, building a chimney for a wood stove requires careful consideration of materials, height, and diameter. It’s essential to install a sturdy base and construct the walls with insulation for optimal performance.

vermont castings defiant

Creating a smoke chamber and installing a chimney cap and spark arrestor ensure efficient ventilation and safety. Regular maintenance and cleaning are crucial to keep the chimney functioning properly.

Interestingly, studies show that well-maintained chimneys reduce the risk of house fires by up to 90%.

Growing up surrounded by the vast beauty of nature, Sierra was always drawn to the call of the wild. While others sought the comfort of the familiar, she ventured out, embracing the unpredictable and finding stories in the heartbeat of nature.   At the epicenter of every remarkable venture lies a dynamic team—a fusion of diverse talents, visions, and passions. The essence of Best Small Wood Stoves is crafted and refined by such a trio: Sierra, Logan, and Terra. Their collective expertise has transformed the platform into a leading authority on small wood stoves, radiating warmth and knowledge in equal measure.

Continue Reading

Wood Stove

How Does A Circulator Wood Stove Work

Published

on

By

I’ve always been fascinated by the inner workings of circulator wood stoves. Imagine this scenario: it’s a cold winter night, and you’re huddled around the cozy warmth of your wood stove. But have you ever wondered how exactly it works?

In this article, we’ll delve into the components, combustion process, airflow, heat distribution, and maintenance of circulator wood stoves.

Get ready to uncover the secrets behind this efficient heating appliance.

Key Takeaways

  • The design of a circulator wood stove includes a firebox at the bottom, a grate for airflow, a baffle system, and cast iron or steel surfaces for heat absorption.
  • The combustion process in a circulator wood stove involves precise regulation of air intake and exhaust to reduce emissions.
  • Proper airflow control in a circulator wood stove is achieved through primary and secondary air inlets, which ignite and sustain combustion respectively.
  • Heat distribution in a circulator wood stove is achieved through strategically placed channels that direct hot air, resulting in even distribution of heat throughout the room.

The Components of a Circulator Wood Stove

I love the efficiency of my circulator wood stove’s components. The anatomy of a circulator wood stove consists of several key parts that work together to provide optimal heating.

wood burning stove small

The firebox, located at the bottom, is where the wood is burned. It has a grate that allows for proper airflow.

Above the firebox is the baffle system, which helps to increase the stove’s efficiency by directing the hot gases towards the stove’s surfaces.

These surfaces, made of cast iron or steel, absorb the heat and radiate it into the room.

The benefits of using a circulator wood stove are numerous. They provide a reliable and cost-effective heating solution, ensuring a steady and consistent warmth throughout the space.

catalytic wood stove

The efficient combustion process also reduces emissions and promotes a cleaner environment.

Understanding the Combustion Process

While the firebox and baffle system play important roles in a circulator wood stove, understanding the combustion process is crucial for optimal heating efficiency. The combustion process in a wood stove involves the burning of wood to produce heat. Here are three key aspects to consider:

  • Airflow Control: Properly controlling the airflow is essential to ensure efficient combustion. The circulator wood stove allows for precise regulation of air intake and exhaust, allowing for better control of the burning process.

  • Heat Transfer: The circulator design enhances heat transfer by maximizing the surface area exposed to the fire. This results in more efficient heating and less wasted energy.

    wood stove wiki

  • Environmental Impact: Wood stove combustion can have environmental consequences, such as air pollution and carbon emissions. However, circulator wood stoves are designed to minimize these impacts by promoting complete combustion and reducing smoke and particulate matter emissions.

Understanding the combustion process in a circulator wood stove allows users to maximize heating efficiency while minimizing the environmental impact.

The Role of Airflow in a Circulator Wood Stove

Controlling the airflow is crucial in a circulator wood stove, as it allows for efficient combustion and optimal heating. The key to achieving this is through proper airflow control mechanisms.

In a circulator wood stove, there are primary and secondary air inlets. The primary air is responsible for igniting the wood and providing initial combustion. On the other hand, the secondary air is used to enhance and sustain the combustion process.

wood stoves for sale cheap

By adjusting the primary and secondary air inlets, you can regulate the amount of oxygen that reaches the fire. This, in turn, affects the temperature and efficiency of the stove. When the airflow is properly controlled, a secondary combustion process occurs, which helps burn the remaining gases and particulates, resulting in a cleaner and more efficient burn. This ultimately contributes to reduced emissions and increased heat output.

Understanding the importance of airflow control is crucial in maximizing the efficiency and performance of a circulator wood stove.

Now that we’ve discussed the role of airflow in a circulator wood stove, let’s explore how heat is distributed within the stove.

How Heat Is Distributed in a Circulator Wood Stove

The distribution of heat in a circulator wood stove depends on the design and placement of the heat convection channels. These channels are responsible for creating convective airflow, which plays a crucial role in evenly distributing the heat throughout the room.

wood stove fireplace insert

Here are three key factors that contribute to effective heat distribution in a circulator wood stove:

  • Design of convection channels: The layout and size of the convection channels determine the direction and flow of the convective airflow. A well-designed stove will have strategically placed channels that allow for efficient heat transfer.

  • Placement of heat convection channels: The location of the convection channels within the stove also affects heat distribution. Channels that are positioned closer to the top of the stove help to direct hot air towards the ceiling, while those situated lower down aid in circulating warm air at ground level.

  • Insulation: Proper insulation within the stove prevents heat loss and ensures that more heat is directed towards the convection channels, maximizing heat distribution.

    cast iron wood burning stove

Understanding these factors is essential for maintaining and troubleshooting a circulator wood stove to ensure optimal heat distribution throughout your living space.

Maintaining and Troubleshooting a Circulator Wood Stove

I’ve found that regularly cleaning the flue and checking for any blockages is essential for maintaining and troubleshooting my circulator wood stove. When it comes to troubleshooting techniques, one of the first things I do is inspect the flue for any buildup of soot or creosote. This can restrict airflow and lead to poor combustion, resulting in decreased efficiency and increased emissions.

To clean the flue, I use a flue brush to remove any deposits, making sure to wear protective gloves and goggles. Another important aspect of maintenance is checking for any blockages in the air intake and exhaust vents. These can be cleared using a small brush or vacuum cleaner.

Frequently Asked Questions

How Long Does It Take for a Circulator Wood Stove to Heat up a Room?

It usually takes around 30 minutes for a circulator wood stove to heat up a room. The benefits of using a circulator wood stove for heating include efficient heat distribution, cost savings, and a cozy ambiance.

lopi wood stove for sale craigslist

Can a Circulator Wood Stove Be Used as the Primary Source of Heat in a Home?

Yes, a circulator wood stove can be used as the primary heat source in a home. However, it is important to follow circulator wood stove safety precautions. The advantages include cost savings and the cozy ambiance it creates.

Are Circulator Wood Stoves Energy-Efficient?

Circulator wood stoves are energy-efficient and cost-effective. They provide an efficient way to heat a home by circulating the warm air throughout the room. This helps to maximize heat distribution and minimize energy waste.

Can a Circulator Wood Stove Be Used in a Mobile Home or Rv?

A circulator wood stove can be used in a mobile home or RV, but there are limitations and safety concerns to consider. Mobile homes have specific requirements for wood stoves, and proper installation and ventilation are crucial for safety.

Do Circulator Wood Stoves Require a Chimney or Can They Be Vented Through a Wall?

Vented through a wall? Absolutely! Circulator wood stoves offer versatile heating options, making them perfect for any space. No need to worry about a chimney, just vent it through a wall and enjoy the warmth.

wood burning stove installation

Conclusion

In conclusion, a circulator wood stove is a highly efficient and effective heating appliance that utilizes the principles of combustion and airflow to distribute heat throughout a space.

By understanding the components and operation of this stove, one can effectively maintain and troubleshoot any issues that may arise.

With its ability to provide consistent and comfortable warmth, a circulator wood stove is a reliable choice for those seeking a reliable and efficient heating solution.

Continue Reading

Wood Stove

How To Blacken A Cast Iron Wood Stove

Published

on

By

  1. Importance of proper ventilation during the blackening process
  2. Benefits of using a specialized blackening solution instead of regular paint or coating

As a seasoned stove enthusiast, I’m here to show you how to transform your cast iron wood stove into a sleek, blackened masterpiece. Just like a phoenix rising from the ashes, your stove will emerge with a renewed sense of beauty and durability.

In this article, I will guide you through the process of preparing the stove surface, selecting the right blackening method, applying the solution, and protecting the finish for long-lasting results.

Get ready to turn up the heat and elevate your wood stove game!

Key Takeaways

  • Preparing the stove surface is important before blackening, including cleaning with a mild soap and water solution and gently scrubbing with a soft brush or sponge.
  • Consider professional blackening services for the best results, as they use specialized products and offer expertise and experience.
  • When applying the blackening solution, use a high-quality brush for even application, and pay attention to corners and crevices for complete coverage.
  • To maintain the blackened cast iron wood stove, regularly clean it with a soft bristle brush or sponge, use a mild dish soap and warm water for stubborn stains, and apply a high-temperature stove polish or sealant for added protection and shine.

Preparing the Stove Surface

I can’t wait to see how the stove surface turns out after I’ve prepared it properly. Cleaning the stove surface is the crucial first step in achieving a beautifully blackened cast iron wood stove.

lopi wood stove reviews

To ensure a clean surface, I recommend using a mild soap and water solution, avoiding harsh chemicals that can damage the cast iron. Gently scrub the surface using a soft brush or sponge, paying attention to any stubborn stains or residue.

Once the surface is clean, it’s time to move on to sanding. Sanding the stove surface helps to remove any rust or rough patches, creating a smooth and even base for the blackening process. Use a medium-grit sandpaper and work in circular motions, being careful not to apply too much pressure.

Make sure to thoroughly wipe away any dust or debris before moving on to the next step.

Choosing the Right Blackening Method

In my experience, finding the most effective method for achieving a desired darkened appearance on my cast iron stove has been crucial. There are alternative blackening techniques available, but for the best results, I highly recommend professional blackening services. These services offer numerous advantages that make them worth considering.

wood burner clearance sale

One advantage is the expertise and experience of professionals who understand the intricacies of blackening cast iron. They have the knowledge and tools to achieve a consistent and long-lasting blackened finish. Additionally, professional services often utilize specialized products that are specifically designed for cast iron, ensuring optimal results.

To highlight the advantages of professional blackening services, I have created a table below:

Advantages of Professional Blackening Services
Expertise and experience
Consistent and long-lasting finish
Specialized products for cast iron
Saves time and effort

Overall, while alternative blackening techniques may seem appealing, the advantages of professional blackening services make them the superior choice for achieving a desired darkened appearance on a cast iron stove.

Applying the Blackening Solution

Using a brush, I apply the blackening solution evenly onto the surface of the stove. This step is crucial in achieving a beautiful blackened finish that not only looks great but also protects the cast iron.

wood burning stove with blower

Here are some proper application techniques to ensure the best results:

  • Start by cleaning the stove thoroughly, removing any dust, dirt, or grease.
  • Use a high-quality brush to apply the blackening solution in long, even strokes.
  • Pay special attention to corners and crevices to ensure complete coverage.
  • Allow the solution to dry completely before buffing the surface with a soft cloth for a smooth finish.

Proper application and careful attention to drying and buffing will result in a blackened wood stove that not only looks stunning but also maintains its protective and durable qualities for years to come.

Curing and Protecting the Finish

Once the blackening solution has dried completely, I can protect the finish by applying a thin coat of sealant. This step is crucial in preventing rust and enhancing the stove’s appearance.

The sealant acts as a barrier, shielding the blackened surface from moisture and other elements that could cause corrosion. To ensure maximum protection, I use a high-quality sealant specifically designed for cast iron surfaces.

small wood stove

Before applying the sealant, I thoroughly clean the stove to remove any dust or debris that could affect its adhesion. Using a brush or sponge, I carefully apply the sealant in smooth, even strokes, making sure to cover all exposed areas.

Once applied, I allow the sealant to dry completely, usually overnight, before using the stove. This additional layer of protection not only keeps the stove looking beautiful but also extends its lifespan by preventing rust and deterioration.

Maintaining the Blackened Cast Iron Wood Stove

To keep the finish looking its best, I regularly clean and apply a sealant to my blackened wood stove. Cleaning techniques for a blackened cast iron wood stove are crucial to maintain its appearance and functionality.

Here are some tips to ensure its longevity:

wood stove factory
  • Use a soft bristle brush or sponge to remove any loose debris or ashes from the surface of the stove.
  • For stubborn stains, mix a solution of mild dish soap and warm water. Apply the solution to a cloth and gently scrub the stained area.
  • To prevent rust on a blackened cast iron wood stove, make sure to dry it thoroughly after cleaning. Any moisture left on the surface can cause rusting.
  • Apply a high-temperature stove polish or sealant to protect the finish and add a glossy shine. This will also help prevent rust and keep the stove looking new.

Frequently Asked Questions

Can I Use Any Type of Paint or Coating to Blacken My Cast Iron Wood Stove?

No, using any type of paint or coating is not recommended for blackening a cast iron wood stove. There are different methods available, each with their own pros and cons compared to painting.

How Long Should I Let the Blackening Solution Sit on the Stove Surface Before Wiping It Off?

To achieve optimal results when blackening a cast iron wood stove, it is crucial to allow the blackening solution to sit on the stove surface for the recommended drying time before wiping it off.

Can I Use the Blackening Method on a Stove That Has Already Been Painted or Coated?

Yes, you can use the blackening method on a stove that has already been painted or coated. However, it is important to take safety precautions while applying the blackening solution to protect yourself and the surface.

Is It Necessary to Wear Protective Gear While Applying the Blackening Solution?

It’s always wise to wear protective gear while applying the blackening solution. Ventilation is crucial to prevent inhaling fumes. A specialized blackening solution is recommended instead of regular paint or coating for better results.

wood stove fan repair

How Often Should I Reapply the Blackening Solution to Maintain the Finish on My Cast Iron Wood Stove?

To maintain the finish on your cast iron wood stove, it is recommended to reapply the blackening solution every 6-12 months. Look for high-quality products specifically designed for cast iron stoves.

Conclusion

In conclusion, blackening a cast iron wood stove is a simple process that can enhance its appearance and prolong its lifespan. By following the steps outlined in this article, you can achieve a beautiful and durable blackened finish.

Remember, a little elbow grease and the right blackening method can work wonders for your stove. So don’t hesitate to give it a try and turn your stove into a true gem that will warm your home for years to come.

As the saying goes, “A blackened stove is a sight to behold!” Embrace the beauty and elegance of a blackened stove, and let it become the centerpiece of your kitchen.

wood stove definition
Continue Reading

Wood Stove

How Can You Effectively Maintain an Outdoor Wood Stove for Cooking?

Published

on

By

An image showcasing a well-maintained outdoor wood stove nestled in a serene natural setting

We know that maintaining an outdoor wood stove for cooking can be a challenge, but with the right techniques, it becomes a breeze.

In this article, we will share practical tips and methods to keep your outdoor wood stove in top shape.

From cleaning methods and weather protection to regular inspections and rust prevention, we’ve got you covered.

So let’s dive in and learn how to effectively maintain your outdoor wood stove for a delightful cooking experience.

Key Takeaways

  • Regularly clean the stove’s interior and exterior surfaces to remove residue and prevent rust formation.
  • Inspect and maintain the weatherproof covers and insulation to protect the stove from damage and wear.
  • Apply a protective coating to prevent rust and corrosion during storage.
  • Use heat-resistant paints designed for outdoor use to prevent rust and extend the durability of the stove’s appearance.

Cleaning Methods for Your Outdoor Wood Stove

We’ve found that using a wire brush and a mixture of vinegar and water is the most effective way to clean our outdoor wood stove. Regular maintenance is crucial to ensure its longevity and efficiency.

When cleaning, start by removing any ashes or debris from the stove. Then, using a wire brush, scrub the interior and exterior surfaces to remove any built-up residue. The vinegar and water mixture is an excellent natural cleaner that helps break down grease and grime. Simply spray the mixture onto the surfaces and scrub away. Rinse thoroughly with water and allow the stove to dry completely before using it again.

Cleaning your outdoor wood stove regularly not only improves its performance but also ensures the safety of your cooking environment.

Now, let’s discuss weather protection for your outdoor wood stove.

Weather Protection for Your Outdoor Wood Stove

One important aspect of maintaining our outdoor wood stove is ensuring proper weather protection to prevent any damage caused by rain or snow. Protecting our wood stove from the elements is crucial to its longevity and functionality. There are several options available to weatherproof our outdoor wood stove, such as weatherproof covers and insulation.

To give you a clearer picture, here is a table comparing different weatherproof covers and insulation options:

Weatherproof Covers Insulation Options
Heavy-duty tarp Fiberglass
Waterproof cover Ceramic
Insulated jacket Rockwool
Vinyl cover Foam board
Aluminum cover Reflective foil

These covers and insulation options provide varying levels of protection against rain, snow, and cold temperatures. When choosing the right weatherproof cover or insulation for our outdoor wood stove, it is important to consider factors such as durability, efficiency, and ease of installation.

Proper Storage Techniques for Your Outdoor Wood Stove

Sometimes, we store our outdoor wood stove in a shed during the off-season to protect it from the elements, but other times we leave it outside with a weatherproof cover. Proper storage techniques are essential to ensure the longevity and efficiency of your outdoor wood stove.

Here are some tips to help you maintain your stove effectively:

  • Clean the stove thoroughly before storing it to prevent the buildup of dirt and debris.
  • Make sure to remove any ash and soot from the stove’s interior and exterior surfaces.
  • Apply a protective coating to the stove to prevent rust and corrosion during storage.
  • Create a maintenance schedule to remind you of regular cleaning and inspection tasks.

Regular Inspection of Your Outdoor Wood Stove

To ensure the safety and efficiency of our outdoor wood stove, we should regularly inspect it for any signs of damage or wear and tear. Regular maintenance is crucial in preventing damage and ensuring that the stove functions optimally. By performing routine inspections, we can identify any potential issues before they escalate into major problems.

Start by examining the exterior of the stove for any cracks, dents, or loose parts. Check the chimney and flue for obstructions and clean them if necessary. Inspect the firebox and grates for any signs of rust or corrosion. Clean out any ash or debris that may have accumulated inside.

Additionally, pay attention to the stove’s gaskets and seals. These components can deteriorate over time, leading to heat loss and decreased efficiency. Replace them if needed, ensuring a tight seal.

By regularly inspecting and maintaining our outdoor wood stove, we can prevent damage and ensure its longevity.

In the next section, we’ll discuss rust prevention techniques and the use of heat-resistant paints to further protect our stove.

Rust Prevention and Heat-Resistant Paints for Your Outdoor Wood Stove

When it comes to maintaining an outdoor wood stove, rust prevention is crucial for ensuring its longevity.

One effective method is to apply heat-resistant paints that not only protect against rust but also withstand the high temperatures generated by the stove.

However, it’s important to choose the right paint that’s specifically designed for outdoor use and can withstand the elements.

Best Rust Prevention Methods

We’ve found that applying a high-quality rust-resistant paint to our outdoor wood stove has been the best method for preventing rust and ensuring its longevity. Not only does this paint form a protective barrier against moisture and corrosion, but it also withstands the high temperatures generated by the stove.

In addition to using rust-resistant paint, here are some other effective methods for preventing rust on your outdoor wood stove:

  • Regular cleaning and removal of ashes and debris
  • Applying a rust inhibitor or protective coating to exposed metal surfaces
  • Keeping the stove covered when not in use to protect it from the elements
  • Inspecting the stove regularly for any signs of rust or damage and addressing them promptly

Choosing the Right Paint

Our top priority is finding a paint that is both rust-resistant and heat-resistant for our outdoor wood stove. When it comes to painting our stove, we need a high-quality paint that can withstand the extreme temperatures it will be exposed to. Heat resistant paint options are a great choice for this purpose. These paints are designed to withstand high temperatures without blistering or peeling, ensuring the longevity of our stove. Additionally, using a high-quality paint provides several benefits. It not only protects the stove from rust, but also enhances its appearance, making it more visually appealing. Furthermore, a durable paint can withstand the wear and tear of outdoor use, allowing us to enjoy our cooking experience without worrying about constant maintenance. In the table below, we have listed some popular heat resistant paint options that we can consider for our outdoor wood stove.

Paint Brand Temperature Resistance
Brand A Up to 1200°F
Brand B Up to 1500°F
Brand C Up to 1800°F
Brand D Up to 2000°F
Brand E Up to 2200°F

Longevity of Heat-Resistant Paints

In order to ensure the longevity of our outdoor wood stove, we should regularly inspect and maintain the heat-resistant paints by applying a rust preventative coating and conducting touch-ups as needed. This will help to protect the stove from the harsh elements and extend the durability of the paint.

Here are some practical tips to maintain the paint on your outdoor wood stove:

  • Clean the surface thoroughly before applying any coatings.
  • Apply a rust preventative coating to prevent corrosion and extend the life of the paint.
  • Conduct regular inspections to identify any areas that may need touch-ups.
  • Use a heat-resistant paint specifically designed for outdoor wood stoves to ensure maximum durability.

Obtaining Replacement Parts for Your Outdoor Wood Stove

When it comes to obtaining replacement parts for your outdoor wood stove, it’s important to find reliable options that will ensure the stove’s continued functionality.

We understand the frustration that can come with searching for specific components, but rest assured that there are cost-effective options available.

Reliable Replacement Parts

Although it may be challenging, we can find reliable replacement parts for our outdoor wood stove if we search online or contact the manufacturer. It’s important to have access to reliable suppliers when it comes to replacing parts for our outdoor wood stove.

Here are some tips to help us find the right replacement parts:

  • Research online: Utilize online platforms and websites that specialize in outdoor wood stove replacement parts. Look for websites with positive customer reviews and a wide selection of parts.

  • Contact the manufacturer: Reach out to the manufacturer directly to inquire about replacement parts. They may have specific recommendations or be able to provide the parts themselves.

  • Join online forums or communities: Engage with other outdoor wood stove owners who may have experience finding reliable suppliers. They can provide valuable insights and recommendations.

  • Seek professional advice: Consult with a professional or expert in outdoor wood stoves who can guide you towards reliable suppliers and offer maintenance tips for your stove.

Finding Specific Components

We can easily locate the specific components we need for our outdoor wood stove by reaching out to reliable suppliers or searching online. Finding suppliers who specialize in wood stove parts can ensure that we get high-quality components that are compatible with our stove model. It’s important to choose suppliers who have a good reputation and offer warranty options for their products.

Additionally, troubleshooting common issues with our outdoor wood stove can help us identify the specific components that need replacement. By understanding the functioning of the stove and referring to the user manual, we can identify the faulty parts and find suitable replacements.

Regular maintenance and cleaning of the stove can also prevent common issues and prolong the lifespan of the components.

Cost-Effective Options Available

There are several cost-effective options available to obtain replacement parts for our outdoor wood stove, such as purchasing from second-hand sellers or exploring discounted options online. When considering cost-saving measures for maintaining our wood stove, it’s important to explore alternative fuel sources. Here are some suggestions to help you save money while keeping your stove running efficiently:

  • Consider using reclaimed or salvaged wood as a fuel source. This can be obtained from construction sites, tree removal services, or even old furniture.
  • Explore the option of using wood pellets instead of traditional firewood. Wood pellets are made from compressed sawdust and are a more efficient and cost-effective fuel source.
  • Look into biofuels, such as corn or soybeans, which can be converted into pellets or briquettes for use in your wood stove.
  • Take advantage of community programs or initiatives that offer discounted or free firewood to help reduce costs.

By implementing these cost-saving measures and exploring alternative fuel sources, you can effectively maintain your outdoor wood stove without breaking the bank.

Transitioning into the subsequent section about safe wood fuels and airflow control, let’s now discuss how to ensure optimal performance and safety for your wood stove.

Safe Wood Fuels and Airflow Control for Your Outdoor Wood Stove

When using our outdoor wood stove, it’s important to understand how to safely control airflow and choose the right wood fuels. Proper wood stove maintenance and fuel selection are crucial for efficient and safe cooking.

To maintain your wood stove, regularly clean the stovepipe and chimney to prevent the buildup of creosote, which can lead to chimney fires. Additionally, inspect the gaskets and replace them if necessary to ensure a tight seal.

As for fuel selection, it’s best to use seasoned hardwoods like oak, maple, or birch. These woods burn longer and produce less smoke and creosote. Avoid using softwoods, as they burn quickly and can create excessive smoke.

Frequently Asked Questions

What Are the Best Cleaning Methods for Removing Stubborn Stains and Grease Buildup on an Outdoor Wood Stove?

To effectively maintain an outdoor wood stove for cooking, we use cleaning methods to remove stubborn stains and grease buildup. Additionally, preventing rust and using recommended heat resistant paints can help prolong the stove’s lifespan.

How Can I Protect My Outdoor Wood Stove From Extreme Weather Conditions Such as Heavy Rain and Snow?

To protect our outdoor wood stove from extreme weather conditions, we use protective covers and ensure proper positioning. This safeguards it against heavy rain and snow, preserving its functionality and longevity.

Are There Any Specific Techniques for Storing an Outdoor Wood Stove During the Offseason to Prevent Damage?

When it comes to storing techniques for an outdoor wood stove during the offseason to prevent damage, there are a few key steps to follow. Proper cleaning, covering, and storing in a dry location are essential.

How Often Should I Inspect My Outdoor Wood Stove for Any Potential Issues or Maintenance Needs?

We make sure to regularly inspect our outdoor wood stove for any potential issues or maintenance needs. It’s important to stay on top of things to ensure the stove is in good working condition.

What Are Some Effective Ways to Prevent Rust on an Outdoor Wood Stove, and What Types of Heat-Resistant Paints Are Recommended for This Purpose?

To prevent rust on an outdoor wood stove, we recommend regularly cleaning and drying it after use, applying a heat-resistant paint specifically designed for metal surfaces, and ensuring proper ventilation to prevent moisture buildup.

Conclusion

In conclusion, maintaining an outdoor wood stove for cooking is crucial for its longevity and efficiency. By regularly cleaning, protecting from weather, storing properly, inspecting, preventing rust, and using the right fuels and airflow control, you can ensure optimal performance.

Just like tending to a well-tuned instrument, caring for your outdoor wood stove will result in a harmonious cooking experience that will delight your taste buds and warm your soul. So, embrace the art of stove maintenance and let the culinary symphony begin!

Continue Reading

Trending