
To make your own wood kindling, gather small, dry sticks and branches from fallen or yard wood, ensuring they’re knot-free and seasoned. Use a sharp axe, splitting axe, or froe to cut larger logs into thin strips or noodles. Prepare your workspace on a stable surface and wear gloves and eye protection. Properly stored, your homemade kindling will ignite easily and enhance fire-starting efficiency. Explore more tips on safe tools and techniques to perfect your process.
Key Takeaways
- Use dry, seasoned small sticks, twigs, and bark from fallen trees or yard debris for reliable kindling.
- Split larger logs into thin strips or “noodles” with a sharp axe or splitting tools for quick ignition.
- Store dry, seasoned kindling in organized containers like baskets or boxes to maintain dryness and easy access.
- Prepare workspace on a stable surface, wearing protective gear, and make controlled, precise splits for safety and efficiency.
- Bundle small pieces with twine or rubber bands to facilitate handling and quick fire-starting.
wood kindling splitting axe
As an affiliate, we earn on qualifying purchases.
As an affiliate, we earn on qualifying purchases.
Selecting Suitable Raw Materials for Kindling
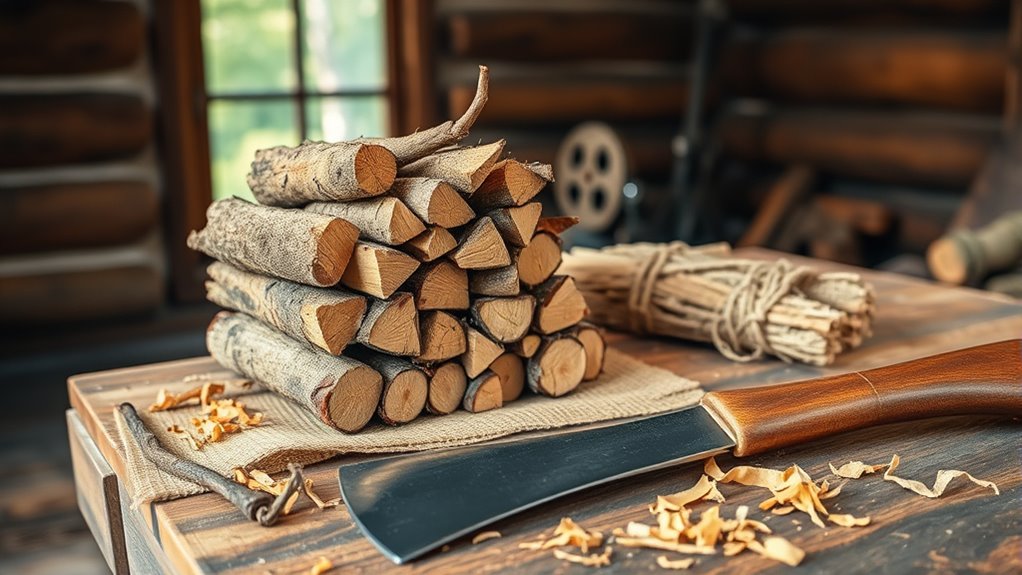
Choosing the right raw materials is essential for making effective kindling. Start with dry kindling and split wood, which ignite more easily and burn longer. Select straight, knot-free sticks and small logs, about 5-8 inches long, to make splitting simpler. Seasoned wood like beech, birch, ash, or conifers is ideal because it splits more readily and sparks faster. Avoid rotted or punky wood, as it creates excess smoke and is hard to split into good kindling. Use small branches, twigs, and bark from fallen trees or yard debris, ensuring they’re dry and free of dirt or moisture. Collect and store materials like pallet pieces, splitter scraps, and dried nursery wood to keep a consistent supply of suitable raw materials. Proper storage helps maintain wood quality and ensures your kindling remains dry and ready for use. Additionally, understanding how sound vibrations influence cellular regeneration can inspire techniques for better wood preservation and drying. Maintaining optimal drying conditions can further improve the quality of your kindling and reduce preparation time.
kindling storage baskets
As an affiliate, we earn on qualifying purchases.
As an affiliate, we earn on qualifying purchases.
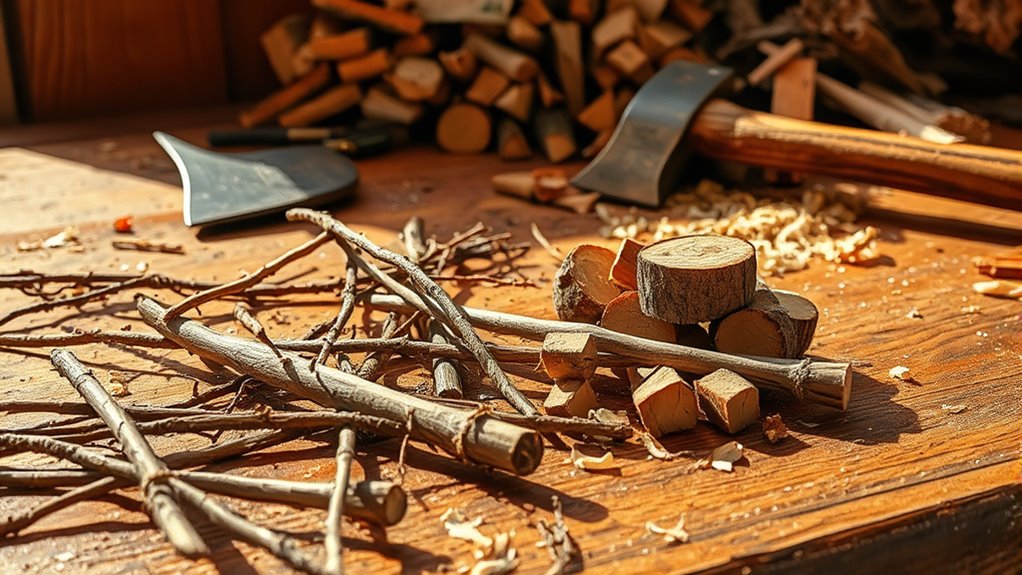
Tools Needed for Cutting and Splitting Kindling
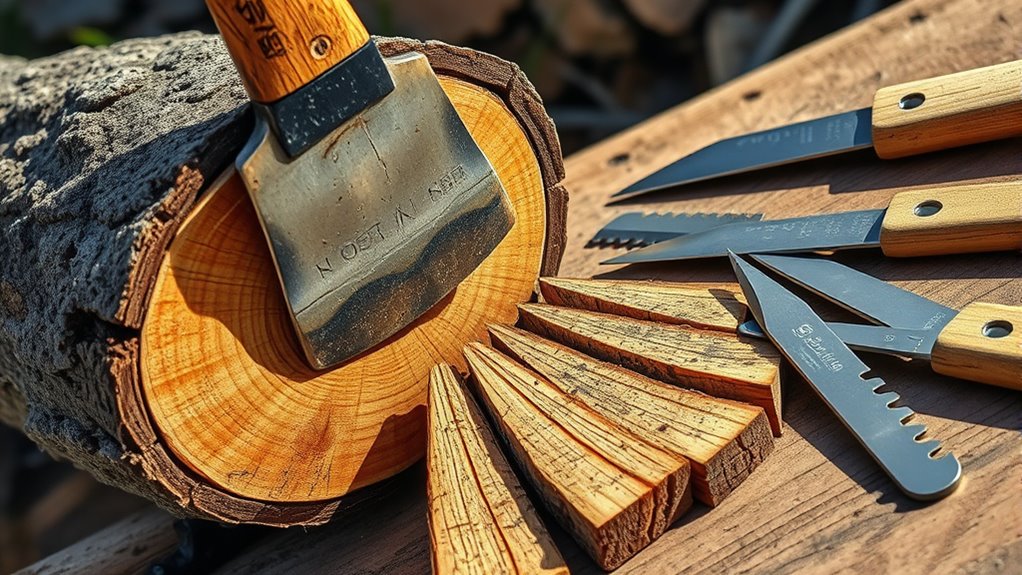
To effectively turn raw wood into kindling, you’ll need the right tools to cut and split your materials safely and efficiently. The key tools include:
- A small Swedish hatchet or splitting axe with a sharp blade and good heft, making splitting firewood into kindling strips easier. Using a tool with high-quality steel ensures durability and cleaner cuts during splitting.
- An axe sharpener to keep your blade razor-sharp, reducing effort and increasing safety.
- A splitting axe with a longer handle for better leverage, helping you split small logs into thin, manageable kindling pieces.
- A froe or specialized kindling splitter for making uniform, parallel splits in logs or slabs, ensuring consistent firewood preparation.
- Using these tools guarantees safe, efficient splitting of firewood into kindling, making your fire-starting process smoother. Proper technique when splitting wood can further improve safety and efficiency, and understanding wood properties can help you choose the best splitting methods. Additionally, being aware of hackathon concepts such as collaboration and process optimization can inspire innovative approaches to organizing your kindling-making workflow.
fire starter kindling tools
As an affiliate, we earn on qualifying purchases.
As an affiliate, we earn on qualifying purchases.
Preparing Your Workspace for Safe Kindling Production

Setting up a safe workspace is essential before you start cutting and splitting kindling. Choose a stable, level surface away from flammable materials to guarantee safety. Clear the area of debris and obstructions, reducing the risk of accidents. Use a sturdy, non-slip work surface like a dedicated chopping block or a thick, flat piece of wood, which helps protect your tools and improves safety. Keep your tools, such as axes or hatchets, sharp and in good condition, and store them securely when not in use to prevent injuries. Establish a designated spot for storing your cut and split kindling, keeping it dry and organized for easy access. Prioritizing safety in your workplace minimizes hazards and makes your kindling production more efficient and enjoyable. Incorporating water safety practices can also help prevent accidents, especially if you are working near water sources or in humid environments, since self watering plant pots demonstrate the importance of proper moisture control and safety measures in handling liquids. Paying attention to interior design basics can inspire safer workspace arrangements that enhance efficiency and reduce clutter. Additionally, staying aware of automation in business can lead to innovative safety solutions that enhance workspace protocols.
seasoned firewood for kindling
As an affiliate, we earn on qualifying purchases.
As an affiliate, we earn on qualifying purchases.
Techniques for Splitting Small Firewood Into Kindling Strips

Splitting small firewood into kindling strips requires precision and careful technique. To start, place your small firewood log on a stable, hard surface with the cut end facing upward. This positioning makes it easier to split into thinner strips. Use a sharp, lightweight splitting axe or Swedish hatchet to strike the log firmly, focusing on clean splits without knots or defects. A well-maintained axe ensures high performance and reduces the effort needed for splitting. Here are some key steps:
Place small logs on a hard surface and strike with a sharp axe for clean, thin kindling strips.
- Find the desired splitting point and position the axe blade accordingly.
- Deliver controlled, accurate strikes, gradually splitting the wood into thinner pieces.
- If the axe sticks or lodges, lift the log and reposition it onto a larger, stable base.
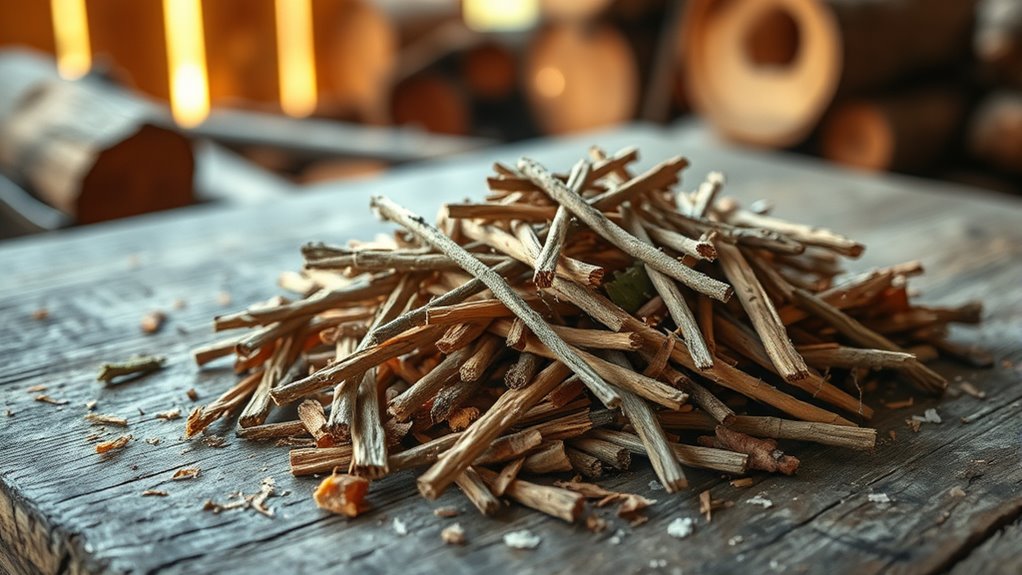
- Collect the resulting thin, elongated kindling strips, perfect for fire lighting.
- For safety and efficiency, always wear protective gloves and eye gear during splitting, especially when working with firewood safety precautions. Staying mindful of proper technique can also prevent injuries and ensure smoother splitting sessions. Additionally, understanding the different types of tools and their maintenance can help prolong their lifespan and improve your overall splitting effectiveness.
Gathering Additional Materials to Enhance Fire Lighting

Gathering a variety of additional materials can substantially improve your fire-starting success. Collect small, straight sticks and twigs from your yard or woodland, aiming for 12-18 inch lengths that ignite easily. Use bark, cones, and peelings from fallen trees or branches as supplementary kindling to help fires catch quickly. Break down larger scraps of untreated wood, pallets, or lumber into thin strips or “noodles” for efficient fuel. Confirm all collected materials are thoroughly dried in a shed, garage, or open-air space; seasoned firewood ignites more easily. Properly prepared and seasoned firewood will burn more efficiently and produce less smoke. Storage methods such as dry storage help keep your kindling in optimal condition. Store your gathered kindling in baskets, drums, or boxes, keeping them dry and accessible. Ensuring your kindling is free of moisture and mold is essential for safe and effective fire lighting, especially when using fire-starting materials. Using properly dried kindling reduces the risk of smoke buildup and incomplete combustion. Additionally, selecting high-quality kindling can further enhance your ability to start a fire quickly and reliably.
Organizing and Storing Your Homemade Kindling
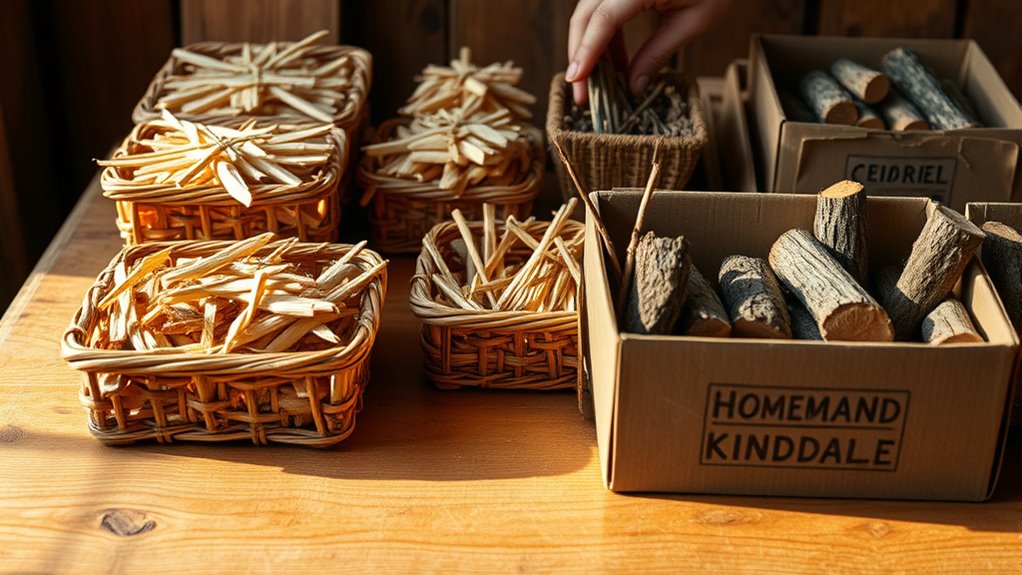
To keep your homemade kindling ready for quick fire-starting, it’s essential to store it properly in labeled, dry containers like large drums, sawbucks, or sturdy boxes. Proper storage guarantees your fire-starting materials stay dry and accessible. Here’s how to organize your kindling:
- Label each container clearly to identify different types or sizes of fire-starting materials.
- Make sure all kindling is thoroughly dried before storage to prevent mold and improve ignition.
- Bundle small pieces with twine or rubber bands for easy handling and quick access.
- Keep fire-starting materials like waxed egg cartons or crumpled paper separate from larger logs for efficient fire-building.
Regularly check your storage, replenish supplies, and rotate older stock to maintain dryness and readiness.
Safety Tips for Handling Tools and Splitting Wood
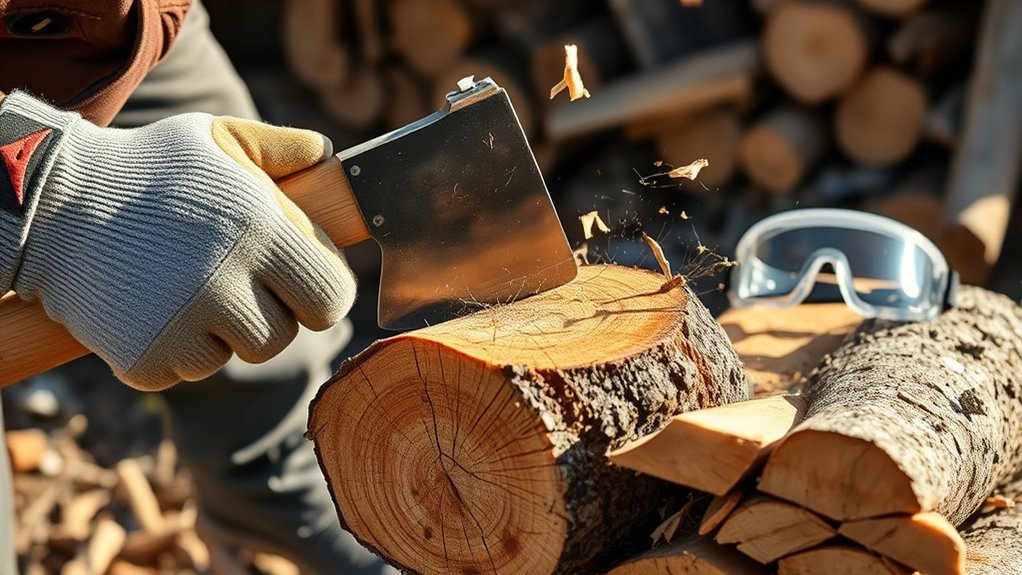
When handling tools and splitting wood, always stay alert and use proper techniques to stay safe. Keep your hands clear of the axe’s striking zone and maintain a firm grip to control the tool. Make sure your splitting surface is stable and on a non-slip surface to prevent accidents. Additionally, using correct safety equipment such as gloves and eye protection can further reduce the risk of injury. It is also important to ensure your wood stove safety standards are met to prevent hazards during storage and handling of firewood. Regularly inspecting your bicycle tires for cracks or deformities can help prevent accidents and ensure safe riding conditions. Incorporating a safety mindset into your routine can significantly improve overall safety during wood splitting activities.
Proper Tool Handling
Handling axes and hatchets safely is essential to prevent injuries during wood splitting. To do this, follow these tips:
- Always wear protective gloves and goggles to shield yourself from flying chips or slips.
- Keep your hands away from the splitting zone and strike the wood on a stable surface for better control.
- Use a sharp blade; dull tools require more force, increasing the risk of slipping while splitting kindling.
- Position your body so the axe swings in a controlled, vertical motion, avoiding overextension that could cause imbalance.
- Ensure your tools are properly maintained and sharp, as this reduces the effort needed and minimizes the risk of accidents.
- Regular maintenance and proper tool handling can significantly improve safety and efficiency during splitting.
Never force the axe into the wood. If it sticks, lift and re-position the tool or the wood. Proper handling keeps you safe and makes splitting more efficient.
Safe Splitting Techniques
Practicing safe splitting techniques is essential for preventing accidents and injuries. When splitting kindling, always wear safety goggles and gloves to protect your eyes and hands from flying wood chips and splinters. Place the firewood on a stable, elevated surface like a log or stump to prevent slipping and give you better control. Keep your hands away from the axe’s striking zone, using a firm grip to maintain safety and control. Use a sharp axe or splitting tool, which reduces the force needed and minimizes mishandling. Split wood with controlled, deliberate strikes, avoiding overreaching or using excessive force that could cause the axe to slip. Following these safety tips ensures you stay safe while making your own wood kindling.
Using Your Kindling Effectively to Start Fires
Arrange your fire properly by placing crumpled newspaper or fire starter at the bottom, then add thin, dry kindling on top to promote airflow. Use small, seasoned sticks about 12-18 inches long to ignite quickly and help the fire catch larger logs efficiently. Gradually add bigger wood pieces while maintaining good airflow, and use multiple lighting points to ensure an even, strong burn.
Proper Fire Layering Techniques
To start a fire effectively, proper layering is essential, especially when using your kindling. Fire layering involves stacking materials to promote airflow and quick ignition. Here’s how:
- Place crumpled newspaper or fire starters at the bottom to ignite easily.
- Add a loose layer of dry, split kindling strips 12-18 inches long, spaced to allow air circulation.
- Position larger, seasoned logs on top of the kindling once flames catch to sustain the fire.
- Build the fire in a teepee or lean-to shape, ensuring good airflow to ignite the kindling efficiently and reduce smoke.
Using proper fire layering techniques maximizes heat transfer and shortens the time to full combustion, making your fire more reliable and efficient.
Using Small, Dry Twigs
Using small, dry twigs is one of the most effective ways to start a fire because they ignite quickly and create a strong foundation for larger logs. Select dry sticks, about 12-18 inches long, free of moisture and rot, to guarantee reliable ignition. Break larger branches into thinner strips, splitting knots and bark to improve airflow and catch fire easily. Arrange your kindling loosely in a teepee or crisscross pattern over crumpled newspaper or quick-lighting materials to promote good airflow. Store your gathered twigs in a dry, covered area to keep them ready for use. Remember, dry sticks are vital for a successful fire-starting process.
| Aspect | Tip |
|---|---|
| Dryness | Use only dry, dead twigs |
| Length | 12-18 inches for best results |
| Arrangement | Loosely in teepee or crisscross pattern |
| Storage | Keep in a dry, covered spot |
| Material | Avoid green or damp wood |
Maintaining Firebed Efficiency
Ensuring your firebed is set up for maximum efficiency starts with using properly prepared kindling that ignites quickly and produces a strong initial flame. To maintain this, focus on using seasoned, knot-free wood and split firewood for your kindling—these burn cleaner and light faster. Here are four tips:
- Keep your kindling dry and stored in a well-ventilated area to prevent moisture absorption.
- Use thin slabs or small split firewood for quick ignition and a strong flame.
- Place crumpled newspaper or firestarter materials beneath your kindling to boost ignition success.
- Layer your firebed with a good mix of crumpled paper, kindling, and seasoned logs to improve airflow and sustain the fire longer.
Following these steps ensures your fire starts reliably and burns efficiently.
Frequently Asked Questions
How Do I Make My Own Kindling?
To make your own kindling, start with seasoned firewood that’s straight and free of knots. Use a small Swedish hatchet or splitting axe, placing the wood on a sturdy log or chopping block. Strike the end of the wood to split it into thin, manageable strips about 12-18 inches long. Keep splitting and thinning the pieces until they’re small enough to ignite quickly. Store your kindling in dry, organized containers nearby for easy access.
What Is the Best Wood to Use for Kindling?
You want to know the best wood for kindling. Softwoods like pine, cedar, and spruce are great because they split easily and ignite quickly. Beech and birch are also excellent, especially when seasoned and bark-free. Choose straight-grain woods like ash and oak for cleaner, more efficient fires. Avoid damp or rotted wood, as it burns poorly and creates smoke. Always use dry, well-seasoned wood for reliable lighting.
What Is the Best Tool to Make Kindling?
Did you know that a small Swedish hatchet can cut through firewood with 50% less effort than a regular axe? When choosing the best tool for making kindling, you should consider safety, efficiency, and ease of use. A sharp, dedicated splitting axe or a kindling cracker is ideal because they let you split wood cleanly without risking injury. Keep your blade sharp for smoother, safer splitting every time.
Can You Use Any Wood for Kindling?
You can’t just use any wood for kindling. Softwoods like pine and cedar ignite faster but burn out quickly, while hardwoods like oak and hickory burn longer and produce more heat. Always pick dry, seasoned wood with low moisture, free of knots and wet patches. Thin, split strips or shredded wood work best because they catch fire easily. Using the right type guarantees safe, efficient, and reliable ignition.
Conclusion
By selecting the right materials, preparing your workspace, and practicing safe techniques, you create kindling that’s easy to ignite, reliable to burn, and safe to handle. With organized storage, you guarantee your kindling stays ready for use. By honing your skills and prioritizing safety, you build confidence in your fire-starting process. Ultimately, your homemade kindling becomes a trusted companion—ready to light your fire, warm your home, and bring comfort to every cozy moment.