
To construct a pellet hopper for your DIY stove, start by choosing durable, heat-resistant materials like metal or high-quality plastics. Design a top opening for easy filling and a bottom discharge outlet aligned with your feeding mechanism. Guarantee the hopper has a stable base and a simple, smooth interior for pellets to flow freely. Test and adjust the feed rate to prevent jams or overfeeding, and secure all joints. Keep exploring to learn more about optimizing your hopper’s design and function.
Key Takeaways
- Design a hopper with a top opening for easy pellet filling and a bottom discharge outlet aligned with the stove’s feeding port.
- Use durable, heat-resistant materials like metal or high-quality plastics to withstand contact and heat exposure.
- Incorporate a gravity-fed or screw conveyor system with an adjustable auger to control pellet flow smoothly.
- Ensure the hopper has a stable base and secure joints to prevent spills, air leaks, or pellet jams during operation.
- Test the assembled hopper with pellets, adjusting the feed mechanism for consistent, jam-free pellet delivery.
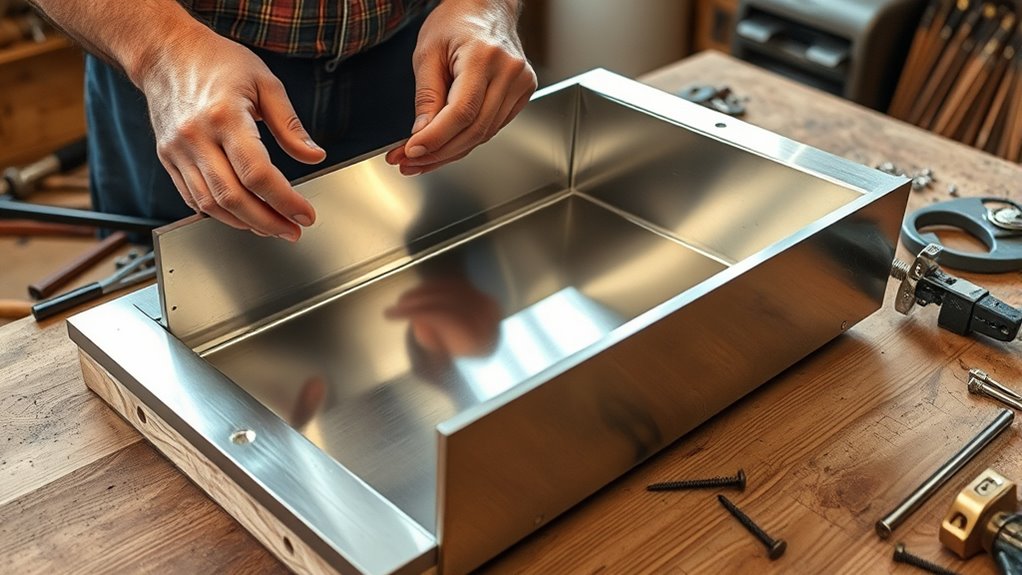
Building a pellet hopper is a straightforward project that can substantially improve the efficiency of your pellet stove or heating system. The key to a successful build lies in designing an effective feeding mechanism and determining the right hopper capacity for your needs. The feeding mechanism is essential because it controls how pellets are delivered from the hopper into the stove’s burn chamber. A consistent and reliable feed ensures steady heat output and minimizes interruptions. When constructing your hopper, consider using durable, heat-resistant materials like metal or high-quality plastics that can withstand constant contact with pellets and potential heat exposure.
Building a pellet hopper with durable, heat-resistant materials enhances stove efficiency and reliability.
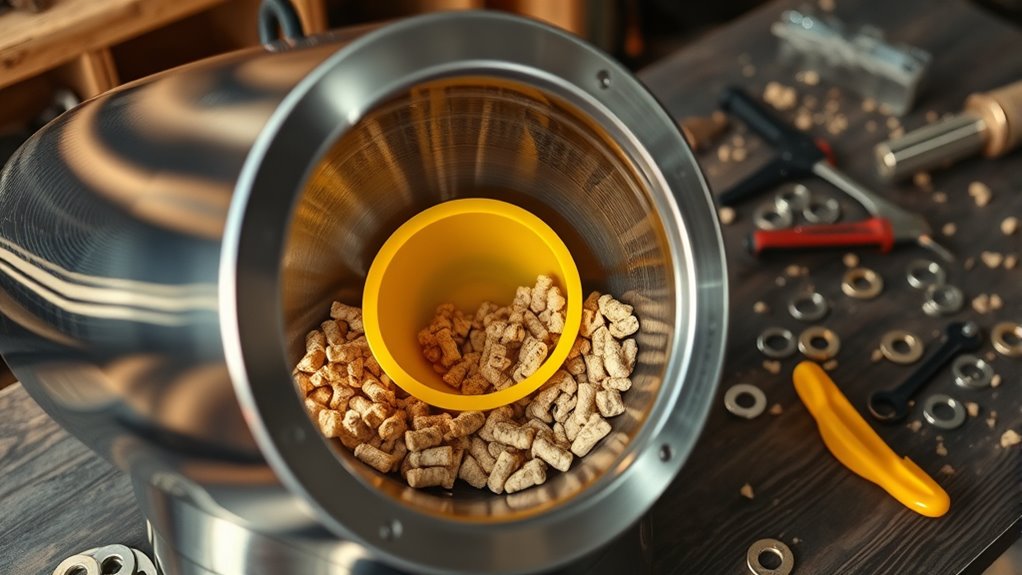
The first step is to decide on the hopper’s capacity, which depends on how long you want your stove to operate without needing a refill. Larger capacities reduce the frequency of refills but also increase the size and weight of your hopper, so find a balance that suits your space and usage habits. For most household applications, a capacity of 20 to 50 pounds is sufficient, but if you’re aiming for extended use, you might want to go larger. Once you determine the capacity, sketch out a design that allows for easy filling and emptying while maintaining a stable base. You’ll need to include an opening at the top for adding pellets and a discharge outlet at the bottom for feeding them into the stove.
Next, focus on creating a reliable feeding mechanism. Gravity-fed systems are common and simple to implement; they rely on the force of gravity to move pellets downward through a chute or screw conveyor. To guarantee consistent feeding, you may want to incorporate a controlled auger or screw conveyor that can be adjusted for feed rate. This adjustment allows you to regulate heat output and prevent overfeeding or clogging. Make sure that the outlet at the bottom of the hopper aligns with your stove’s feeding port, and seal all joints to prevent air leaks or pellet spillage. Additionally, considering safety measures during construction ensures safe operation, especially regarding proper sealing and secure placement.
Finally, test your hopper thoroughly before installing it into your stove. Fill it with pellets and observe how smoothly the feeding mechanism operates. Adjust the feed rate if necessary and ensure there’s no jamming or blockages. Properly constructing and fine-tuning your hopper will result in a more efficient, reliable, and safe pellet stove setup, giving you better control over your heating system and reducing the need for frequent refills.
pellet stove hopper assembly kit
As an affiliate, we earn on qualifying purchases.
As an affiliate, we earn on qualifying purchases.
Frequently Asked Questions
What Materials Are Best for Insulating the Hopper?
For insulating your hopper, you should consider insulation options like mineral wool, ceramic fiber, or foam board, as they offer excellent thermal barriers. These materials help maintain consistent pellet temperature and prevent heat loss. Make sure to choose fire-resistant options and guarantee proper installation to maximize insulation effectiveness. Proper insulation improves efficiency and safety, so select materials suited for high temperatures and easy to work with.
How Do I Prevent Hopper Jams During Operation?
Like a knight guarding his castle, you must guarantee proper hopper design to prevent jams. Use a smooth, angled slope to facilitate pellet flow, and incorporate a vibration mechanism if needed. Keep the feed opening clear, avoid sharp edges, and regularly clean out debris. By focusing on jam prevention during operation, you’ll maintain consistent feeding, reducing downtime and ensuring your DIY pellet stove runs smoothly and efficiently.
What Safety Precautions Should I Take During Construction?
When building your pellet hopper, prioritize safety by wearing appropriate safety gear like gloves and goggles to protect against sharp edges and debris. Guarantee electrical safety by disconnecting power before working on any wiring or electrical components. Keep your workspace clean and well-lit, and double-check all connections. Follow manufacturer instructions carefully, and avoid rushing to prevent accidents. Staying vigilant and cautious helps you build a safe, reliable pellet hopper.
How Do I Modify the Hopper for Different Pellet Sizes?
Ever notice how small changes in hopper design can keep pellet flow smooth? To modify for different pellet sizes, you should adjust the feed opening and internal angles, ensuring pellets don’t jam or bridge. Use wider or narrower chutes as needed, and test with various sizes to perfect the flow. These tweaks help your hopper work efficiently across different pellet types, keeping your stove running smoothly and reliably.
What Is the Ideal Capacity for a Home DIY Pellet Hopper?
You should aim for a hopper capacity of about 20 to 40 pounds for your home DIY pellet stove. This size offers ample pellet storage without making the hopper too bulky or difficult to replenish frequently. Consider your daily usage and space constraints to find the ideal capacity. A well-sized hopper ensures consistent feeding, efficient combustion, and fewer refills, making your stove more reliable and convenient for regular heating needs.

GameXcel Pellet Bucket – 2.64 Gallon Metal Container – Heat-Resistant Steel Bin for Hot Ash Pellets Firewood – Convenient Ash Disposal with Handle
【STURDY METAL】Heavy-duty steel resists dents and daily wear.
As an affiliate, we earn on qualifying purchases.
As an affiliate, we earn on qualifying purchases.
Conclusion
Building your pellet hopper may take effort, but it’s a rewarding project that saves money and boosts your stove’s efficiency. With patience and careful craftsmanship, you’ll enjoy a reliable fuel supply for cozy fires. Remember, Rome wasn’t built in a day—so take your time and enjoy the process. Soon enough, you’ll have a custom hopper that keeps your stove running smoothly, turning your DIY project into a warm, successful achievement.

M&G DuraVent PelletVent Pro 3" Pellet Chimney Adjustable Wall Strap (3PVP-WSA)
3.625" Diameter
As an affiliate, we earn on qualifying purchases.
As an affiliate, we earn on qualifying purchases.

Pellet Stove Igniter Compatible with All Models of Castle/Comfortbilt Pellet Stoves HP21,HP22,Replace Part#Castle 720307/ComfortBilt igniter1 IG-1,6"Long and 3/8 "Diameter
Pellet Stove Igniter Replacement Spec: 6" long slide in style ,3/8 "Diameter,AC 115V 450 W
As an affiliate, we earn on qualifying purchases.
As an affiliate, we earn on qualifying purchases.