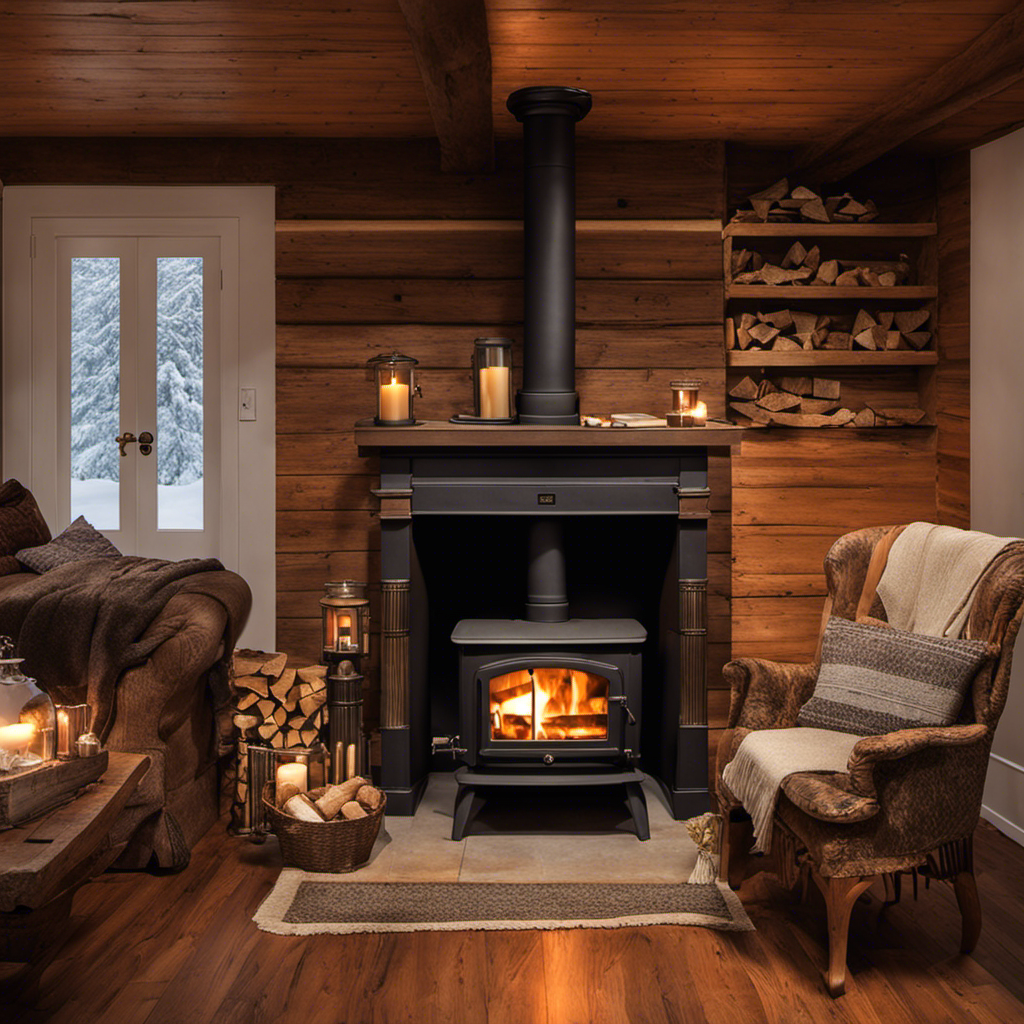
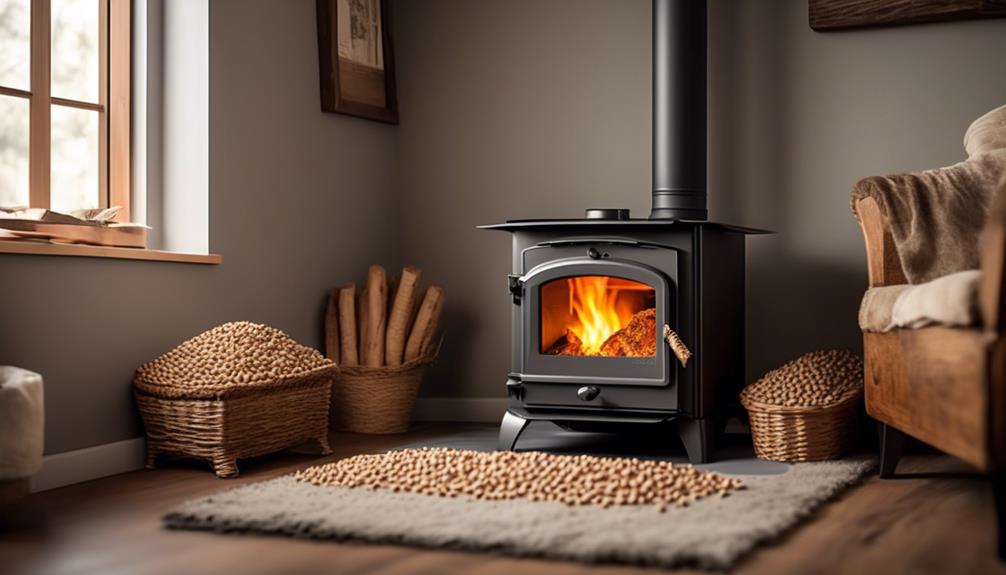
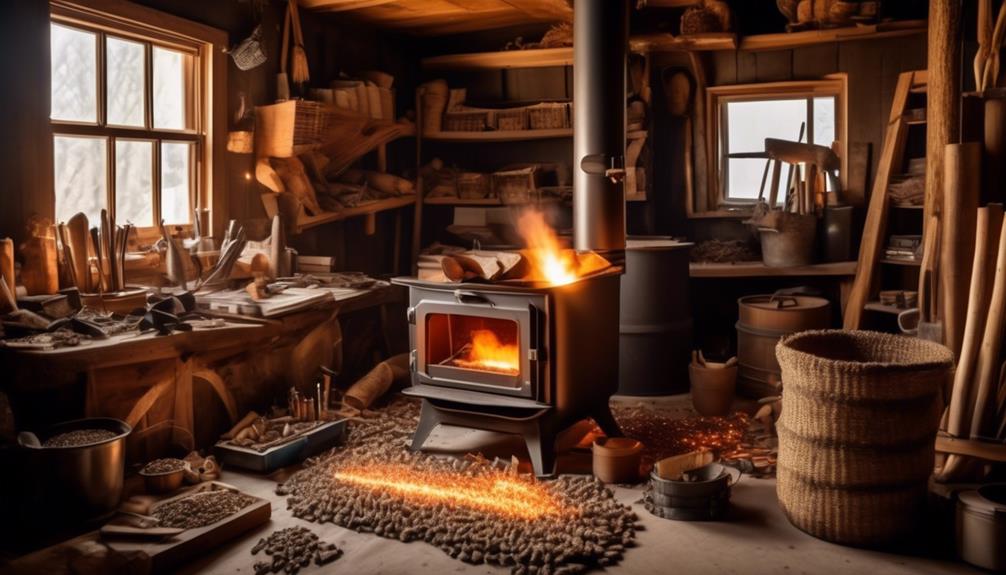
Have you ever thought about the comfort and simplicity that a DIY pellet basket can bring to your wood-burning stove? The benefits of warming your house with wood stoves are well acknowledged.
It’s a simple solution that can save you time and money. With just a few materials and some basic crafting skills, you can create a basket that allows you to burn wood pellets without the need for electricity.
But how exactly does it work, and what are the potential advantages?
Let’s explore the ins and outs of this innovative adaptation and see how it could enhance your wood stove experience.
Key Takeaways
- DIY pellet baskets for wood stoves provide a cost-effective solution for wood stove owners.
- They offer increased heat output, extended burn time, and reduced fuel consumption compared to traditional wood burning methods.
- Pellet burners produce the same amount of heat as cut wood but burn about 10% more wood by weight.
- Using fuel pellets results in significantly less ash residue and simplifies the fire starting process.

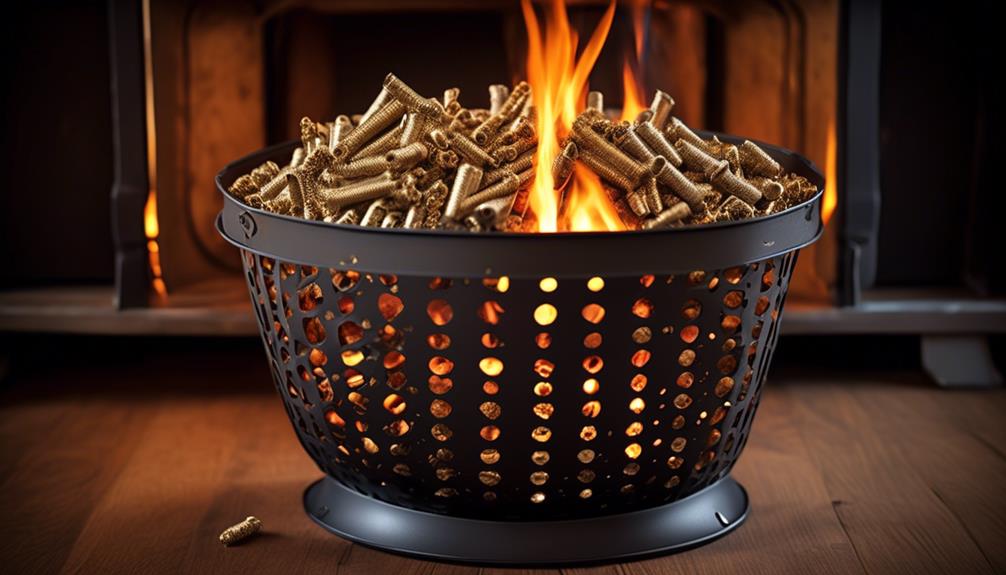
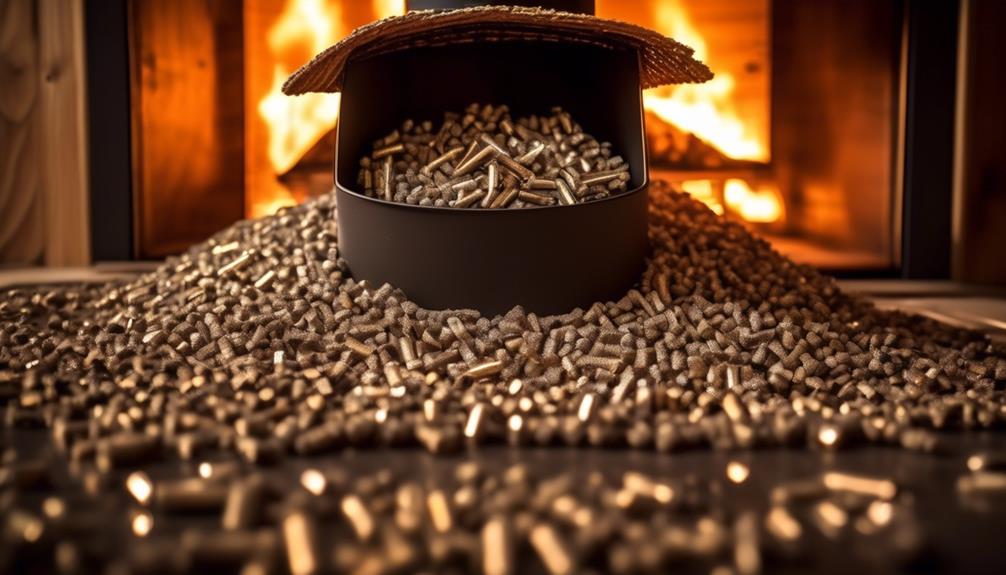
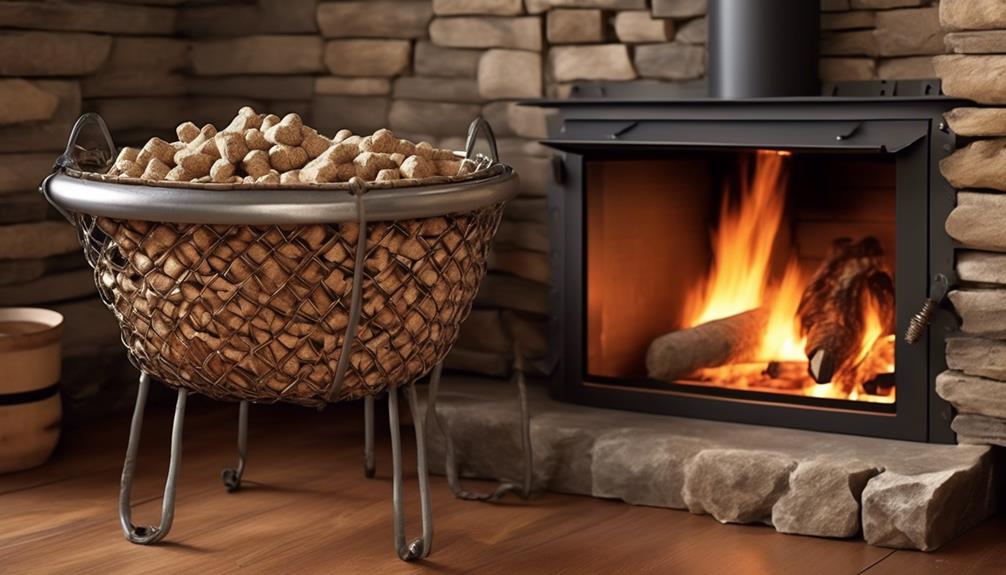
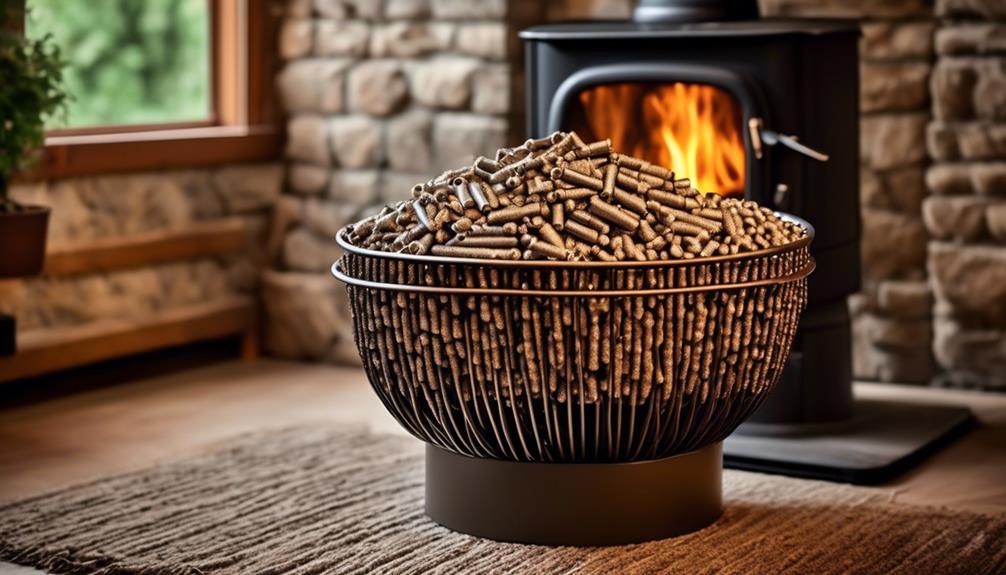
Pellet Basket, Portable Pellet Burner Basket for Fireplaces and Wood Stoves, Emergency Camping Stove
- Dimensions: 11.5 × 8 × 6.7 inches
- Material: Thickened stainless steel
- Durability: Resistant to high temperatures
As an affiliate, we earn on qualifying purchases.
As an affiliate, we earn on qualifying purchases.
Materials and Costs
What materials and costs are involved in creating a DIY pellet basket for a wood stove?
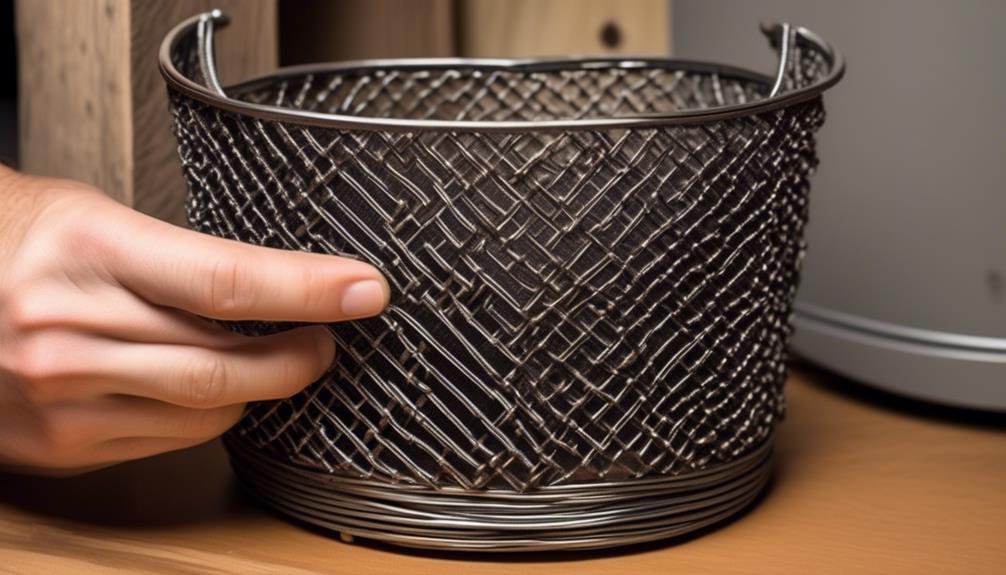
When making a DIY pellet basket for a wood stove, it’s essential to have the right materials. We need machine netting, preferably steel with small holes, for the adapter. It’s important to measure the fireplace or stove floor and obtain a piece of netting that’s 1.5 times longer and wider.
Additionally, heavy gauge steel construction angle is necessary for the base of the pellet box. To weave and secure the basket, thin and pliable steel wire is required.
As for the costs, these materials can be found at a hardware store. The machine netting, steel construction angle, and steel wire can be purchased at reasonable prices, making the DIY pellet basket a cost-effective solution for wood stove owners.
Shaping the Basket
Alright, now let’s talk about shaping the basket.
We’ll cover welding the frame, attaching mesh sides, and adding handle slots.
These are the key points we need to address to ensure the basket holds up and functions properly.
Welding the Frame
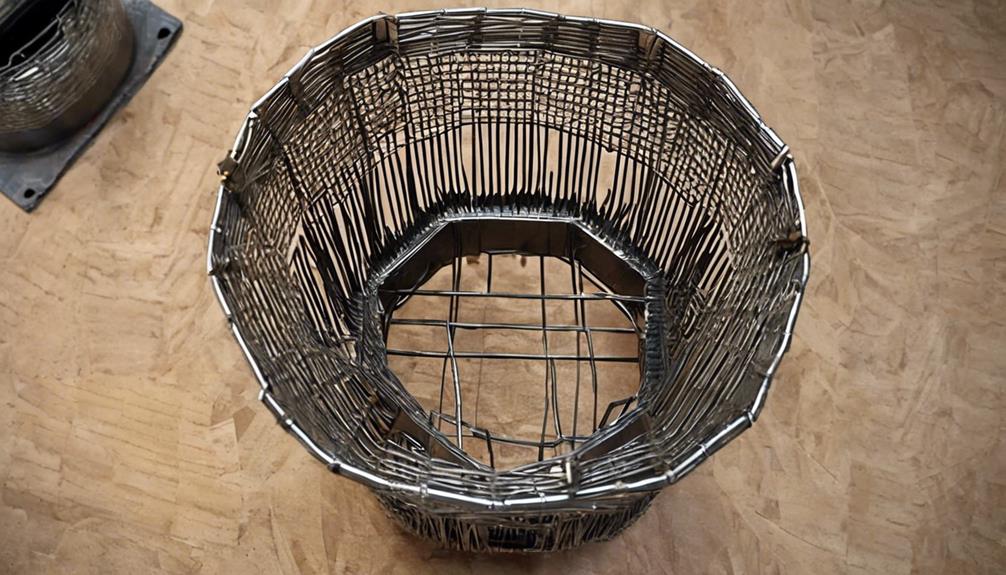
Using heavy gage steel construction angle, we construct the wire box similar to a cardboard shoe box for the frame of the pellet basket.
The next step involves welding the frame, ensuring sturdy construction.
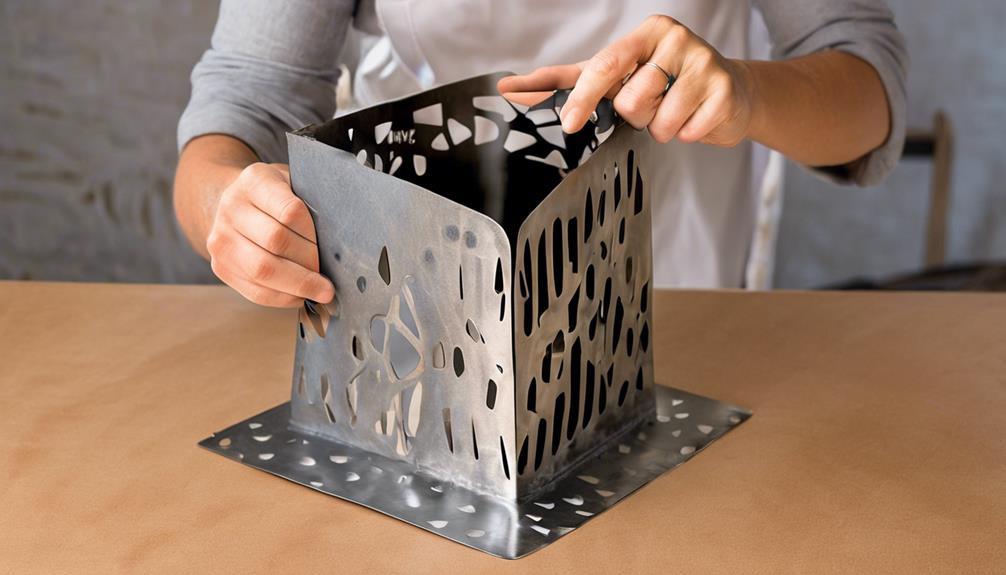
Cut lines in the netting at the corners and fold the box up to shape the basket.
Weave and secure the flaps of the box using steel wire and needle-nose pliers, keeping the side walls slightly inclined for easy insertion of the grate.
Additionally, create a base for air circulation and support by cutting and folding the remaining netting, and then attach it to the metal box for easy emptying and sturdiness.
This meticulous welding process is critical for maintaining the structural integrity of the pellet basket, ensuring it can withstand the high temperatures and constant use.
Attaching Mesh Sides
Carefully weave and secure the mesh sides of the wire box to shape the basket, ensuring sturdy construction for the pellet basket. Use expanded metal to create the sides by cutting the metal mesh and folding it at the corners. Weave the cut sections together using steel wire and needle-nose pliers, ensuring a tight and secure fit.
Remove any zip ties used for temporary support once the weaving is complete.
Additionally, create a base for the grate by cutting and folding the remaining netting, then wire-tie metal corner molding sections to cover the base.
Attach the grate/base to the metal box for easy emptying and sturdiness, ensuring the side walls of the basket are slightly inclined for easy insertion of the grate.
This will result in a well-constructed and durable pellet basket for your wood stove.
Adding Handle Slots
To shape the basket, cut lines in the netting at the corners and fold the box up, creating the desired form. Once the basket has taken shape, it’s time to add handle slots. We will need to carefully cut and shape the stainless steel mesh to create slots for the handles. Below is a table outlining the steps for adding handle slots to the DIY pellet basket for the wood stove:
| Step | Description |
|---|---|
| 1. | Measure and mark the locations for the handle slots on the top edge of the basket. |
| 2. | Use heavy-duty steel wire to secure the edges of the slots and reinforce them for durability. |
| 3. | Ensure the handle slots are wide enough for a comfortable grip when lifting the basket. |
| 4. | Smooth any sharp edges to prevent any risk of injury. |
Forming the Basket
Let’s talk about welding the frame and attaching the mesh screen to form the basket.
We’ll use steel wire and needle-nose pliers to weave and secure the flaps of the box.
Once the weaving is complete, we’ll remove the zip-ties and tuck the wire ends into the netting for a clean finish.
Welding the Frame
Using steel wire and needle-nose pliers, weave and secure the flaps of the box to form the frame for the pellet basket. Once the weaving is complete, it’s time to weld the frame to ensure durability and stability.
Here’s how to weld the frame for the pellet basket:
- Align the edges of the wire frame precisely to ensure a seamless weld.
- Use a welding machine with the appropriate settings to achieve a strong and secure weld.
- Weld all the joints of the frame thoroughly to prevent any weak points.
- Inspect the welded frame carefully to ensure it’s structurally sound before proceeding to the next steps.
Welding the frame is crucial in creating a robust and long-lasting pellet basket for your wood stove.
Attaching Mesh Screen
Weaving and securing the flaps of the box with steel wire and needle-nose pliers forms the initial structure for the pellet basket. Once the box is securely woven, it’s time to attach the mesh screen.
Cut the mesh screen to the appropriate size, allowing for some overlap to ensure complete coverage. Use the needle-nose pliers to secure the mesh screen to the top edges of the box, ensuring that it’s taut and securely in place.
Twist the wire ends together and cut them down to the last twist, then tuck the wire ends into the netting using the pliers. This will provide a smooth and secure finish.
With the mesh screen attached, the basket is now ready for the next steps in the construction process.
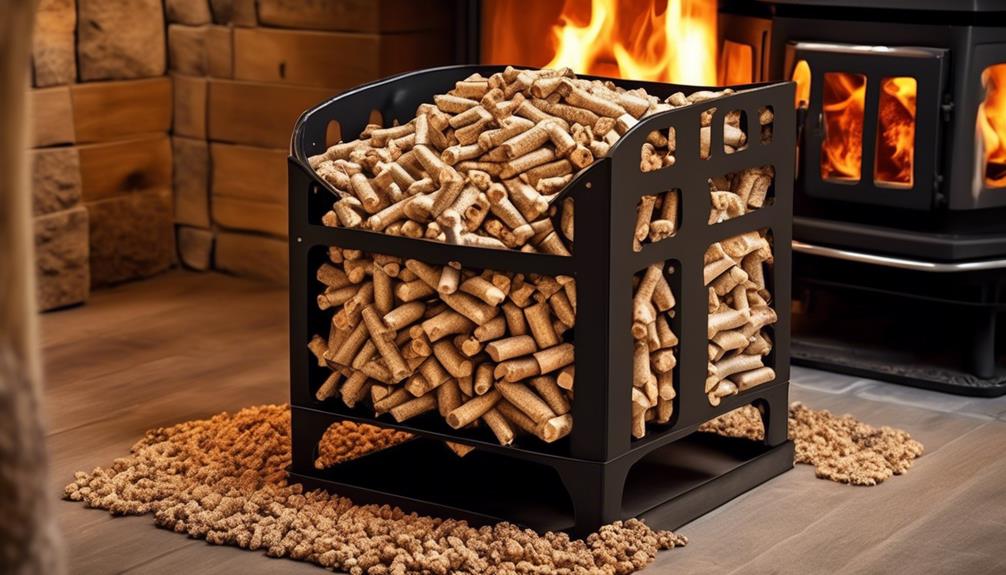
Building the Base
To construct the base of the pellet basket, select machine netting and heavy gauge steel construction angle as the appropriate materials. These materials provide the necessary strength and durability for supporting the weight of the wood pellets and withstanding the heat generated within the wood stove.
Here’s how we build the base:
- Selecting the right materials: Choosing the proper machine netting and heavy gauge steel construction angle is crucial for ensuring the stability and resilience of the base.
- Shaping the basket: Constructing a wire box similar to a cardboard shoe box allows for efficient use of the netting and easy assembly of the base.
- Weaving the basket: Skillfully weaving the netting with steel wire and needle-nose pliers ensures that the base is securely fastened and capable of accommodating the wood pellets.
- Creating the base: Cutting and folding the remaining netting to form the base provides a sturdy foundation for the grate, enabling easy emptying and enhancing the overall robustness of the pellet basket.
Testing and Results
We tested the pellet basket by filling it with pellets and observing the initial flame spread. We also evaluated its efficiency and monitored the burn time and heat output.
Additionally, we assessed the adaptability of the basket by observing the behavior of the flame when starting the fire from the top.
To further gauge its performance, we compared the heat output and efficiency of the pellet basket with burning cut wood.
Based on the testing results, we were able to refine the design and construction of the pellet basket to optimize efficiency and heating capacity.
Efficiency of Pellet Basket
After conducting rigorous testing, the data revealed the remarkable efficiency of the pellet basket in our wood stove. The results were truly impressive, highlighting the numerous benefits of incorporating a pellet basket into our wood stove setup.
Here’s what we found:
- Increased Heat Output: The pellet basket significantly amplified the heat produced by the wood stove, creating a cozy and comfortable environment in our living space.
- Extended Burn Time: With the pellet basket, we observed a notably prolonged burn time, allowing for consistent warmth throughout the day and night.
- Reduced Fuel Consumption: The efficiency of the pellet basket led to a noticeable decrease in the amount of fuel needed to maintain optimal heating levels.
- Minimal Ash Residue: We were pleasantly surprised by the minimal ash residue left behind, streamlining the cleaning process and enhancing overall convenience.
The efficiency of the pellet basket truly exceeded our expectations, making it a valuable addition to our wood stove.
Comparison With Traditional Method
The remarkable efficiency of the pellet basket in our wood stove prompts a comparison with the traditional method, revealing compelling testing and results.
When comparing the pellet burner with the traditional cut wood method, we found that the fuel pellets burn with the same amount of heat as cut wood, and by weight, they burn about 10% more wood. Specifically, burning oak pellets results in about 25% more wood burned by weight compared to traditional cut wood.
Additionally, the ash produced after burning fuel pellets is significantly less compared to cut wood. Moreover, using fuel pellets eliminates the need to cut wood and go through multiple steps to start the fire.
With adjustments, 4 hours of burn time can be achieved with half the amount of pellets.
These results clearly demonstrate the advantages of using a pellet burner over traditional wood methods.
Impact on Heating Costs
Our testing revealed a significant impact on heating costs when using the pellet basket. Compared to cut wood, the pellet basket showed a 10% increase in burning efficiency. This increase in efficiency translates to potential cost savings, especially when using oak pellets. In fact, the use of oak pellets resulted in a 25% higher wood weight burn, further showcasing the potential for cost savings.
Not only did the pellet basket offer cost savings, but it also provided other advantages. For instance, fuel pellets burned consistently for 3 hours, offering a reliable heat source. This consistency in burn time also means less maintenance is required.
Another advantage of the pellet basket is the minimal amount of ash it produces compared to traditional cut wood. This reduction in ash translates to reduced cleanup and maintenance efforts.
Furthermore, the efficiency improvements of the pellet basket allowed for a 4-hour burn time with only half the amount of pellets required. This further contributes to cost savings.
One Month Later
Upon reflection, the pellet basket has proven to be a valuable addition to our wood stove. One month later, the impact of using wood pellets instead of traditional wood burning has been quite remarkable. The burning pellets have provided a consistent and efficient heat source, significantly reducing the need to cut wood and making fire maintenance easier. The energy return from the pellets burning has been impressive, offering a cost-effective and environmentally friendly alternative. With some adjustments, the efficiency of the pellet basket has improved, allowing for longer burn times and reduced fuel consumption. Overall, the one month later assessment shows that the pellet basket has been a successful addition to the wood stove, providing reliable heat without the need for electricity.
| Benefits | Observations |
|---|---|
| Consistent & efficient heat source | Reliable performance |
| Reduced wood cutting | Easier fire maintenance |
| Cost-effective & eco-friendly alternative | Impressive energy return |
| Improved efficiency | Longer burn times, reduced fuel consumption |
The transition to using wood pellets has not only simplified the wood burning process but has also demonstrated a positive impact on our energy efficiency and heating costs.
Recommended Contests
Let’s talk about the points we need to consider as we explore the recommended contests for our DIY pellet basket for wood stoves.
These contests focus on various aspects such as basket materials, assembly instructions, efficiency, and the benefits of using a pellet basket.
Each contest provides an opportunity for us to showcase our innovative designs and solutions for heating and energy efficiency.
Basket Materials
For the recommended materials in building the pellet basket, machine netting, steel with small holes, heavy gauge steel construction angle, pliable steel wire, and metal corner molding sections are essential to ensure durability, proper air circulation, sturdiness, and stability.
When considering the materials for the pellet basket, we recommend the following:
- Machine Netting: Due to its durability and heat resistance, machine netting, also known as rabbit-hutch screen, is an optimal choice for the adapter.
- Steel with Small Holes: Opt for steel netting with small holes to prevent pellets from falling through and ensure proper air circulation within the basket.
- Heavy Gauge Steel Construction Angle: Utilize heavy gauge steel construction angle for the base of the pellet basket to provide sturdiness and support, ensuring it can withstand daily use.
- Pliable Steel Wire: Thin, pliable steel wire is crucial for weaving and securing the netting, guaranteeing a strong and secure construction that can withstand the demands of pellet burning.
Assembly Instructions
To assemble the pellet basket, we recommend starting with creating the frame by cutting two 12-inch lengths of 1-inch steel or aluminum flat stock and drilling a 1/4 inch hole through the face of the flat stock. After that, follow the steps below to construct the basket:
| Step | Instructions |
|---|---|
| 1. Cutting and Folding the Basket | Use tin snips to cut a 12-inch by 32-inch rectangle out of expanded steel lath. Fold the material to create a 90-degree bend. Cut two 12-inch by 12-inch squares out of expanded steel lath to form the sides of the basket. |
| 2. Securing the Frame to the Basket | Roll the metal lathe up into a sheet and fold it around a 12-inch piece of flat stock at the back of the basket. Line up the top holes on the support pieces with the holes in the flat stock on the front and back of the basket. Secure the bolts in place with hex nuts. |
| 3. Using Your Pellet Burner | Place the pellet burner inside the fireplace or wood stove. Fill the basket with high-quality softwood or hardwood pellets. Ignite the pellets using a commercial wooden or gel fire starter. Adjust the draft for proper air circulation. |
Following these precise instructions will ensure the successful assembly of your pellet basket.
Efficiency and Benefits
Pellet baskets offer a cost-effective and efficient alternative to traditional stoves, providing consistent heat and reducing ash and emissions. Here are the benefits and efficiency of using a pellet basket:
- Great Heat: Pellet baskets deliver a high amount of heat output, ensuring a warm and cozy living space.
- Efficiency: They require fewer wood pellets and produce minimal ash and emissions, making them environmentally friendly and cost-effective.
- Consistent Heat: Pellet baskets provide a steady and even heat, eliminating the need for constant adjustments and ensuring a comfortable indoor environment.
- Convenience: With easy installation and maintenance, pellet baskets offer a hassle-free heating solution for fireplaces, wood stoves, and outdoor fire pits.
These benefits make pellet baskets an excellent choice for individuals seeking mastery in efficient and effective home heating solutions.
Burning Wood Pellets
When burning wood pellets in a wood stove, it’s essential to use premium grade pellets with low ash content and moisture for optimal efficiency and minimal maintenance. The quality of the wood pellets directly impacts the combustion process, heat output, and overall performance of the wood stove. Premium grade pellets are designed to burn cleanly and efficiently, producing consistent heat with minimal ash residue. This not only ensures a more comfortable and cleaner environment but also reduces the need for frequent maintenance.
Burning wood pellets offers a convenient and environmentally friendly alternative to traditional wood burning. When burned correctly, wood pellets provide a consistent heat output and require less frequent refueling compared to traditional firewood. Additionally, utilizing a pellet basket with proper airflow adjustments and quality pellets can result in extended burn times and reduced maintenance.
This makes burning wood pellets a cost-effective and sustainable choice for heating with a wood stove. By choosing the right pellets and maintaining proper airflow, wood pellet burning can provide efficient and reliable heat while minimizing the environmental impact.
Assembling the Frame

As we move forward with assembling the frame, it’s crucial to ensure that the two 12-inch lengths of 1-inch steel or aluminum flat stock, previously discussed in the burning wood pellets section, are prepared with precision and care. Here’s how to assemble the frame:
- Cut the 12-inch lengths of flat stock with a metal hack saw, ensuring clean and straight cuts.
- Drill 1/4 inch holes through the face of the flat stock, 1/2-inch in from the short edge and repeat the process for the other piece to create identical holes.
- Cut two thirty-three inch lengths of 1/2-inch flat bar with a metal hack saw.
- Place the first piece of flat stock on a level surface and mark points on its face at specific distances to create bends, ensuring accuracy for the structural integrity of the frame.
Cutting and Folding
Using tin snips, cut a 12-inch by 32-inch rectangle out of expanded steel lath and fold the material to create a 90-degree bend. This will serve as the base of the pellet basket.
After creating the base, make another vertical cut and bend the other side upwards at a 90-degree angle to form the basket.
Next, cut two 12-inch by 12-inch squares out of expanded steel lath to form the sides of the basket. Fold the edges inwards on three sides to create a shallow tray with one open end.
Then, roll the metal lathe up into a sheet and fold it around a 12-inch piece of flat stock at the back of the basket. Repeat this process with the second piece of flat stock at the front of the basket.
Align the top holes on one of the support pieces with the holes in the flat stock on the front and back of the basket. Slide a 1/4-inch bolt through the holes to connect the frame to the side support and the mesh basket, and secure the bolt in place with a hex nut.
This cutting and folding process creates a sturdy and functional pellet basket for your wood stove.
Securing the Frame
After cutting and folding the expanded steel lath to create the base and sides of the pellet basket, we roll the metal lathe around a 12-inch piece of flat stock at the back of the basket, repeating the process at the front, and then aligning the top holes on one of the support pieces with the holes in the flat stock on the front and back of the basket.
Once the frame is aligned, we secure it by sliding a 1/4-inch bolt through the holes to connect the frame to the side support and the mesh basket. This step ensures the stability and integrity of the pellet basket, preventing any deformation or misalignment during use.
Finally, we secure the bolt in place with a hex nut, repeating the process for the other side of the support. This meticulous approach to securing the frame guarantees that the pellet basket is robust and can withstand the rigors of use, providing a reliable and long-lasting solution for wood stove pellet burning.
- Precisely aligning the frame ensures a sturdy and dependable pellet basket.
- Securing the frame with bolts and nuts provides a durable and long-lasting solution.
- Attention to detail in securing the frame is crucial for optimal performance.
- A securely fastened frame contributes to the overall safety and efficiency of the pellet basket.
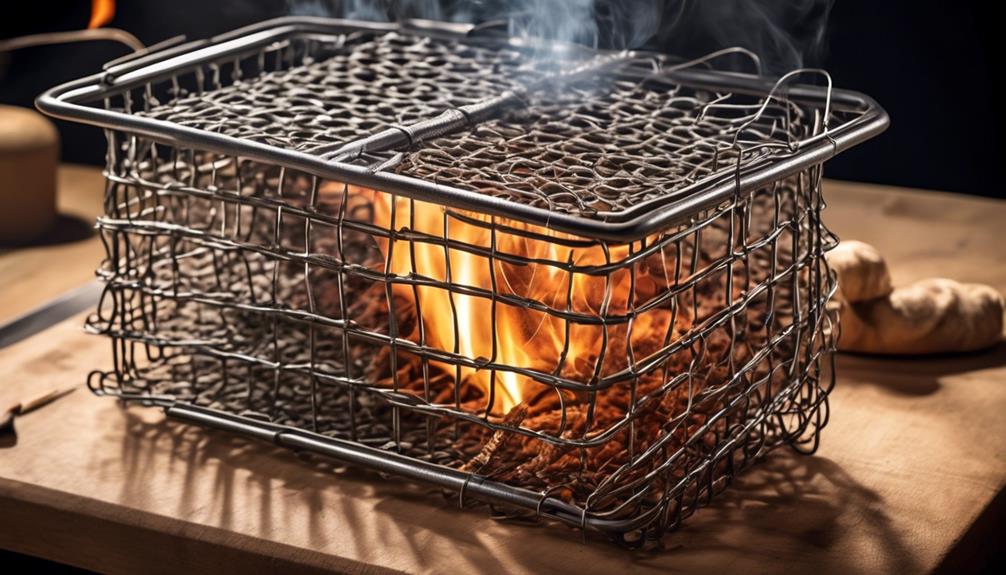
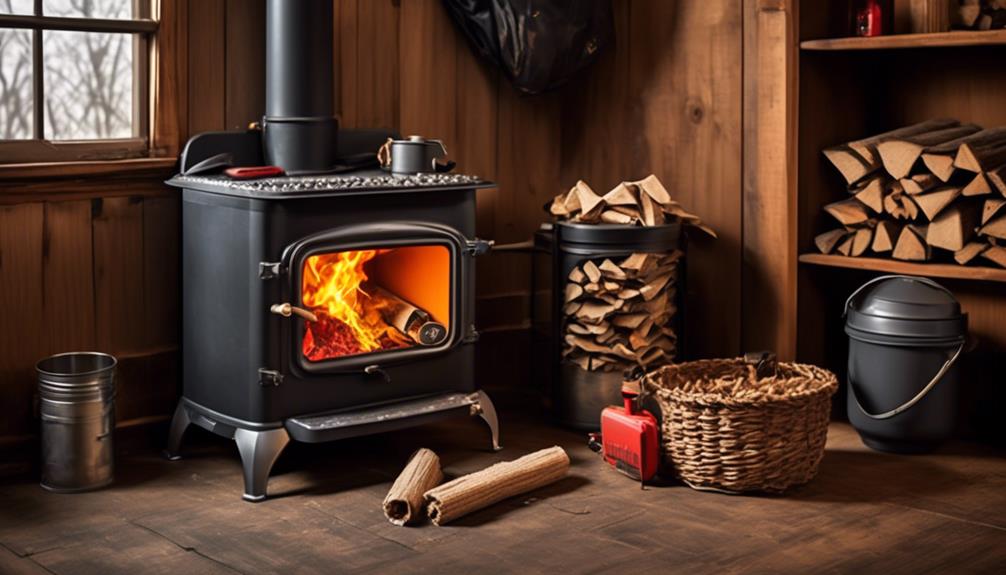
Using Your Pellet Burner
We find that starting with a small amount of pellets to test the adapter and observing the flame spread before filling the basket completely is an effective way to ensure proper functionality. This method allows us to assess the ignition and flame distribution, ensuring that the pellets are burning efficiently.
When igniting the fuel pellets with a torch, it’s essential to allow 20-25 minutes for the pellets to fully catch fire. Additionally, using a small piece of fire-starter block on top of the pellet mound can aid in the ignition process.
Once ignited, the fuel pellets burn consistently for about 3 hours. To extend the heat, adding small pieces of cut wood on the embers can provide an additional 60-90 minutes of warmth.
It’s crucial to evaluate the efficiency and heating capacity of the adapter, and consider adjusting the design for longer burn times and improved durability. By following these steps and considering potential improvements, we can optimize the performance of the pellet burner and maximize its heating capabilities.
Safety Precautions
To ensure safe operation, it’s essential to keep flammable materials away from the heating appliance when using the pellet basket. Safety precautions are crucial to prevent potential fire hazards and ensure the well-being of everyone in the vicinity. Here are some important safety measures to consider:
- Keep the area around the pellet basket clear of any flammable items, such as curtains, papers, or furniture, to minimize the risk of fire.
- Install a carbon monoxide detector in the vicinity of the pellet basket to safeguard against harmful gas exposure and ensure a healthy indoor environment.
- Never leave the pellet basket unattended while it’s burning. Proper supervision is essential to prevent accidents and address any issues promptly.
- Ensure that children and pets are kept at a safe distance from the heating appliance when the pellet basket is in use to avoid any potential harm.
Implementing these safety precautions will contribute to a secure and controlled environment when using the pellet basket. It’s crucial to adhere to these measures and always follow the manufacturer’s instructions to guarantee safe and proper operation.
Maintenance and Cleaning

In maintaining and cleaning the pellet basket, our primary focus is to ensure its safe and efficient operation by regularly removing ash and debris while also inspecting for any potential damage or blockages.
Proper maintenance and cleaning are crucial for the optimal performance of the pellet basket. Regularly removing ash from the basket is essential to maintain efficient burning and prevent blockages. Clearing the surrounding area of the basket from any debris ensures proper airflow and prevents potential hazards.
It’s important to inspect the pellet basket for any signs of damage or wear and tear, addressing any issues promptly to prevent further complications. Additionally, checking the air intake and exhaust vents for blockages and clearing them is vital to maintain optimal performance.
To keep the pellet basket in top condition, it’s also important to lubricate moving parts and replace any worn components.
Frequently Asked Questions
Do Pellet Baskets Work in Wood Stoves?
Yes, pellet baskets work well in wood stoves. They efficiently distribute air for combustion, producing great heat.
At first, they may produce some smoke, but once started correctly, they burn cleanly and require minimal ash cleaning.
They’re cost-effective and can use various pellet types.
Can You Convert a Wood-Burning Stove to Pellets?
Yes, we can absolutely convert a wood-burning stove to burn pellets! It’s a game-changer.
With a homemade pellet basket, we can efficiently use wood pellets. We can construct it using machine netting, steel construction angle, and steel wire. Shaping, weaving, and securing it with wire ensures efficient burning.
The base needs a metal grate for air circulation and support, along with metal corner molding for stability. Testing the efficiency and heating capacity is crucial for success.
How Long Does a 40lb Bag of Pellets Last in a Pellet Stove?
We find that a 40lb bag of pellets can last approximately 24-48 hours in a pellet stove, depending on factors like the stove’s efficiency and heat settings.
The burn rate typically ranges from 1 to 2 pounds per hour, so it could last anywhere from 20 to 40 hours.
Factors such as the size of the stove, outdoor temperature, and pellet brand can impact its duration.
How Do You Make Your Own Pellets for a Wood Stove?
We make our own pellets for a wood stove by using a pellet mill to compress sawdust or wood shavings into small, dense pellets.
This process involves grinding the raw material into a fine powder, adding a binding agent, and then compressing the mixture through small holes in a die.
The resulting pellets can be used as a renewable and efficient fuel source for heating our home.
Conclusion
In conclusion, building a DIY pellet basket for your wood stove is a cost-effective and efficient way to burn wood pellets without the need for electricity.
With some basic materials and a little bit of effort, you can create a convenient alternative for heating your home.
So why not give it a shot and see if this DIY project is the right fit for your heating needs?
The ball is in your court!