Pellets & Pellet Stoves
Can You Put a Pellet Stove Where a Wood Stove Was

Can you believe it? I recently discovered a game-changing solution for replacing a wood stove with a pellet stove. If you’re like me and considering this switch, you’re in luck!
In this article, I’ll guide you through the benefits, considerations, and steps involved in transforming your existing wood stove location into a cozy pellet stove haven. Get ready to learn about the installation process, venting options, maintenance, and even a cost comparison between wood and pellet stoves.
Let’s dive in and explore the possibilities!
Key Takeaways
- Pellet stoves are more energy efficient and produce more heat for the same amount of fuel compared to wood stoves.
- Replacing a wood stove with a pellet stove can save money on heating costs and is easier to operate and maintain.
- Proper preparation is necessary when installing a pellet stove, including cleaning the area, inspecting the chimney, and making necessary modifications.
- When choosing a pellet stove, consider factors such as heating capacity, efficiency, design, and follow manufacturer’s instructions for installation and venting options.
Benefits of Replacing a Wood Stove With a Pellet Stove
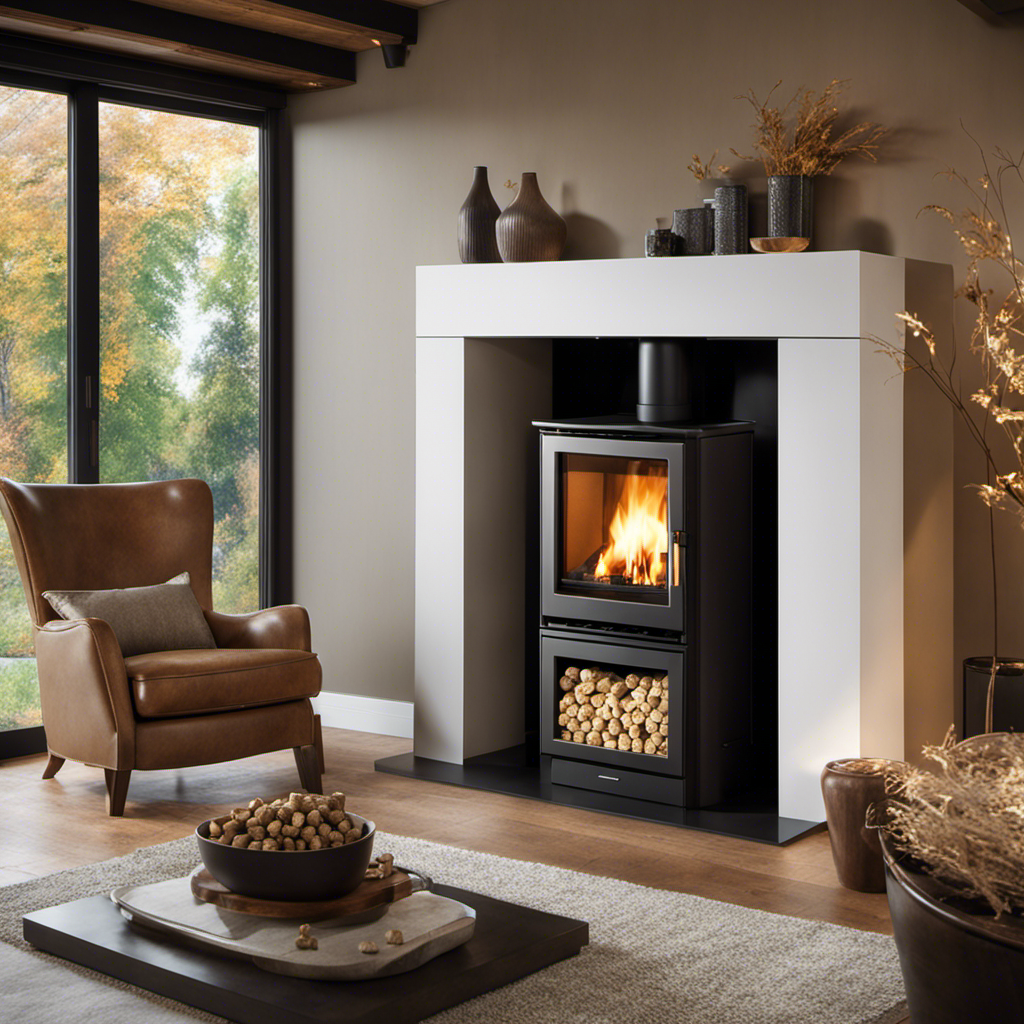
You’ll love the benefits of replacing your wood stove with a pellet stove. Pellet stoves offer numerous advantages over traditional wood stoves, making them a popular choice for homeowners.
One of the main benefits is their energy efficiency. Pellet stoves burn small pellets made from compressed wood or biomass, which results in a more efficient and cleaner burn compared to burning logs in a wood stove. This means that pellet stoves produce more heat for the same amount of fuel, saving you money on heating costs.
Additionally, pellet stoves are easier to operate and maintain, with automatic ignition and feeding systems. They also produce less ash and require less frequent cleaning. These benefits make pellet stoves a great option for replacing your wood stove.
Now, let’s explore some considerations before installing a pellet stove in place of a wood stove.
Considerations Before Installing a Pellet Stove in Place of a Wood Stove
Before installing a pellet stove in place of a wood stove, it’s important to consider several factors.
Pellet stoves have become increasingly popular due to their many benefits. Compared to other heating options, pellet stoves are more efficient and environmentally friendly. They burn compressed wood pellets, which are a renewable energy source, producing less pollution and greenhouse gas emissions. Pellet stoves also provide consistent heat and have a higher heating capacity than traditional wood stoves.
When replacing a wood stove with a pellet stove, it’s crucial to ensure that the area is properly prepared. This involves removing the existing wood stove, cleaning the surrounding area, and making any necessary modifications to accommodate the pellet stove’s installation. Taking these steps will ensure a smooth and successful transition to a pellet stove.
Now let’s discuss how to remove and prepare the area for a pellet stove.
Steps to Remove and Prepare the Area for a Pellet Stove
After removing the existing stove, it’s essential to clean the surrounding area and make any necessary modifications for the new installation. Pellet stoves have become increasingly popular due to their numerous benefits. They are energy-efficient, environmentally friendly, and provide a consistent heat source.
To prepare the area for a pellet stove, start by disconnecting the wood stove from the chimney and removing it from the space. Next, thoroughly clean the area, removing any debris or ashes. It’s important to inspect the chimney for any damage or blockages and address them accordingly. Additionally, check for any electrical or ventilation requirements that may need to be met for the new pellet stove.
Choosing the Right Pellet Stove for Your Needs
When selecting the ideal pellet stove for your requirements, it’s important to consider factors such as heating capacity, efficiency, and design.
Pellet stoves offer several benefits over traditional wood stoves. They are more efficient, producing more heat with less fuel and emitting fewer pollutants. Additionally, pellet stoves are easier to operate, with automatic ignition and temperature control.
To install a pellet stove, the first step is to choose the right stove for your space. Consider the size of your room and the desired heating capacity.
Once you have selected the stove, the installation process involves preparing the area, including ensuring proper ventilation and clearance from combustible materials. It is important to follow the manufacturer’s instructions and consult a professional if necessary.
Now, let’s move on to the installation process for the pellet stove in the existing wood stove location.
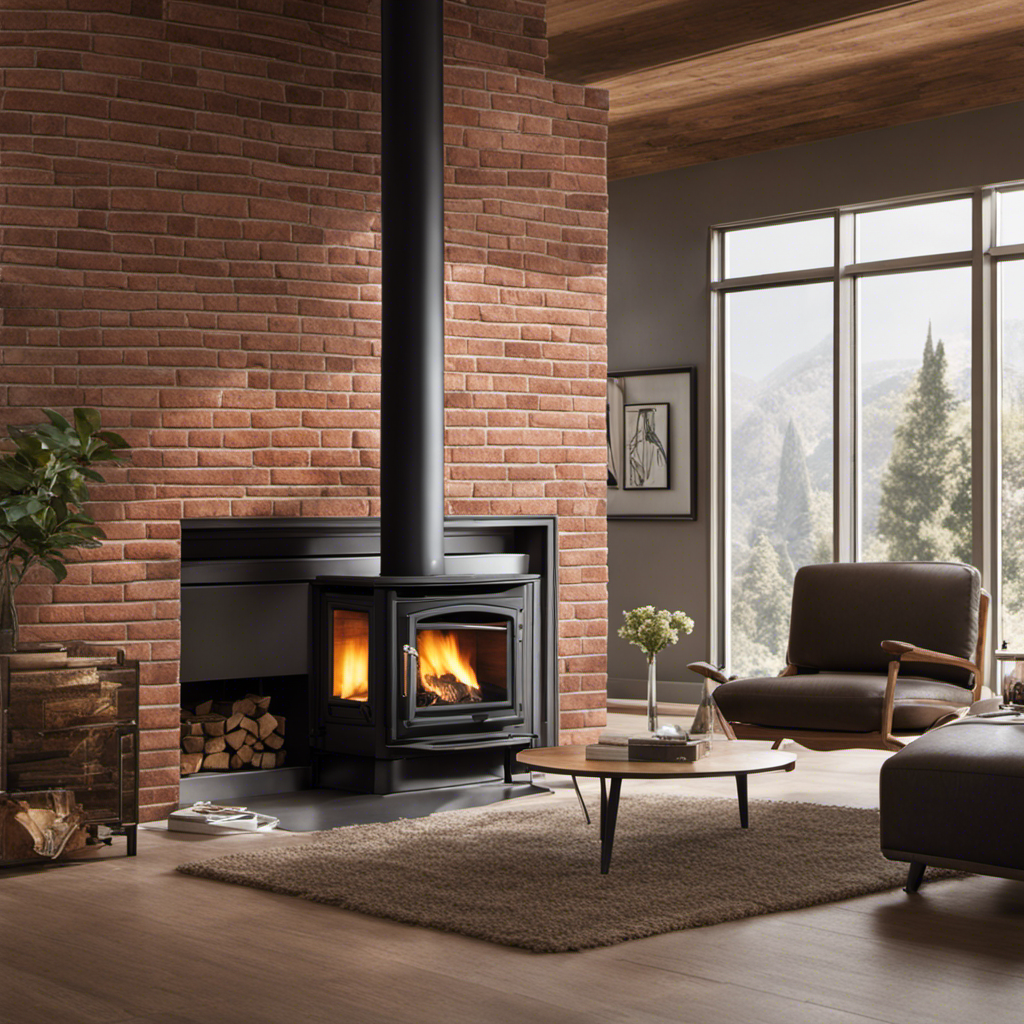
Installation Process for the Pellet Stove in the Existing Wood Stove Location
To properly install the pellet stove in your existing wood stove location, it’s crucial to follow the manufacturer’s instructions and ensure proper ventilation and clearance.
Pellet stoves offer numerous benefits compared to other heating options. They are highly efficient, burning pellets made from compressed sawdust, agricultural waste, or other biomass materials. This makes them environmentally friendly and cost-effective.
Unlike traditional wood stoves, pellet stoves have automatic ignition and temperature control, providing convenient and consistent heat. Additionally, pellet stoves produce less smoke and ash, reducing maintenance and improving air quality.
When converting your wood stove to a pellet stove, you’ll need to consider the venting options. This involves determining the most suitable venting system based on your existing chimney and the pellet stove’s requirements. Proper venting ensures safe operation and efficient heat distribution throughout your home.
Venting Options for the Pellet Stove Conversion
Consider the available venting options for the conversion, as they play a crucial role in ensuring safe and efficient operation of your new pellet stove.
When it comes to installing a pellet stove in the existing wood stove location, there are a few venting options to consider. The most common options are through-the-wall venting and chimney venting.
Through-the-wall venting involves installing a vent pipe that goes through an exterior wall, while chimney venting utilizes the existing chimney by installing a flexible liner.
Both options have their advantages and disadvantages, so it’s important to consult with a professional to determine the best option for your specific situation.
Once you have chosen the appropriate venting option and completed the installation process, it’s essential to properly maintain and care for your newly installed pellet stove.
Maintenance and Care for the Newly Installed Pellet Stove
When it comes to maintaining and caring for a newly installed pellet stove, there are a few key points to keep in mind.
First, regular cleaning of the stove is essential to ensure optimal performance and prevent any potential issues.
Second, troubleshooting common problems that may arise, such as ignition or feeding issues, can help keep the stove running smoothly.
Lastly, proper fuel storage is crucial for maintaining the quality of the pellets and maximizing their efficiency.
Cleaning Pellet Stove
Cleaning the pellet stove is essential for maintaining its efficiency and longevity. Regular maintenance and cleaning are crucial to keep your pellet stove running smoothly and prevent any potential issues. Here are some maintenance tips to ensure your pellet stove stays in optimal condition.
First, make sure to clean the ash trap regularly. Remove any accumulated ash using a vacuum or an ash pan.
Next, clean the burn pot and the heat exchanger. These areas can accumulate ash and soot, which can affect the stove’s performance. Use a wire brush or a soft cloth to remove any debris.
Additionally, don’t forget to clean the glass on the door. Use a specialized glass cleaner to remove any residue and ensure a clear view of the fire.
Finally, inspect the gaskets and seals for any signs of wear or damage. Replace them if necessary to maintain proper combustion and prevent leaks.
By following these cleaning and maintenance tips, you can prolong the lifespan of your pellet stove and enjoy its efficient heating capabilities for years to come.
However, if you do encounter any issues with your pellet stove, troubleshooting common problems can help resolve them quickly and efficiently.
Troubleshooting Common Issues
If your pellet stove is not igniting properly, check the fuel supply and make sure there are no blockages in the auger or hopper. Troubleshooting common issues with pellet stoves can help ensure optimal performance and warmth in your home.
Here are some troubleshooting tips to get your pellet stove back on track:
- Clean the burn pot and remove any ash or debris.
- Check the igniter for any signs of damage or malfunction.
- Inspect the exhaust vent for blockages or obstructions.
- Verify that the thermostat is set to the desired temperature.
By following these troubleshooting steps, you can often identify and resolve common issues with your pellet stove.
Now, let’s transition to the next section about proper fuel storage, which is crucial for maintaining the efficiency and longevity of your pellet stove.
Proper Fuel Storage
Properly storing your fuel is essential for maintaining the efficiency and longevity of your pellet stove. When it comes to fuel storage organization, there are a few key safety precautions to keep in mind. First and foremost, it’s important to store your pellets in a dry and well-ventilated area to prevent moisture damage. Additionally, it’s crucial to keep your fuel away from any potential sources of ignition such as open flames or electrical appliances. To help you stay organized and ensure easy access to your fuel supply, consider using the following table:
Fuel Type | Storage Container | Storage Location |
---|---|---|
Wood Pellets | Plastic bags or bins | Cool, dry area |
Corn Pellets | Sealed containers | Dark, dry place |
Biomass Pellets | Metal containers | Well-ventilated space |
Cost Comparison: Wood Stove Vs. Pellet Stove Installation
When comparing the installation of a wood stove versus a pellet stove, there are several key points to consider.
Firstly, the efficiency and potential savings of each option should be examined.
Secondly, the installation requirements and associated costs should be taken into account.
Lastly, the environmental impact of both wood and pellet stoves should be compared.
Efficiency and Savings?
Installing a pellet stove can save you money on heating bills and improve the efficiency of your home. Pellet stoves are known for their energy efficiency, as they burn small pellets made from compressed wood or other biomass materials. These pellets have a high energy content and burn cleanly, resulting in minimal waste and emissions.
The efficiency of a pellet stove can help reduce your overall heating costs, offering long term savings. By using a pellet stove, you can also decrease your reliance on fossil fuels and contribute to a greener environment.
Now that we understand the efficiency and savings offered by pellet stoves, let’s explore the installation requirements and costs.
Installation Requirements and Costs?
When it comes to installing a pellet stove where a wood stove once stood, there are a few key factors to consider. First and foremost, you’ll need to ensure that the existing chimney and venting system are compatible with the pellet stove. It’s also important to evaluate the space requirements and make any necessary modifications to accommodate the new appliance.
As for cost comparison, pellet stoves generally have a lower upfront cost compared to wood stoves. However, the cost of pellets can add up over time, especially if you plan to use the stove as your primary heat source. On the other hand, wood stoves require a steady supply of firewood, which can also be a cost factor.
In summary, while the installation requirements for a pellet stove may differ from those of a wood stove, considering the cost comparison is crucial in making an informed decision.
Now, let’s delve into the environmental impact comparison between pellet stoves and wood stoves.
Environmental Impact Comparison?
Comparing the environmental impact, pellet stoves produce fewer emissions than traditional wood stoves.
When it comes to heating our homes, it’s important to consider the impact on our planet.
Pellet stoves are designed to burn compressed wood pellets, which are made from recycled sawdust and other wood waste. This means that they are a more sustainable and environmentally friendly option compared to traditional wood stoves.
Pellet stoves have higher energy efficiency, meaning they can generate more heat using less fuel. This not only reduces the amount of pollution released into the air but also saves on heating costs.
Additionally, pellet stoves produce very little ash and soot, making them easier to clean and maintain.
Overall, choosing a pellet stove over a traditional wood stove can significantly reduce your environmental footprint while keeping your home warm and cozy.
Frequently Asked Questions
What Are the Environmental Benefits of Using a Pellet Stove Instead of a Wood Stove?
Using a pellet stove instead of a wood stove has several environmental benefits. Pellet stoves burn cleaner and produce fewer emissions, reducing air pollution. They also use renewable fuel sources and can save money compared to traditional wood stoves.
Can I Use the Existing Chimney for Venting the Pellet Stove?
Yes, you can use the existing chimney for venting the pellet stove. However, it is important to have a professional inspect and make any necessary modifications to ensure proper ventilation and safety.
How Often Do Pellet Stoves Require Maintenance and What Is Involved in the Maintenance Process?
Maintaining a pellet stove is essential for optimal performance. The frequency of maintenance depends on usage and manufacturer recommendations. Regular cleaning of the burn pot, ash pan, and venting system are part of the maintenance process.
Are There Any Specific Requirements or Considerations for Installing a Pellet Stove in a Mobile Home?
Installing a pellet stove in a mobile home requires specific requirements and considerations. It’s important to ensure proper ventilation, clearance from combustible materials, and compliance with local codes and regulations. Seek professional guidance for a safe and efficient installation.
Are There Any Limitations or Restrictions on Where a Pellet Stove Can Be Installed Within a Home?
There are some limitations and restrictions to consider when installing a pellet stove. It’s important to follow manufacturer guidelines and consult with a professional to ensure proper installation.
Conclusion
In conclusion, replacing a wood stove with a pellet stove offers numerous benefits. These include increased efficiency, convenience, and environmental friendliness. Some may argue that the initial cost of installing a pellet stove can be higher. However, it is important to consider the long-term savings in fuel costs. Additionally, the installation process is relatively straightforward and can be done by a professional.
By making this switch, you can enjoy a cozy and efficient heating solution. At the same time, you will be reducing your carbon footprint.
Pellets & Pellet Stoves
How to Remove the Inside Wall Brick Like of Wood Pellet Stove to Clean

I’ve got a fascinating statistic for you: did you know that cleaning the inside wall brick of a wood pellet stove can increase its efficiency by up to 20%?
In this article, I’ll be sharing step-by-step instructions on how to remove the inside wall brick of your wood pellet stove for a thorough cleaning. With just a few tools and some elbow grease, you’ll be able to keep your stove running smoothly and effectively.
Let’s get started!
Key Takeaways
- Turn off and cool down the stove before starting the cleaning process.
- Use the appropriate tools and materials, and follow safety precautions throughout the cleaning.
- Thoroughly clean the burn pot by disconnecting it from electrical connections and removing it from the combustion chamber.
- When cleaning the inside wall brick, remove screws or clips holding the brick, choose the right cleaning method, and inspect for cracks or damage before sealing the bricks to prevent moisture penetration.
Tools and Materials Needed
To remove the inside wall brick, you’ll need a few tools and materials. The tools required include a flathead screwdriver, a hammer, a chisel, and a vacuum cleaner with a brush attachment.
As for the materials, you’ll need a drop cloth or tarp to protect the surrounding area from debris and dust. Cleaning techniques are also essential for this process.
Start by disconnecting the stove from the power source and removing any loose debris from the inside. Then, use the flathead screwdriver to gently pry the bricks loose. If they are stubborn, tap the screwdriver with the hammer to loosen them further.
Once the bricks are removed, vacuum the area to remove any remaining dust or debris. With the bricks removed, you can now proceed to prepare the stove for cleaning, ensuring optimal performance and longevity.
Preparing the Stove for Cleaning
Before starting, make sure you have all the necessary tools for preparing your stove for cleaning. Cleaning your wood pellet stove is an important maintenance task that ensures its optimal performance.
To begin, ensure that the stove is turned off and has completely cooled down. This will prevent any accidental burns or injuries.
Next, gather a vacuum cleaner with a brush attachment, a soft cloth or sponge, a stove cleaner specifically designed for wood pellet stoves, and a pair of gloves to protect your hands. It is essential to follow safety precautions during the cleaning process to avoid any mishaps.
The next section will guide you through the process of removing the burn pot, an important step in cleaning your wood pellet stove.
Removing the Burn Pot
When it comes to removing the burn pot from your wood pellet stove, there are a few techniques that can make the process easier.
One method is to simply lift the burn pot out of the stove, while another involves using a screwdriver or wrench to unscrew any bolts or fasteners holding the pot in place.
Once the pot is removed, it’s important to clean it thoroughly to ensure optimal performance and efficiency of your stove.
Burn Pot Removal Techniques
First, make sure you’ve turned off and unplugged the wood pellet stove before attempting to remove the burn pot. Burn pot maintenance is crucial for the proper functioning of your wood pellet stove.
Troubleshooting common issues often requires removing and inspecting the burn pot. To remove the burn pot, locate the access panel on the stove’s exterior. Open the panel and carefully disconnect the burn pot from its electrical connections.
Next, detach the burn pot from the stove’s combustion chamber by unscrewing the retaining bolts. Gently lift the burn pot out of the stove, being cautious not to spill any residual pellets.
With the burn pot removed, you can now proceed to clean it thoroughly, ensuring optimal performance and longevity of your wood pellet stove.
Cleaning the Burn Pot
Once you’ve disconnected the burn pot, it’s important to carefully inspect and remove any debris or ash. Burn pot maintenance is crucial for the proper functioning of your wood pellet stove. Troubleshooting burn pot issues often starts with a thorough cleaning.
Begin by using a small brush or vacuum to remove loose debris from the burn pot. Be sure to pay attention to the corners and crevices where ash can accumulate. Next, use a damp cloth to wipe down the inside walls of the burn pot, removing any stubborn residue. This will help prevent clogs and ensure optimal combustion.
Now, let’s move on to disassembling the inside wall brick, which is an essential step in maintaining your wood pellet stove’s efficiency.
Disassembling the Inside Wall Brick
To remove the inside wall brick, follow these steps:
- Turn off the wood pellet stove and allow it to cool down completely.
- Put on protective gloves and goggles before starting the disassembly process.
- Locate the screws or clips that hold the brick in place.
- Use a screwdriver or pliers to carefully remove the screws or clips, taking care not to damage the surrounding components.
- Once the screws or clips are removed, gently pry the brick away from the stove, starting at one corner and working your way around.
- Take your time during this process to avoid causing any further damage.
- Once the brick is detached, set it aside for cleaning.
Now, let’s move on to the cleaning process:
- Remove any debris or soot from the inside wall brick to ensure optimal performance and efficiency.
Cleaning the Inside Wall Brick
When it comes to cleaning techniques for bricks, there are a few key points to keep in mind.
First, it’s important to choose the right cleaning method based on the type of brick and the level of dirt or stains.
Second, using a mixture of water and a mild detergent can help remove surface dirt and grime.
Lastly, regular maintenance tips for bricks include inspecting for cracks or damage, sealing the bricks to prevent moisture penetration, and avoiding harsh chemicals that can cause discoloration or erosion.
Cleaning Techniques for Bricks
If you’re looking to clean the bricks inside your wood pellet stove, start by gathering the necessary supplies. You’ll need a stiff-bristle brush, a vacuum cleaner with a brush attachment, warm water, mild detergent, and a sponge or cloth.
Begin by using the brush to scrub off any loose soot and debris from the bricks. Then, use the vacuum cleaner to remove the loosened particles.
Next, mix some warm water with a small amount of mild detergent and dampen the sponge or cloth with the solution. Gently scrub the bricks using circular motions, focusing on areas with stubborn soot stains. Rinse the bricks with clean water and pat them dry with a towel.
Now that your bricks are clean, let’s move on to maintenance tips for keeping them in great condition.
Maintenance Tips for Bricks
After cleaning, it’s important to regularly inspect the bricks for any signs of damage or wear. Proper maintenance is crucial to ensure the longevity and structural integrity of your bricks.
One key aspect of brick maintenance is to choose the right cleaning methods. Different types of bricks may require specific cleaning solutions and techniques to prevent damage. For example, acidic cleaners should be avoided on certain types of bricks as they can cause discoloration or erosion. It is also essential to remove any dirt or debris from the surface before applying any cleaning products.
Regularly inspecting the bricks allows you to identify any cracks, chips, or loose mortar that may require repair. It is recommended to conduct these inspections at least once a year to catch any issues early on and prevent further damage.
By regularly maintaining and inspecting your bricks, you can ensure their longevity and keep them in optimal condition for years to come.
Moving on to inspecting for damage or wear…
Inspecting for Damage or Wear
First, check for any signs of damage or wear on the inside wall brick of your wood pellet stove. Inspecting for cracks is crucial as they can compromise the integrity of the brick and affect the stove’s performance. Carefully examine the surface, paying close attention to any hairline cracks or larger fractures.
Additionally, check for rust, especially around the edges or corners of the brick. Rust can indicate moisture damage and may require further investigation. If you notice any damage or rust, it is essential to address it promptly to prevent further deterioration.
Once you have thoroughly inspected the inside wall brick, you can proceed to reassembling it, ensuring a secure fit and proper alignment.
Reassembling the Inside Wall Brick
To ensure a secure fit and proper alignment, make sure you carefully position and connect the inside wall brick of your wood pellet stove. Reassembling the inside wall brick requires attention to detail and following specific techniques to ensure a successful installation.
Here are some helpful reassembling techniques and troubleshooting tips:
- Clean the inside of the stove thoroughly before reassembling to remove any debris or build-up.
- Check the condition of the gaskets and replace them if necessary to ensure a tight seal.
- Use high-temperature adhesive or cement to secure the inside wall brick in place.
By following these reassembling techniques and troubleshooting tips, you can ensure that your wood pellet stove functions efficiently and safely.
Now, let’s move on to the next section, where we will discuss replacing the burn pot.
Replacing the Burn Pot
Replacing the burn pot is a simple task that can be done by carefully disconnecting the old pot and installing the new one in its place.
Before replacing the burn pot, it’s important to troubleshoot any issues with it. If the burn pot is not igniting properly or is producing excessive smoke, it may need to be cleaned. A regular cleaning schedule for the burn pot is recommended to maintain optimal performance.
To replace the burn pot, first, ensure that the stove is cool and disconnected from the power source. Then, remove the access panel and locate the burn pot. Carefully disconnect any wires or connections attached to the burn pot.
Next, remove the old burn pot and install the new one in its place. Finally, reconnect any wires or connections and replace the access panel.
With the burn pot replaced, we can now move on to finishing up and testing the stove.
Finishing Up and Testing the Stove
Now that the burn pot has been replaced, it’s time to finish up by reconnecting any wires or connections and testing the stove for proper functioning. Before moving forward, it’s important to ensure everything is properly connected and secured. Start by referring to the manufacturer’s manual for specific instructions on wiring and connections. Once everything is reconnected, it’s time to test the stove for efficiency and troubleshoot any common issues. Here is a table that provides a step-by-step guide for testing the stove:
Step | Action |
---|---|
1 | Power on the stove and set the desired temperature. |
2 | Observe the ignition process. The stove should ignite quickly and smoothly. |
3 | Monitor the flame pattern. It should be consistent and stable. |
4 | Check the exhaust for any smoke or unusual odors. |
5 | Verify that the stove is maintaining the desired temperature. |
Frequently Asked Questions
Can I Clean the Inside Wall Brick of a Wood Pellet Stove Without Disassembling It?
I can’t clean the inside wall brick of a wood pellet stove without disassembling it. However, there may be alternative cleaning methods or professional cleaning services available to ensure a thorough and effective cleaning process.
How Often Should I Clean the Inside Wall Brick of My Wood Pellet Stove?
To properly clean the inside wall brick of a wood pellet stove, you’ll need a few tools. First, make sure the stove is cool. Then, use a vacuum or brush to remove any debris. Repeat this process as often as necessary for optimal performance.
Can I Use Regular Household Cleaners to Clean the Inside Wall Brick of My Wood Pellet Stove?
I wouldn’t recommend using regular household cleaners on wood pellet stove walls. Instead, opt for suitable alternatives like vinegar or mild soap mixed with water. Regular maintenance and avoiding excessive heat can prolong the lifespan of the bricks.
Are There Any Safety Precautions I Should Take When Cleaning the Inside Wall Brick of My Wood Pellet Stove?
When it comes to proper maintenance and cleaning of wood pellet stoves, it’s important to prioritize safety. Before removing the inside wall brick, ensure the stove is completely cooled down to avoid any potential accidents.
Is It Necessary to Replace the Burn Pot Every Time I Clean the Inside Wall Brick of My Wood Pellet Stove?
No, it is not necessary to replace the burn pot every time I clean the inside wall brick of my wood pellet stove. However, regular burn pot maintenance tips and alternative cleaning methods for wood pellet stoves are recommended.
Conclusion
In conclusion, cleaning the inside wall brick of a wood pellet stove is an important maintenance task that should be done regularly to ensure optimal performance.
By following the steps outlined in this article and using the necessary tools and materials, you can successfully remove, clean, and reassemble the inside wall brick.
One interesting statistic to note is that a clean inside wall brick can improve the efficiency of a wood pellet stove by up to 20%. This improvement results in significant cost savings and a more comfortable living environment.
Pellets & Pellet Stoves
How to Replace a Pellet Stove With Wood Stove

I know what you’re thinking – replacing a pellet stove with a wood stove sounds like a daunting task. But let me assure you, with the right tools and a bit of know-how, it can be a straightforward process.
In this article, I’ll walk you through each step, from assessing the requirements of both stoves to connecting the wood stove to the chimney or flue.
So, let’s dive in and learn how to make the switch and enjoy the warmth and charm of a wood-burning stove in your home.
Key Takeaways
- Assess the requirements and gather the necessary tools and materials for the installation.
- Prepare the space by measuring dimensions, clearing debris, ensuring proper ventilation, and addressing any obstructions or flammable materials.
- Disconnect and remove the pellet stove safely, taking precautions to avoid damage or injury.
- Prepare for the wood stove installation by clearing flammable materials, ensuring a sturdy floor, checking for combustible materials in walls or ceiling, and maintaining proper clearance.
Assessing the Pellet Stove and Wood Stove Requirements
To properly assess the requirements for both your pellet stove and wood stove, you’ll need to consider factors such as size, ventilation, and fuel availability. Evaluating costs and comparing heating efficiency are also crucial in making an informed decision.
First, measure the dimensions of your current pellet stove to determine the appropriate size for the wood stove. Take into account the clearance requirements and ensure that the space can accommodate the new stove.
Next, evaluate the ventilation system. Wood stoves require a chimney or flue to safely exhaust the smoke. Check if your existing setup meets the necessary specifications or if modifications are needed.
Lastly, consider fuel availability. Pellet stoves use wood pellets, while wood stoves require firewood. Determine which option is more readily accessible and cost-effective for you.
With these factors in mind, you can proceed to gather the necessary tools and materials for the installation process.
Gathering the Necessary Tools and Materials
Before starting the process of replacing a pellet stove with a wood stove, it’s crucial to gather all the necessary tools and materials.
The essential tools needed for this project include a screwdriver, pliers, tape measure, and a level.
Additionally, a required materials checklist should include items such as a wood stove, stove pipe, chimney cap, fireproof sealant, and stove cement.
Essential Tools Needed
The essential tools you’ll need for the job include a wrench, a screwdriver, and a level. These tools are crucial for the smooth and safe replacement of a pellet stove with a wood stove. Let’s compare these tools and their importance in the process.
Tool | Purpose | Safety Precautions |
---|---|---|
Wrench | Used to tighten and loosen bolts and nuts | Wear protective gloves to prevent injuries |
Screwdriver | Used to remove screws and fasteners | Ensure the screwdriver is the correct size and in good condition |
Level | Ensures the stove is properly aligned and balanced | Place the level on a flat surface for accurate readings |
Required Materials Checklist
Now that we’ve covered the essential tools, let’s take a look at the materials checklist you’ll need for this task.
When assessing pellet stove requirements, it is important to consider the size and heating capacity of the wood stove you choose as a replacement. First, you will need to measure the square footage of the area you wish to heat to determine the appropriate stove size.
Additionally, consider the type of wood stove that best suits your needs, such as a freestanding stove or an insert. You will also require a chimney liner, stovepipe, and a hearth pad or floor protection.
Don’t forget to gather everything necessary, including firebricks, fireproof caulk, and high-temperature paint, to ensure a successful installation without compromising safety.
Gathering Everything Necessary
Make sure you’ve got all the required items like firebricks, fireproof caulk, and high-temperature paint to successfully install your new stove. Before starting the installation process, it is crucial to assess the space where the pellet stove currently sits. Measure the dimensions of the area to ensure that your new wood stove will fit properly. Additionally, inspect the surroundings for any potential hazards or obstructions that may need to be addressed before proceeding.
To prepare for the installation, it is important to remove any debris or objects that may hinder the process. Clear the area around the pellet stove, ensuring there are no loose items or flammable materials nearby. Thoroughly clean the space, removing dust, dirt, and any accumulated debris. This will help create a safe and clean environment for the installation of your new wood stove.
Proceeding to the next section, disconnecting and removing the pellet stove requires careful attention to detail and following proper procedures.
Disconnecting and Removing the Pellet Stove
First, I’ll discuss the process of disconnecting the electrical and ventilation systems when removing a pellet stove. This involves turning off the power supply and disconnecting any electrical connections. It’s also important to properly seal off the ventilation pipes.
Next, I’ll explain the importance of safely removing the pellet stove without causing any damage or injury. This includes carefully disconnecting the stove from the flue and removing any remaining pellets or debris from the stove and surrounding area.
Disconnecting Electrical and Ventilation
Before you begin, make sure to turn off the electricity and disconnect the ventilation system.
To safely disconnect the electrical connections, start by locating the circuit breaker for the pellet stove and switch it off. This will prevent any accidental electrical shocks during the removal process.
Next, carefully disconnect the power supply cord from the outlet. Ensure that the cord is not tangled or obstructed by any objects.
Moving on to the ventilation system, you will need to remove the ventilation ducts that are connected to the pellet stove. Use a screwdriver or a wrench to loosen the screws or bolts securing the ducts in place. Gently pull the ducts away from the stove while being cautious not to damage them.
Now that the electrical connections are disabled and the ventilation ducts are removed, you can proceed to the next section on removing the pellet stove safely.
Removing Pellet Stove Safely
Once the electrical connections and ventilation ducts are taken care of, you can safely proceed with the removal of the pellet stove. Before beginning the removal process, it is important to take certain precautions to ensure your safety. Here are some key steps to safely remove a pellet stove:
Precautions During Removal |
---|
Turn off the power supply to the stove |
Wear protective gloves and goggles |
Disconnect the stove from the venting system |
Empty the pellet hopper and remove any remaining pellets |
Remove the front panel and disconnect the electrical connections |
Preparing for Wood Stove
To ensure a smooth installation, it’s important to assess the space and make sure there is proper ventilation for the new stove. When preparing the space for a wood stove installation, there are several safety precautions to keep in mind.
Firstly, clear the area surrounding the installation site of any flammable materials, such as curtains or furniture. Next, ensure that the floor is sturdy and can support the weight of the wood stove. Additionally, check for any combustible materials in the walls or ceiling that may need to be addressed prior to installation.
Lastly, make sure there is adequate clearance between the wood stove and any nearby walls or furniture to prevent overheating and potential fire hazards. By taking these necessary precautions, you can create a safe and functional environment for your wood stove installation.
In the next section, we will discuss the steps to physically prepare the space for the wood stove installation.
Preparing the Space for the Wood Stove Installation
You’ll need to clear out any furniture or other items from the area where the wood stove will be installed. This is important to ensure proper ventilation and clearance for the stove.
When choosing the right location for the wood stove, consider factors such as proximity to combustible materials, accessibility for maintenance, and the layout of your home. It is recommended to place the stove in a central location to maximize heat distribution.
Once the area is cleared, measure the dimensions of the stove and mark the location on the floor. Ensure that there is enough space around the stove for proper ventilation and clearance as per the manufacturer’s recommendations.
With the space prepared, it’s time to move on to the installation of the wood stove and venting system, ensuring a safe and efficient heating solution for your home.
Installing the Wood Stove and Venting System
After clearing the area and marking the dimensions for installation, it’s time to begin installing the wood stove and venting system. Here are some important steps to follow:
- Ensure that the stove is positioned correctly, allowing for proper clearance from combustible materials.
- Assemble the venting components, including the stovepipe, thimble, and chimney cap.
- Connect the stovepipe to the flue collar on the wood stove, ensuring a secure fit.
When installing the wood stove, it’s important to troubleshoot common issues that may arise. These can include improper clearance, insufficient draft, or leaks in the venting system. By addressing these issues promptly, you can ensure the safe and efficient operation of your wood stove.
Now that the wood stove and venting system are in place, we can move on to connecting the wood stove to the chimney or flue.
Connecting the Wood Stove to the Chimney or Flue
Once the venting components are securely assembled, it’s time to connect the stovepipe to the chimney or flue for proper ventilation. When connecting the wood stove to the existing chimney, it is crucial to select the right size flue for the wood stove. This ensures efficient and safe operation. The size of the flue should match the size of the wood stove’s flue collar. If the flue is too small, it can lead to poor draft and increased risk of smoke backflow. On the other hand, if the flue is too large, it can result in decreased efficiency and potential overheating. To help you select the right size flue, refer to the table below:
Wood Stove Size (BTU) | Flue Size (inches) |
---|---|
Up to 25,000 | 6 |
25,000 – 60,000 | 8 |
60,000 – 100,000 | 10 |
Over 100,000 | 12 |
Testing and Fine-tuning the Wood Stove for Optimal Performance
To ensure optimal performance, it’s important to test and fine-tune the wood stove. Testing methods play a crucial role in identifying any issues or inefficiencies that may affect the stove’s functionality.
One common testing method is the smoke test. This involves igniting a small fire in the stove and observing the smoke that is emitted. Ideally, the smoke should be minimal and clear. If there is excessive smoke or a strong odor, it may indicate a problem with the stove’s ventilation or combustion.
Another important aspect of testing is checking the stove’s temperature distribution. This can be done using a surface thermometer to measure the heat output in various areas of the stove.
Troubleshooting tips include adjusting the air vents, ensuring proper fuel supply, and cleaning the stove regularly to prevent buildup and improve overall efficiency.
Frequently Asked Questions
How Much Does It Cost to Replace a Pellet Stove With a Wood Stove?
Replacing a pellet stove with a wood stove can vary in cost depending on the specific installation requirements. Factors such as the type of wood stove, labor fees, and any necessary modifications to the existing setup can influence the overall cost.
Can I Use the Existing Chimney for the Wood Stove Installation?
Yes, you can use the existing chimney for the wood stove installation. It is important to properly install the wood stove with the existing chimney to ensure safety and efficiency.
Are There Any Specific Building Codes or Regulations I Need to Follow When Replacing a Pellet Stove With a Wood Stove?
When replacing a pellet stove with a wood stove, it is crucial to follow building codes and regulations. Familiarize yourself with local codes to ensure proper installation. Consider the pros and cons of switching fuels for optimal heat efficiency.
What Are the Advantages of Using a Wood Stove Over a Pellet Stove?
Using a wood stove instead of a pellet stove has advantages like increased heat output and the ability to burn different types of wood. It provides a more versatile and efficient heating option.
Do I Need to Hire a Professional to Replace a Pellet Stove With a Wood Stove, or Can I Do It Myself?
I can replace a pellet stove with a wood stove, but it is recommended to hire a professional. Steps to replace: disconnect power, remove pellet stove, install wood stove, connect power.
Conclusion
In conclusion, replacing a pellet stove with a wood stove requires careful assessment, proper tools and materials, and step-by-step installation.
While some may argue that the process is complicated and time-consuming, the benefits of a wood stove, such as increased heat output and a traditional ambiance, far outweigh any initial challenges.
By following the outlined steps and seeking professional assistance if needed, homeowners can successfully make the switch and enjoy the warmth and comfort of a wood stove in their homes.
Pellets & Pellet Stoves
How to Put Out a Silo Wood Pellet Fire

As a fire safety expert, I’ve seen firsthand the devastation that a silo wood pellet fire can cause. It’s a situation that requires immediate action and a clear plan of attack.
In this article, I’ll guide you step-by-step on how to put out a silo wood pellet fire, ensuring the safety of yourself and those around you.
From assessing the fire to controlling the air supply, using fire extinguishers to calling for emergency assistance, we’ll cover it all.
Don’t panic – I’ve got you covered.
Key Takeaways
- Regularly inspect the silo and surrounding areas for fire hazards and maintain equipment to prevent fires.
- Install fire detection systems like smoke alarms and heat sensors to quickly assess and understand the fire situation.
- Manage air vents and ventilation properly to control airflow and prevent fire risks.
- Choose the right type and size of fire extinguisher, aim at the base of the flames, and sweep from side to side to effectively put out a silo wood pellet fire.
Safety Precautions
Before attempting to put out the silo wood pellet fire, it’s important to take necessary safety precautions.
Fire prevention is key to avoid accidents and ensure the safety of everyone involved. Regularly inspect the silo and surrounding areas for any potential fire hazards, such as flammable materials or electrical issues. Install fire detection systems, like smoke alarms and heat sensors, to quickly identify any signs of fire. Additionally, keep firefighting equipment accessible and regularly maintained. This includes fire extinguishers, fire blankets, and water hoses.
By having these safety measures in place, you can minimize the risk of a fire getting out of control.
Now, let’s move on to assessing the fire and determining the best course of action.
Assessing the Fire
When assessing a fire, it’s important to quickly determine the extent of the danger. Evaluating the damage and identifying the causes are crucial steps in understanding the situation and taking appropriate action. To help you assess the fire effectively, I have prepared a table below that outlines key factors to consider:
Factors to Consider | Importance | Examples |
---|---|---|
Size of the fire | High | Small flames vs. large inferno |
Smoke production | High | Thick, black smoke vs. light, white smoke |
Heat intensity | High | Intense heat vs. moderate heat |
Structural integrity | High | Collapsed walls vs. intact structure |
Controlling the Air Supply
When it comes to controlling the air supply in a silo wood pellet fire, two key points to consider are air vents and temperature regulation.
Proper airflow is essential for maintaining safety in these situations. In this discussion, we will explore the importance of managing air vents and temperature to ensure the right airflow and prevent any potential hazards.
Air Vents and Temperature
To control the temperature, you’ll need to adjust the air vents on the silo wood pellet fire. Proper air vent maintenance is essential for effective temperature regulation. By manipulating the air vents, you can increase or decrease the airflow, which directly impacts the fire’s intensity and heat output. Here is a table outlining the different air vent settings and their corresponding effects on temperature:
Air Vent Setting | Temperature |
---|---|
Fully Open | High |
Partially Open | Medium |
Closed | Low |
Proper Airflow for Safety
Make sure you regularly clean and clear the air vents to maintain proper airflow for safety. Proper ventilation is crucial in ensuring that any potential fire is contained and suppressed effectively.
When air vents are clogged or obstructed, it can hinder the flow of air, which may lead to poor combustion and an increased risk of fire. By regularly cleaning and clearing the air vents, you ensure that there is adequate airflow, allowing for optimal combustion and reducing the chances of a fire occurring.
However, even with proper ventilation, accidents can still happen. In such cases, it is essential to know how to use fire extinguishers effectively to quickly and efficiently suppress the fire before it spreads and causes further damage.
Using Fire Extinguishers
When it comes to using fire extinguishers, proper selection is crucial. You need to choose the right type of extinguisher for the specific type of fire you are dealing with.
Additionally, it is important to know how to apply the extinguisher effectively to maximize its effectiveness in suppressing the fire.
Proper Extinguisher Selection
Using the wrong extinguisher can be dangerous, so it’s important to choose the proper one for a silo wood pellet fire. When it comes to fire prevention and suppression, selecting the right extinguisher is crucial. Here are three key factors to consider:
-
Class A: Look for an extinguisher specifically designed for Class A fires, which involve ordinary combustible materials like wood pellets.
-
Size: Ensure the extinguisher is large enough to handle the size of the fire. A small extinguisher may not be effective in fully extinguishing a silo fire.
-
Reach: Opt for an extinguisher with a long reach or an extended hose, as silos can be tall and difficult to access.
By carefully considering these factors, you can choose an extinguisher that is suitable for combating a silo wood pellet fire.
Now, let’s discuss how to apply the extinguisher effectively to extinguish the fire.
Applying Extinguisher Effectively
To effectively apply the extinguisher, remember to aim at the base of the flames and sweep from side to side. This technique ensures that the fire’s fuel source is targeted and extinguished. When dealing with a silo wood pellet fire, it is crucial to understand the importance of proper application. Here is a table outlining the steps for applying an extinguisher effectively:
Step | Action |
---|---|
1 | Aim at the base of the flames |
2 | Sweep from side to side |
3 | Maintain a safe distance |
4 | Monitor the fire for re-ignition |
5 | Ensure proper ventilation of exhaust systems |
Calling for Emergency Assistance
If you can’t control the wood pellet fire in the silo, you should immediately call for emergency assistance. Don’t hesitate to contact your local fire department for their professional expertise in handling such situations. They are trained to respond to emergency calls and have the necessary equipment to extinguish fires effectively.
When contacting the fire department, provide them with detailed information about the fire, such as the location, size, and any potential hazards. Stay on the line until they advise you on what to do next. Remember, the safety of yourself and others is of utmost importance, so it’s crucial to rely on the expertise of emergency responders in these situations.
Now, let’s discuss some preventive measures to avoid future fires in the silo.
Preventing Future Fires
One way to prevent future fires in the silo is by regularly inspecting and maintaining the equipment. Fire prevention is crucial in ensuring the safety and efficiency of the silo.
Regular maintenance procedures should be followed to identify any potential hazards or issues that could lead to a fire. This includes checking for any signs of wear and tear on the equipment, such as frayed wires or malfunctioning sensors.
It is also important to clean the silo regularly to remove any dust or debris that could ignite and cause a fire.
Frequently Asked Questions
What Are the Common Causes of Silo Wood Pellet Fires?
Common causes of silo wood pellet fires include poor maintenance, improper storage, and electrical malfunctions. To prevent these fires, regular inspections, proper ventilation, and following manufacturer guidelines for installation and usage are essential.
Can the Fire Spread to Other Parts of the Property?
The fire can spread to other parts of the property if not properly contained. It is crucial to have an emergency response plan in place to quickly and effectively address the situation.
Is It Safe to Attempt to Put Out the Fire Without Professional Help?
It’s important to consider the dangers of DIY fire extinguishing. Attempting to put out a silo wood pellet fire alone can be risky. Seek professional help to ensure your safety and the safety of your property.
How Long Does It Typically Take to Extinguish a Silo Wood Pellet Fire?
To effectively extinguish a silo wood pellet fire, you’ll need the right tools and equipment. It’s important to act quickly and follow proper safety protocols. The time it takes to put out the fire can vary depending on the size and severity.
Are There Any Specific Maintenance Practices That Can Help Prevent Silo Wood Pellet Fires in the Future?
Maintenance practices are crucial for fire prevention in silo wood pellet storage. Regular inspections, cleaning, and ensuring proper ventilation are key. Additionally, implementing temperature monitoring systems and following safety guidelines can help prevent future fires.
Conclusion
In conclusion, putting out a silo wood pellet fire requires careful assessment and control of the air supply. It is important to use fire extinguishers and, if necessary, call for emergency assistance. By following these safety precautions and taking immediate action, you can prevent further damage and ensure the safety of yourself and others.
Remember, just like a firefighter rushing into a burning building, it is important to act swiftly and decisively when faced with a fire. Stay vigilant and be prepared to tackle any fire that may arise in the future.
-
Pellets & Pellet Stoves4 months ago
How to Make a Pellet Basket for Wood Burning Stoves
-
BestSmallWoodStoves.com Selected2 months ago
Choosing the Best Wood Pellets: Reviews for 2023
-
Pellets & Pellet Stoves3 months ago
Why Is My Wood Pellet Stove Putting so Much Soot
-
Pellets & Pellet Stoves4 months ago
How to Convert Wood Stove to Pellet Stove
-
Pellets & Pellet Stoves4 months ago
Do Wood Pellet Stoves Add Value When Selling Your House
-
BestSmallWoodStoves.com Selected3 months ago
Fire-Maple Z1 LPG Adapter Review: Safe and Convenient
-
BestSmallWoodStoves.com Selected3 months ago
POTOUZHI Tabletop Fire Pit Review
-
Wood Stove2 months ago
When To Open And Close Damper On Wood Stove