Wood Stove
Wood Stove Smokes When Wind Blows
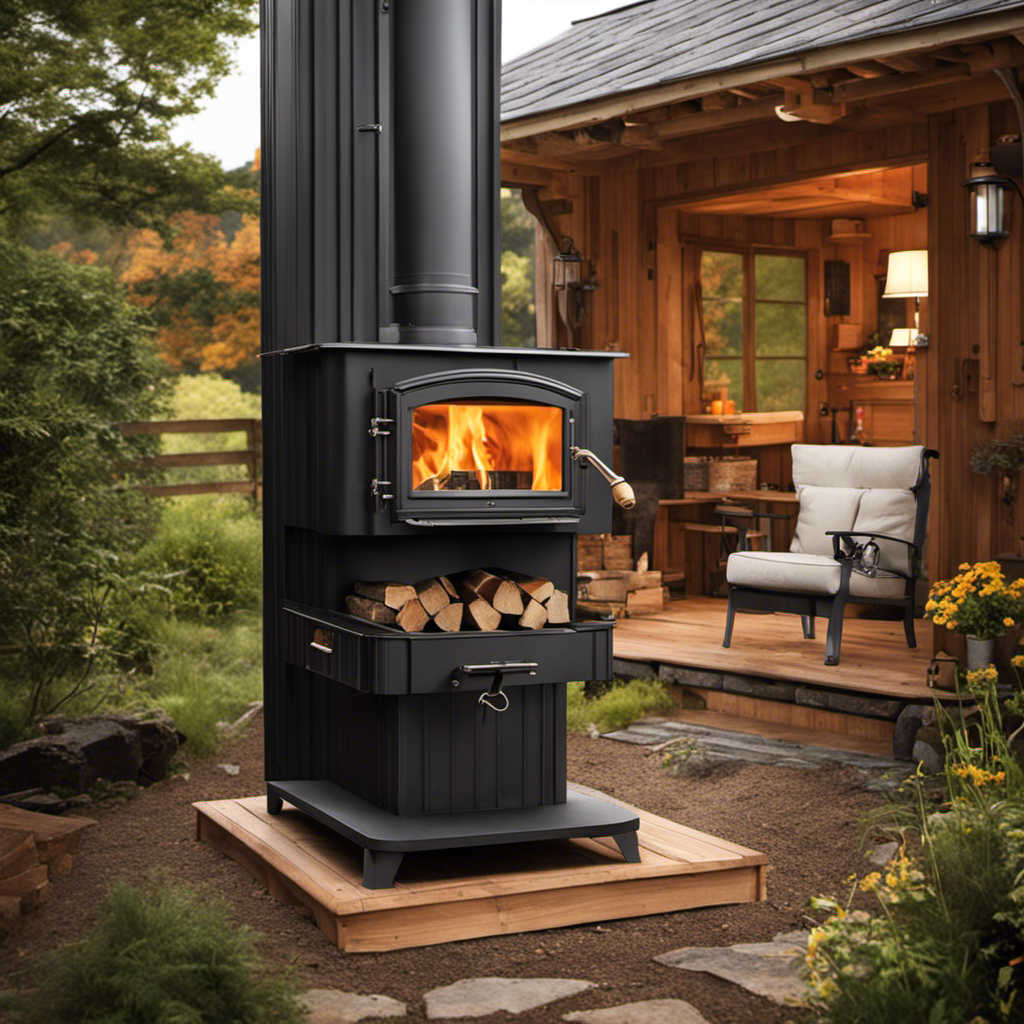
As someone with expertise in maintaining wood stoves, I understand how annoying it is when a room fills with smoke due to increasing wind speeds. However, don’t worry! In this article, we’ll cover the reasons why wood stoves are prone to smoking during windy conditions and offer effective solutions.
From proper ventilation techniques to common mistakes to avoid, I’ll equip you with effective strategies to control smoke and maximize efficiency.
Say goodbye to smoke-filled rooms and hello to a cozy, problem-free wood stove experience.
Key Takeaways
- Proper chimney height is crucial in preventing smoke issues during windy conditions.
- Good ventilation and airflow help minimize smoke when the wind blows.
- Common mistakes such as overlooking chimney height and poor stovepipe joint seals contribute to smoke problems.
- Techniques like adjusting the damper, using a draft stopper, and installing windbreaks can control smoke and maximize efficiency in windy weather.
Understanding the Factors That Cause Wood Stoves to Smoke in Windy Conditions
I think understanding the factors that cause wood stoves to smoke in windy conditions is important. When the wind blows, it can disrupt the airflow in and around the wood stove, leading to smoke escaping into the room.
One of the main causes of wood stove smoke in windy conditions is a lack of proper chimney height. If the chimney is too short, the wind can create a downdraft, pushing the smoke back into the house.
Another factor is the location of the wood stove. If it’s placed too close to a window or door, the wind can blow directly into the stove, causing it to smoke.
To prevent wood stove smoke in windy weather, it’s crucial to ensure that the chimney is tall enough and the stove is positioned properly. This will help minimize the effects of wind on the stove’s performance and prevent smoke from entering the room.
Proper ventilation: the key to minimizing smoke when the wind blows.
Proper Ventilation: The Key to Minimizing Smoke When the Wind Blows
Proper ventilation is crucial for minimizing smoke when there’s strong wind. When it comes to wood stoves, maximizing airflow is essential to prevent smoke from being blown back into your living space. One important factor to consider is the proper chimney height.
A chimney that’s too short can result in poor draft and increased smoke. The height of the chimney should be sufficient to ensure that the smoke is carried away by the wind. According to experts, the chimney should extend at least three feet above the highest point of the roof. This allows for better air circulation and prevents the wind from causing smoke to be blown back into the house.
Common Mistakes That Contribute to Smoke Issues in Wood Stoves During Windy Weather
One mistake I made wasn’t considering the height of my chimney, which resulted in increased smoke and poor draft during windy weather. This is a common mistake that many people overlook when installing a wood stove.
The height of the chimney plays a crucial role in ensuring proper ventilation and minimizing smoke issues. A chimney that’s too short can cause backdraft, where the wind blows down the chimney and pushes smoke back into the house. To avoid this, it’s important to follow the recommended guidelines for chimney height based on the stove’s manufacturer specifications.
Additionally, another common mistake isn’t properly sealing the stovepipe joints. Leaks in the joints can allow smoke to escape into the room, causing poor air quality and potential health risks. To prevent this, it’s important to use high-quality stovepipe sealant and ensure a tight seal between the sections of pipe.
Effective Techniques for Controlling Smoke and Maximizing Efficiency in Windy Conditions
During windy conditions, I found that adjusting the damper settings on my stove helped control smoke and maximize efficiency. Here are four effective techniques for controlling draft and reducing smoke issues caused by wind direction impact:
-
Adjust the damper: By opening the damper slightly, you can increase the airflow and prevent smoke from escaping into the room. Conversely, closing the damper can restrict airflow and reduce smoke production.
-
Use a draft stopper: Placing a draft stopper in the stovepipe can prevent wind from entering the stove and causing smoke issues. This simple yet effective solution helps maintain a steady draft and improves combustion efficiency.
-
Create a windbreak: Installing a windbreak around the stove can shield it from strong gusts of wind. This can significantly reduce the impact of wind direction on the stove’s performance and minimize smoke problems.
-
Check the chimney height: Ensuring that your chimney extends above nearby obstacles, such as trees or buildings, can help prevent wind interference. A taller chimney promotes better draft and reduces the likelihood of smoke issues during windy conditions.
Installing Windbreaks and Other Exterior Solutions to Reduce Smoke From Wood Stoves
I have found that installing a windbreak around my stove can greatly reduce the amount of smoke that enters my home. Wind deflectors, such as a strategically placed fence or other barriers, help redirect the wind away from the stove’s chimney, preventing it from blowing smoke back into the house.
These windbreaks create a more stable environment around the stove, allowing for better combustion and reducing the chances of smoke backdrafts.
Additionally, chimney extensions can be used to increase the height of the chimney, helping to improve the draft and prevent smoke from being pushed back into the house by strong winds.
Frequently Asked Questions
How Does Wind Affect the Performance of a Wood Stove?
When wind blows, it can impact the efficiency and combustion of a wood stove. The airflow from the wind can disrupt the draft, causing smoke to back up into the room.
Can the Type of Wood Used in a Wood Stove Affect the Amount of Smoke Produced in Windy Conditions?
The type of wood used in a wood stove can indeed impact the amount of smoke produced in windy conditions. Wind can affect the performance of the stove, leading to increased smoke emissions with certain wood types.
Are There Any Specific Maintenance Tasks That Should Be Done to Prevent Smoke Issues in Wood Stoves During Windy Weather?
Preventive maintenance and troubleshooting tips can help prevent smoke issues in wood stoves during windy weather. Regularly inspecting and cleaning the chimney, ensuring proper airflow, and using wind baffles can all improve stove performance in these conditions.
Is There a Specific Temperature Range That Is More Prone to Causing Smoke Issues in Wood Stoves During Windy Conditions?
The temperature range can influence smoke issues in wood stoves during windy conditions. Understanding how wind affects combustion and draft can help identify the optimal temperature range to prevent smoke problems.
Are There Any Health Risks Associated With Wood Stove Smoke in Windy Conditions?
In windy conditions, wood stove smoke can pose health risks and have negative environmental impacts. Studies show that exposure to wood smoke can lead to respiratory issues and increased risk of heart disease.
Conclusion
In conclusion, understanding the factors that cause wood stoves to smoke in windy conditions is crucial for minimizing smoke issues.
Proper ventilation is key in ensuring efficient burning and reducing smoke. Avoiding common mistakes and implementing effective techniques can further control smoke and maximize efficiency.
Additionally, installing windbreaks and other exterior solutions can significantly reduce smoke emission from wood stoves. By implementing these strategies, homeowners can enjoy a smoke-free environment even when the wind blows.
Growing up surrounded by the vast beauty of nature, Sierra was always drawn to the call of the wild. While others sought the comfort of the familiar, she ventured out, embracing the unpredictable and finding stories in the heartbeat of nature.
At the epicenter of every remarkable venture lies a dynamic team—a fusion of diverse talents, visions, and passions. The essence of Best Small Wood Stoves is crafted and refined by such a trio: Sierra, Logan, and Terra. Their collective expertise has transformed the platform into a leading authority on small wood stoves, radiating warmth and knowledge in equal measure.
Wood Stove
How To Install Wood Stove In Shed Shop Metal
I have always enjoyed the comfortable heat that a wood stove adds to a room. That’s why I was inspired to document and share my experience of installing one in my workshop for others to see.
In this article, I’ll walk you through the steps of choosing the right wood stove for your shed shop, prepping the metal surface, and installing the chimney and ventilation system.
Get ready to transform your shed shop into a toasty haven!
Key Takeaways
- Prioritize safety features such as a heat shield, proper ventilation, and a secure door when choosing a wood stove for your shed shop.
- Consider the size and heating capacity of the wood stove to ensure it matches the dimensions of your shed shop.
- Prepare the metal surface by clearing debris, roughening it up with sandpaper, and cleaning and degreasing it for optimal adhesion during installation.
- Install the chimney and ventilation system by securely attaching the metal flue pipe to the wood stove, aligning the stovepipe with the flue collar, tightening with stainless steel screws, and applying high-temperature silicone for a leak-free seal.
Choosing the Right Wood Stove for Your Shed Shop
I’m considering different options for my shed shop, and I’m trying to figure out which wood stove would be the best choice. When it comes to wood stove safety, it’s crucial to prioritize the well-being of myself and the shed. I want to ensure that the stove I choose is equipped with safety features like a heat shield, proper ventilation, and a secure door to prevent any accidents.
Additionally, energy efficiency is important to me as it can help save on heating costs in the long run. I’ll be looking for a wood stove with a high efficiency rating, which means it will effectively burn the wood and produce more heat with less fuel.
Preparing the Metal Surface for Wood Stove Installation
Before installing the wood stove, I need to thoroughly clean and sand the metal surface to ensure proper adhesion. This is crucial for the stove’s stability and longevity.
Here’s how I prepare the shed surface for the wood stove installation:
Clear the area: Remove any debris, dust, or old paint from the metal surface. This will create a clean and smooth base for the stove.
Sand the surface: Use a fine-grit sandpaper to roughen up the metal. This helps the paint or adhesive to adhere better and prevents peeling or flaking.
Clean and degrease: Wipe down the metal surface with a degreaser or soapy water to remove any grease or oil. This step ensures optimal adhesion and prevents any potential fire hazards.
Installing the Chimney and Ventilation System
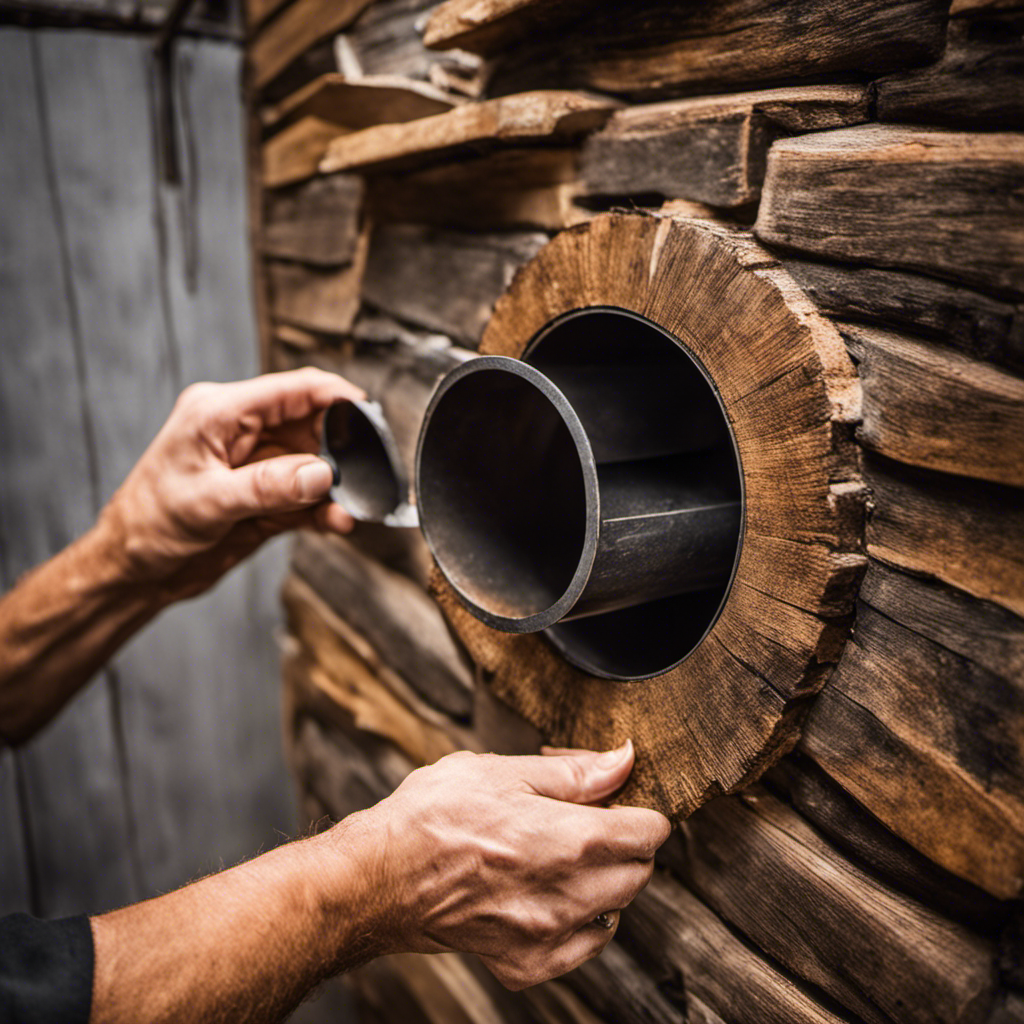
To properly install the chimney and ventilation system, I secure the metal flue pipe to the stove using high-temperature silicone for a safe and efficient operation.
Installing the stovepipe and sealing the connections is crucial to ensure proper air flow and ventilation in the shed shop.
First, I carefully position the stovepipe on the top of the wood stove, aligning it with the flue collar. Then, I secure it tightly using stainless steel screws and a screwdriver.
To seal the connections, I apply a generous amount of high-temperature silicone around the joints, ensuring a tight and leak-free seal. This prevents any smoke or fumes from escaping into the shed shop, keeping the air clean and safe.
Additionally, I make sure to check the overall alignment and stability of the stovepipe, ensuring that it’s properly supported and connected to the chimney.
Positioning and Securing the Wood Stove in the Shed Shop
I carefully position and secure the wood stove in the shed shop, ensuring it’s stable and properly aligned. The wood stove stands tall, its black iron body gleaming in the dimly lit space. The warm glow of the fire dances through the glass door, casting a comforting ambiance. The stovepipe extends upwards, its silvery surface contrasting against the rustic wooden beams.
The first step to securing the wood stove is to fasten it to the floor using sturdy bolts. I tighten each bolt, ensuring a snug fit that will prevent any movement during use. Next, I attach heat-resistant gaskets to the joints of the stovepipe, creating an airtight seal that will maximize efficiency. Finally, I install a heat shield behind the stove, protecting the surrounding walls from the intense heat.
With the wood stove carefully positioned and securely fastened, I can now enjoy the warmth and coziness it will bring to my shed shop.
Testing and Maintaining the Wood Stove for Safe Operation
After thoroughly cleaning the flue and examining the firebricks for any cracks, I light a small fire in the wood stove to test its safe operation.
As a wood stove owner, it’s crucial to prioritize regular cleaning for the longevity of the appliance. Over time, creosote, a byproduct of burning wood, can accumulate in the flue, posing a fire hazard. Cleaning the flue regularly prevents the buildup of creosote and ensures proper airflow.
Additionally, checking the firebricks for cracks is essential. Cracked firebricks can compromise the stove’s efficiency and safety. It’s vital to replace any damaged firebricks promptly.
When using a wood stove, it’s important to watch out for common safety hazards such as carbon monoxide poisoning, chimney fires, and burns. Regular maintenance and vigilance are key to ensuring the safe operation of a wood stove.
Frequently Asked Questions
Can I Install a Wood Stove in a Shed Shop Made of Materials Other Than Metal?
Yes, you can install a wood stove in a shed shop made of materials other than metal. However, it is important to consider the ventilation requirements to ensure safe and efficient operation.
How Much Clearance Do I Need to Leave Between the Wood Stove and Other Combustible Materials in the Shed Shop?
To ensure safety, it is crucial to adhere to clearance requirements when installing a wood stove in a shed shop. Proper ventilation must be considered to prevent any risk of fire or damage to combustible materials.
What Type of Chimney Pipe Should I Use for the Wood Stove Installation in a Metal Shed Shop?
For wood stove ventilation in a metal shed shop, it’s important to use a chimney pipe made of materials suitable for high temperatures. Look for stainless steel or double-walled insulated pipes for safe and efficient installation.
Do I Need a Building Permit to Install a Wood Stove in a Shed Shop?
I don’t need a building permit to install a wood stove in my shed shop. However, it’s important to check local building permit requirements and safety regulations to ensure compliance and protect against potential hazards.
How Often Should I Clean the Chimney and Ventilation System of the Wood Stove in the Shed Shop?
I check the chimney sweep for my wood stove in the shed shop every year. Signs like excessive smoke or a strong odor indicate the need for chimney cleaning. It’s important to keep the ventilation system clean for safety and efficiency.
Can the Same Installation Steps be Used for Installing a Wood Stove in both a Shed and a Garage?
Yes, the same installation steps can be used for installing a wood stove in both a shed and a garage. It is important to ensure proper ventilation and clearance from combustible materials when you install wood stove garage. Always follow manufacturer’s instructions and local building codes for safe installation.
Conclusion
In conclusion, installing a wood stove in your shed shop can provide efficient heating and create a cozy atmosphere. Remember the adage, ‘Measure twice, cut once,’ to ensure precision when positioning and securing the stove.
Take the necessary precautions to maintain safe operation and regularly test the stove for any issues.
With careful preparation and proper installation, you can enjoy the warmth and comfort of a wood stove in your shed shop.
Growing up surrounded by the vast beauty of nature, Sierra was always drawn to the call of the wild. While others sought the comfort of the familiar, she ventured out, embracing the unpredictable and finding stories in the heartbeat of nature.
At the epicenter of every remarkable venture lies a dynamic team—a fusion of diverse talents, visions, and passions. The essence of Best Small Wood Stoves is crafted and refined by such a trio: Sierra, Logan, and Terra. Their collective expertise has transformed the platform into a leading authority on small wood stoves, radiating warmth and knowledge in equal measure.
Wood Stove
How To Replace Wood Stove Door Gasket
If you observe that the door of your wood stove is not closing tightly, it could indicate that you need to replace the gasket.
In this article, I’ll guide you through the process of replacing the wood stove door gasket step by step.
By following these instructions, you’ll be able to ensure a tight seal and improve the efficiency of your wood stove.
So let’s get started and make your wood stove more effective and energy-efficient!
Key Takeaways
- Regularly evaluate the condition of the wood stove door gasket to ensure optimal performance and prevent energy loss.
- Gather the necessary tools and materials, including a flathead screwdriver and a new gasket made specifically for wood stoves.
- Carefully remove the old gasket from the wood stove door, using patience and finesse to remove any residue.
- Install the new gasket onto the wood stove door by cleaning the groove, applying high-temperature adhesive, and ensuring proper alignment and a flush fit.
Assessing the Condition of the Existing Gasket
I can feel the heat escaping from the wood stove door, indicating that the gasket may need to be replaced.
As an experienced wood stove user, I know that evaluating the lifespan of a gasket is crucial in maintaining the efficiency of the stove. Over time, gaskets can deteriorate due to high temperatures, constant use, or improper maintenance.
There are several signs to look for when assessing the condition of the gasket. Firstly, check for any visible wear and tear, such as fraying or cracks in the gasket material.
Secondly, pay attention to the seal around the door. If you notice any gaps or leaks when the stove is in use, it’s a clear indicator that the gasket is no longer functioning properly.
Lastly, if the gasket feels brittle or hardened, it has likely reached the end of its lifespan.
Regularly evaluating the gasket’s condition is essential for ensuring the stove’s optimal performance and preventing energy loss.
Gathering the Necessary Tools and Materials
To complete the task, I’ll need a few tools and materials, such as a flathead screwdriver and a new gasket.
Before replacing the gasket on my wood stove door, I need to prepare the door itself. This involves cleaning the surface thoroughly to ensure proper adhesion of the new gasket.
I’ll also need to measure the dimensions of the old gasket so that I can purchase the correct gasket material. It’s important to choose a gasket that’s made specifically for wood stoves to ensure optimal performance and longevity.
Once I’ve gathered all the necessary tools and materials, I can proceed with removing the old gasket from the wood stove door.
Removing the Old Gasket From the Wood Stove Door
After cleaning the surface thoroughly, I carefully peel away the worn-out seal. It takes some patience and finesse, but eventually, the old gasket residue comes off, leaving a clean surface to work with.
Removing the gasket residue is an important step in ensuring a proper seal for the new gasket. Here are some tips to help you through this process:
- Use a putty knife or scraper to gently scrape off any remaining gasket material.
- Wipe the surface with a cloth dampened with rubbing alcohol to remove any adhesive residue.
- For stubborn residue, you can use a commercial adhesive remover or a mixture of vinegar and water.
- Be cautious not to scratch or damage the wood stove door surface while removing the residue.
- Finally, thoroughly clean the surface with a mild detergent and warm water to prepare it for the new gasket installation.
Installing the New Gasket Onto the Wood Stove Door
The new gasket fits snugly into the groove on the wood stove door, ensuring a tight seal.
When installing the new gasket, it’s important to follow proper techniques to ensure a successful replacement.
Start by cleaning the groove thoroughly to remove any debris or residue from the old gasket.
Apply a small amount of high-temperature adhesive to the groove, spreading it evenly.
Then, carefully press the new gasket into the groove, making sure it’s aligned properly and sits flush.
Troubleshooting common issues during installation includes checking for any gaps or uneven sections in the gasket, which could lead to air leaks.
Once the new gasket is securely installed, it’s time to move on to testing the newly replaced gasket for proper sealing.
Testing the Newly Replaced Gasket for Proper Sealing
I can check the newly installed gasket by running my hand along the edges to feel for any air leaks. It’s important to properly test the gasket to ensure a tight seal, as a faulty seal can lead to heat loss and reduced efficiency. Here are some tips to ensure a tight seal when testing a newly replaced wood stove door gasket:
-
Clean the surfaces: Before installing the gasket, make sure to clean the stove door and the mating surface thoroughly. Any debris or residue can interfere with the sealing process.
-
Apply pressure evenly: When closing the stove door, apply even pressure to ensure the gasket compresses evenly along the entire perimeter. Uneven pressure can result in gaps and air leaks.
-
Check for gaps: After closing the door, visually inspect the gasket for any visible gaps. If you notice any, adjust the gasket or replace it if necessary.
-
Monitor for smoke or odors: Light a small fire in the stove and monitor for any smoke or odors escaping from around the door. If you detect any, it’s a sign of a faulty seal that needs to be addressed.
-
Regular maintenance: Periodically check the gasket for wear and tear, and replace it if needed. This will ensure a consistently tight seal and optimal stove performance.
Frequently Asked Questions
How Do I Know if My Wood Stove Door Gasket Needs to Be Replaced?
If my wood stove door gasket is worn out, signs like smoke leakage and difficulty in maintaining a proper fire indicate the need for replacement. It’s crucial to maintain a properly sealed door for safety and efficiency.
Can I Use Any Type of Adhesive to Install the New Gasket Onto the Wood Stove Door?
Yes, you can use different types of adhesive to install the new gasket onto the wood stove door. However, it is important to choose the right adhesive that is heat resistant and suitable for the specific type of gasket material.
Is It Necessary to Remove the Entire Wood Stove Door in Order to Replace the Gasket?
No, it is not necessary to remove the entire wood stove door to replace the gasket. There are alternative methods for gasket installation that do not require door removal.
How Often Should I Replace the Gasket on My Wood Stove Door?
I replace the gasket on my wood stove door every 1-2 years. To install a new one, I remove the old gasket, clean the surface, and carefully attach the new gasket. You can buy wood stove door gaskets online or at hardware stores.
Can I Reuse the Old Gasket if It Is Still in Good Condition?
No, it is not recommended to reuse the old gasket even if it is in good condition. It is best to replace it with a new one to ensure proper sealing and prevent any potential issues.
Conclusion
In conclusion, replacing the wood stove door gasket is a simple and essential task for maintaining the efficiency of your wood stove.
By assessing the condition of the existing gasket, gathering the necessary tools and materials, removing the old gasket, and installing the new one properly, you can ensure a secure and efficient seal.
Remember to test the newly replaced gasket for proper sealing to ensure the optimal performance of your wood stove.
So, don’t wait, give your wood stove the attention it deserves and enjoy the warmth it provides.
Growing up surrounded by the vast beauty of nature, Sierra was always drawn to the call of the wild. While others sought the comfort of the familiar, she ventured out, embracing the unpredictable and finding stories in the heartbeat of nature.
At the epicenter of every remarkable venture lies a dynamic team—a fusion of diverse talents, visions, and passions. The essence of Best Small Wood Stoves is crafted and refined by such a trio: Sierra, Logan, and Terra. Their collective expertise has transformed the platform into a leading authority on small wood stoves, radiating warmth and knowledge in equal measure.
Wood Stove
How To Install Wood Stove Insert
The comforting sound of a wood fire has always been beloved to me, which led me to choose to install a wood stove insert in my home. While the project seemed overwhelming at first, with the proper tools and thorough planning, I successfully completed the installation on my own.
In this guide, I’ll take you through the step-by-step process of assessing your space, choosing the perfect insert, and safely installing it.
Get ready to enjoy the warmth and ambiance of a wood stove insert in your own home!
Key Takeaways
- Properly assess and prepare the space, including measuring the area and evaluating ventilation and chimney conditions.
- Prioritize safety throughout the installation process, wearing protective gear and following ladder safety procedures.
- Choose the right wood stove insert based on heating needs, home characteristics, and heating efficiency.
- Ensure proper sizing and installation by measuring the space, checking clearances and ventilation, and consulting with a professional if unsure.
Assessing Your Space and Preparing for Installation
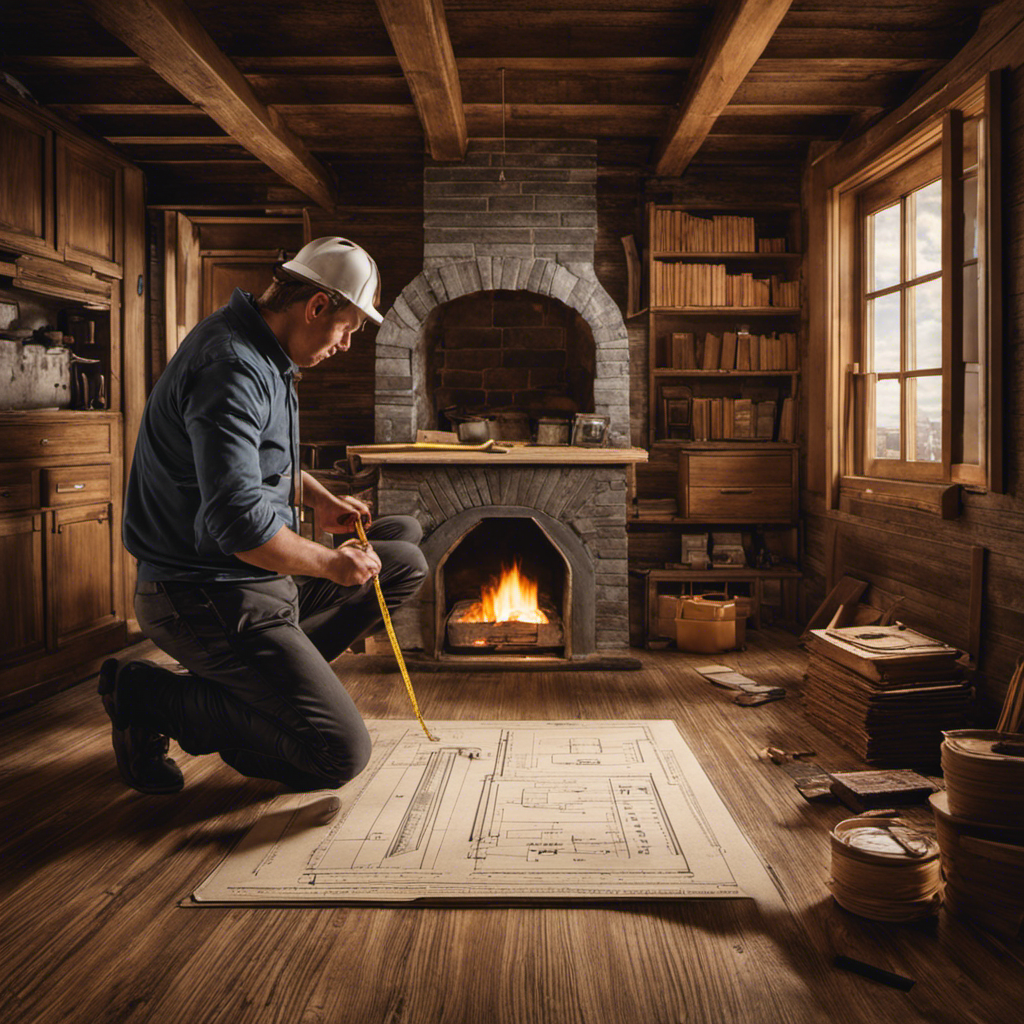
I’m evaluating my space to determine the best location for installing a wood stove insert. Before diving into the installation process, it’s crucial to carefully assess the available space and make necessary preparations. Follow this pre-installation checklist to ensure a smooth and safe installation.
Measure the area: Begin by measuring the space where you plan to install the wood stove insert. Consider the dimensions of the insert and clearance requirements specified by the manufacturer.
Check for proper ventilation: Verify that your space meets the necessary ventilation requirements. Ensure that there’s adequate clearance from combustible materials such as walls and furniture.
Evaluate the chimney: Assess the condition of your existing chimney. Verify if it’s compatible with a wood stove insert. If needed, hire a professional to clean and inspect the chimney for any potential issues.
Clear the area: Remove any objects or obstructions near the installation site. This includes furniture, curtains, and any flammable items that may pose a safety hazard.
Install a non-combustible hearth: Place a non-combustible hearth pad beneath the wood stove insert to protect the surrounding flooring.
Choosing the Right Wood Stove Insert for Your Home
When choosing the right wood stove insert for your home, it’s important to consider a few key factors.
First, assess the heating needs of your space and determine the most efficient option for your heating requirements.
Next, ensure that the wood stove insert is properly sized and installed according to the manufacturer’s specifications to maximize its performance and safety.
Lastly, consider the specific characteristics of your home, such as the layout and insulation, to ensure that the wood stove insert is compatible with your space and will provide optimal heating efficiency.
Efficient Heating Options
I’ve found that using an efficient heating option like a wood stove insert can greatly reduce energy costs. Not only does it provide warmth and comfort, but it also maximizes heating efficiency and is a cost-effective solution for heating your home. Here is a step-by-step guide on how to install a wood stove insert:
- Measure the fireplace opening to ensure the wood stove insert fits properly.
- Clear the area around the fireplace and lay down a non-combustible floor pad for safety.
- Install a chimney liner to improve the efficiency and safety of the wood stove insert.
- Position the wood stove insert in the fireplace opening and secure it according to the manufacturer’s instructions.
- Connect the stovepipe to the wood stove insert and the chimney liner.
- Install a chimney cap to prevent debris and animals from entering the chimney.
- Test the wood stove insert to ensure it is working properly and efficiently.
By following these steps, you can enjoy the benefits of a wood stove insert while saving on energy costs.
Pros | Cons |
---|---|
High heating efficiency | Requires regular maintenance |
Cost-effective heating | Initial installation cost |
Provides a cozy ambiance | Requires a good supply of firewood |
Proper Sizing and Installation
Proper sizing and installation are essential for maximizing the efficiency and effectiveness of a wood stove. When it comes to installing a wood stove, there are a few crucial steps to follow to ensure a safe and efficient operation.
Here are three important considerations:
Measure the space: Determine the square footage of the area you want to heat. This will help you choose the right size stove for your needs.
Clearances and ventilation: Check local codes and manufacturer guidelines for the required clearances from combustible materials. Ensure proper ventilation requirements are met to prevent the buildup of harmful gases.
Chimney installation: If you don’t already have a chimney, you’ll need to install one. Make sure it’s correctly sized and installed to provide a safe and efficient draft for your wood stove.
Remember to always follow safety precautions and consult with a professional if you’re unsure about any aspect of the installation process.
Considerations for Your Home
In my opinion, the size and layout of my home are important factors to consider when choosing a wood stove. Not only do I want a stove that will effectively heat my space, but I also want it to be energy efficient. To determine the right size stove for my home, I considered the square footage of the space I wanted to heat, as well as the layout of the rooms. I also took into account any insulation or draft issues that may affect the stove’s performance. Additionally, I wanted a stove that would be compatible with other heating alternatives in my home, such as a central heating system. By considering these factors, I was able to find a wood stove that was both suitable for my home’s layout and energy efficient.
Considerations | Size of Home | Layout of Rooms | Energy Efficiency |
---|---|---|---|
Importance | Important | Important | Important |
Factors | Square footage | Open or closed floor plan | Insulation and draft issues |
Compatibility with other | |||
heating alternatives |
Gathering the Necessary Tools and Materials
Before starting the installation process, it’s crucial to gather all the necessary tools and materials to ensure a smooth and efficient workflow.
Begin by assembling the essential tools such as a drill, screwdriver, level, and tape measure.
Additionally, gather the required materials including screws, brackets, insulation, and sealant for a secure and airtight installation.
Remember to prioritize safety by wearing protective gear such as gloves and goggles throughout the process.
Essential Tools for Installation
I’ll need a few essential tools for the installation of the wood stove insert. Here are the tools you’ll need to ensure a successful installation:
Chimney brush: This tool is crucial for cleaning the chimney before installing the wood stove insert. It helps remove creosote buildup and ensures proper airflow.
Fireproof gloves: Safety should always be a priority when working with a wood stove insert. Fireproof gloves protect your hands from burns and allow you to handle hot materials safely.
Level: It’s important to ensure that the wood stove insert is level during installation. A level tool helps you achieve this, ensuring proper functionality and preventing any potential issues down the line.
Before beginning the installation process, make sure you’ve these essential tools on hand. They’ll make the installation process easier and safer, allowing you to enjoy your wood stove insert for years to come.
Required Materials for Assembly
To assemble the unit, I’ll need the following materials: fireproof insulation, high-temperature adhesive, and a chimney liner. Here is a detailed materials list for the assembly of a wood stove insert:
Materials | Quantity |
---|---|
Fireproof Insulation | 1 roll |
High-Temperature Adhesive | 1 tube |
Chimney Liner | 1 piece |
Vent Pipe | 1 length |
Trim Kit | 1 set |
Now that I have gathered all the necessary materials, I can proceed with the assembly steps. First, I will apply the fireproof insulation to the interior of the firebox, ensuring a tight seal. Next, I will attach the chimney liner to the stove, using the high-temperature adhesive to secure it in place. Once the liner is in position, I will connect the vent pipe to the liner, making sure to align it properly. Finally, I will install the trim kit to give the wood stove insert a finished look.
With the assembly complete, I can now move on to preparing the fireplace and chimney for installation.
Preparing the fireplace and chimney for installation requires thorough cleaning and inspection to ensure the safety and efficiency of the wood stove insert.
Preparing the Fireplace and Chimney for Installation
I’m checking the fireplace and chimney for any potential issues before installing the wood stove insert. It’s essential to prepare the fireplace and chimney properly to ensure the safe and efficient operation of the wood stove insert.
Here are the preparation steps and safety precautions to follow:
Inspect the Fireplace: Start by examining the interior and exterior of the fireplace for any signs of damage, such as cracks or loose bricks. Ensure that the fireplace is structurally sound before proceeding with the installation.
Clean the Chimney: Clean the chimney thoroughly to remove any creosote buildup or debris that could potentially ignite and cause a chimney fire. Hire a professional chimney sweep if necessary, as they have the expertise and tools to perform a thorough cleaning.
Check the Chimney Liner: Inspect the chimney liner for any damage or deterioration. The liner is crucial for proper ventilation and preventing the buildup of dangerous gases. Replace or repair the liner if needed.
Safety Precautions:
- Wear protective gear, including gloves and safety goggles, when inspecting and cleaning the fireplace and chimney.
- Use a sturdy ladder and have someone assist you when accessing the roof to inspect and clean the chimney.
- If you notice any significant issues or are unsure about the preparation steps, consult a professional before proceeding with the installation.
Installing the Wood Stove Insert Safely and Properly
Before proceeding with the installation, it’s crucial to ensure that all necessary safety measures are in place to install the wood stove insert properly.
Installing a wood stove insert can be a rewarding project, but it’s important to prioritize safety throughout the process. Here is a step-by-step guide to help you install your wood stove insert safely and properly.
Clear the area around the fireplace and remove any flammable materials.
Put on protective gloves and goggles to prevent any injuries.
Check the manufacturer’s instructions for specific installation guidelines.
Make sure the chimney is clean and free from any debris or obstructions.
Install the hearth pad or floor protector to protect your flooring from heat and sparks.
Carefully position the wood stove insert into the fireplace opening, ensuring it’s level and centered.
Connect the stovepipe to the insert and secure it with screws or clamps.
Install a chimney liner to improve draft and prevent the buildup of creosote.
Connect the stovepipe to the chimney liner using a connector pipe and secure it tightly.
Test the wood stove insert for proper operation and check for any leaks or issues.
Remember to follow all safety precautions, such as keeping flammable materials away from the stove and having a fire extinguisher nearby. If you’re unsure about any step of the installation process, consult a professional to ensure a safe and proper installation.
Testing and Maintaining Your Wood Stove Insert for Optimal Performance
Maintaining optimal performance of my wood stove insert requires regular testing and inspection.
To ensure that my wood stove insert is functioning safely and efficiently, I follow these steps:
Check for air leaks: I inspect the gaskets and seals around the stove door and flue pipe for any signs of wear or damage. If I notice any leaks, I replace the gaskets or seals to maintain a proper seal.
Test the draft: I use a smoke pencil or incense stick to check the draft of the stove. By holding the smoke pencil or incense stick near the stove door and flue pipe, I can observe the direction and strength of the draft. If the draft is weak or inconsistent, I may need to clean or adjust the flue pipe or damper.
Monitor the temperature: I regularly check the temperature inside the stove using a stove thermometer. This helps me ensure that the stove is operating at the optimal temperature range for efficient and clean burning. If the temperature is too low, I may need to adjust the air intake or clean the burn pot.
By regularly testing and inspecting my wood stove insert using these methods, I can troubleshoot any issues and ensure that it’s operating at its best.
Remember to always follow safety precautions and consult a professional if you’re unsure or encounter any problems.
Frequently Asked Questions
How Long Does It Typically Take to Install a Wood Stove Insert?
Typically, the installation time for a wood stove insert depends on the size of the insert. Larger inserts may require more time and effort to properly install.
It’s important to carefully measure the dimensions of the fireplace opening and the insert to ensure a proper fit. Before starting the installation process, make sure to gather all the necessary tools and materials.
Safety precautions, such as wearing gloves and eye protection, should be followed throughout the installation process.
Can a Wood Stove Insert Be Installed in a Fireplace That Is Already in Use?
Installing a wood stove insert in a fireplace that’s already in use can present potential safety concerns. It’s important to ensure proper clearance between the insert and the existing fireplace, as well as to address any ventilation issues. Additionally, it’s crucial to follow all manufacturer’s instructions and safety precautions.
However, using a wood stove insert in a fireplace offers several benefits. Firstly, it increases efficiency by allowing for better combustion and heat distribution. This means that less energy is wasted, resulting in lower heating costs. Secondly, a wood stove insert reduces heat loss by creating a sealed system that prevents warm air from escaping up the chimney. This can make a significant difference in maintaining a comfortable temperature in your home.
Lastly, using a wood stove insert can improve air quality. Traditional fireplaces can produce a lot of smoke and particulate matter, which can be harmful to respiratory health. Wood stove inserts, on the other hand, have built-in mechanisms to control the combustion process and reduce emissions. This means that you can enjoy the warmth and ambiance of a fire without compromising the air quality in your home.
Are There Any Special Requirements for the Type of Wood That Can Be Burned in a Wood Stove Insert?
When it comes to the type of wood that can be burned in a wood stove insert, there are definitely some requirements to consider.
First and foremost, it’s important to use dry, seasoned wood that has been properly stored. Green or wet wood can lead to excessive smoke and creosote buildup, which is a fire hazard.
Additionally, avoid burning treated or painted wood, as it can release toxic chemicals.
Always prioritize safety and choose the right type of wood for your wood stove insert.
Do I Need to Hire a Professional for the Installation, or Is It Something I Can Do Myself?
I can definitely install a wood stove insert myself, but it’s important to consider the advantages of hiring a professional. They have the expertise and experience to ensure a safe and proper installation.
However, if you decide to go the DIY route, here are some tips:
- Make sure to read and follow the manufacturer’s instructions carefully.
- Gather all the necessary tools.
- Take safety precautions such as wearing protective gear and ensuring proper ventilation.
Are There Any Government Regulations or Permits Required for Installing a Wood Stove Insert?
Government regulations and installation permits are crucial when installing a wood stove insert. It’s important to ensure compliance with local building codes and fire safety regulations.
Permits may be required to ensure that the installation meets safety standards and is properly inspected. Failure to obtain the necessary permits can result in fines or even the removal of the stove.
It’s recommended to consult with local authorities or a professional to navigate the regulations and obtain the required permits for a safe and legal installation.
Can I Use the Same Steps for Installing a Wood Stove Insert in a Corner?
Yes, you can use the same steps for installing a wood stove insert in a corner. However, you may need to consider the specific dimensions and space requirements for a corner installation. It’s important to follow the manufacturer’s instructions and seek professional guidance for safe and efficient installation wood stove corner.
Conclusion
In conclusion, installing a wood stove insert can be a rewarding project that adds warmth and efficiency to your home. By carefully assessing your space, choosing the right insert, and following the proper installation steps, you can enjoy the benefits of a cozy and cost-effective heating solution.
For example, John and Sarah decided to install a wood stove insert in their living room, and they were thrilled with the increased heat output and reduced energy bills.
Remember to always prioritize safety and regularly maintain your wood stove insert for optimal performance.
Growing up surrounded by the vast beauty of nature, Sierra was always drawn to the call of the wild. While others sought the comfort of the familiar, she ventured out, embracing the unpredictable and finding stories in the heartbeat of nature.
At the epicenter of every remarkable venture lies a dynamic team—a fusion of diverse talents, visions, and passions. The essence of Best Small Wood Stoves is crafted and refined by such a trio: Sierra, Logan, and Terra. Their collective expertise has transformed the platform into a leading authority on small wood stoves, radiating warmth and knowledge in equal measure.
-
Wood Stove9 months ago
How To Build A Thermoelectric Generator For A Wood Stove
-
Wood Stove5 months ago
What Can I Use As Insulation On Wood Stove Pipes
-
Wood Stove1 month ago
How To Use Damper And Draft On Wood Stove
-
Wood Stove3 days ago
How Far Does Wood Stove Have To Be From Wall
-
Wood Stove8 months ago
How To Make A Heat Shield For A Wood Stove
-
Wood Stove1 month ago
When To Open And Close Damper On Wood Stove
-
Wood Stove9 months ago
How To Use The Flue On A Wood Stove
-
Wood Stove5 months ago
How To Install A Wood Stove Pipe And Chimney