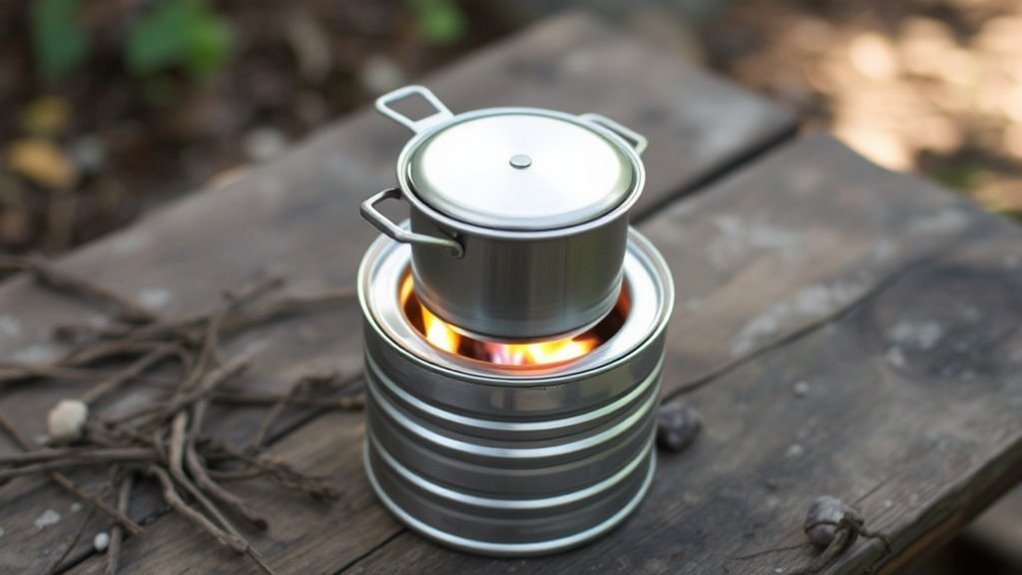

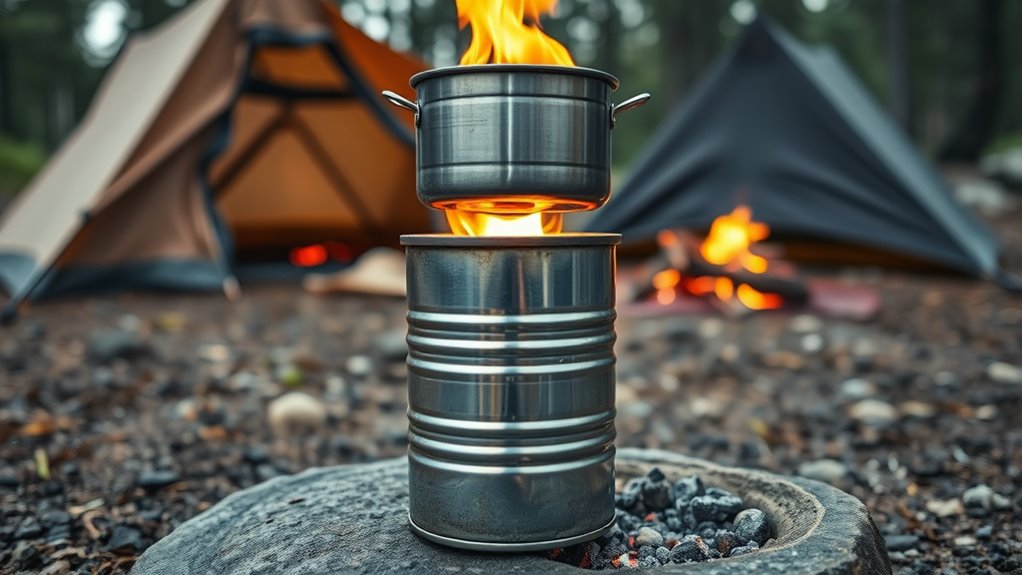
To build a portable DIY rocket stove for camping or emergencies, gather durable materials like steel cans and insulation to guarantee efficiency and safety. Design your stove with proper airflow, then assemble core components such as the combustion chamber and feed tube securely. Test and tweak it for peak heat output and fuel use, keeping safety in mind with regular maintenance. If you keep exploring, you’ll discover step-by-step tips to create a reliable, effective stove.
Key Takeaways
- Gather durable, heat-resistant materials and basic tools to ensure a sturdy, efficient, and portable rocket stove build.
- Design the stove with optimal airflow, insulation, and proper component placement for maximum fuel efficiency and heat output.
- Assemble airtight combustion chamber, secure feed tube, and stable base, sealing gaps for improved performance and safety.
- Test and adjust airflow or chamber size to optimize combustion, heat distribution, and fuel consumption.
- Prioritize safety by regular cleaning, inspecting for damage, maintaining proper ventilation, and keeping fire safety equipment nearby.

Rocket Stove for Cooking Portable Wood Burning Wood Fire Camping Backyard Cooking Outdoor Events BBQ Comes with Storage Bag
Excellent Structural Design: The rocket stove leverages its well-engineered structure to create a chimney effect—hot air rises, drawing…
As an affiliate, we earn on qualifying purchases.
As an affiliate, we earn on qualifying purchases.
Gathering Materials and Tools
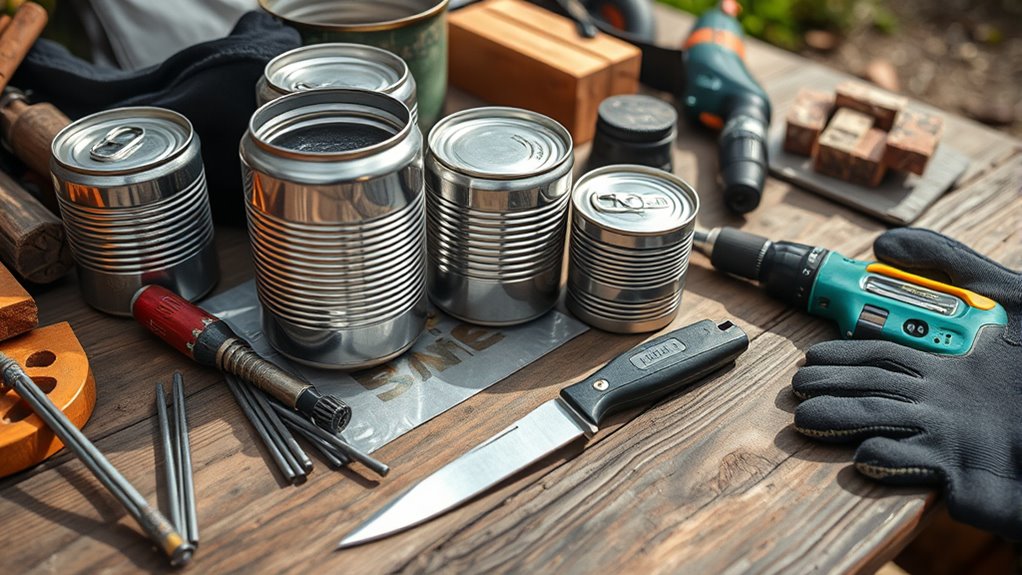
Before you begin building your DIY rocket stove, gathering all the necessary materials and tools is vital. Start with material sourcing by collecting durable, heat-resistant items like steel cans, bricks, or metal pipes, which form the stove’s core components. You’ll also need insulating materials such as perlite or vermiculite to improve efficiency. For tool selection, assemble basic equipment like a drill, tin snips, screwdrivers, and a measuring tape. These tools will help you cut, shape, and assemble parts accurately. Make sure your tools are in good condition to avoid mishaps. Proper material sourcing guarantees your stove will withstand high temperatures, while the right tool selection makes the building process smoother and safer. Having everything ready sets a solid foundation for your DIY rocket stove project. Additionally, understanding projector technology can help you optimize your setup if you plan to incorporate visual displays or instructions during your build.

Double Barrel Stove Kit for 30 to 55 Gal Drum Wood Stove, Heavy Duty Steel Barrel Camp Stove Kit with Stove Door for DIY Oil Barrel Heating in Workshop, Cabin & Garage
DIY Wood Burning Stove Setup: Build your own barrel wood stove kit with this practical camping accessories drum…
As an affiliate, we earn on qualifying purchases.
As an affiliate, we earn on qualifying purchases.
Designing Your Rocket Stove
Designing your rocket stove involves planning a layout that maximizes airflow and combustion efficiency. You want to create a chamber where air flows smoothly to promote complete burning of fuel, which improves fuel efficiency. You should also consider emotional support strategies to stay motivated during construction and use, especially if encountering challenges. Position the burn tunnel and combustion chamber to enhance heat transfer, directing heat toward your cooking surface effectively. Keep the intake inlet sized correctly to ensure enough oxygen without excessive air, balancing fuel efficiency and heat retention. Insulating the combustion chamber helps maintain high temperatures, boosting heat transfer and reducing fuel consumption. Consider the overall shape and dimensions to optimize airflow, ensuring steady, hot flames. Proper design minimizes wasted energy, making your stove more effective for cooking or emergency use. Additionally, airflow management is crucial for achieving consistent combustion and maximizing heat output. Researching efficient design principles can help optimize your stove’s performance and fuel usage, saving you time and resources during construction and use. Incorporating construction tips from experienced builders can further improve your overall design. Exploring modern materials can also enhance durability and insulation, further improving efficiency.

Range Kleen 550 Stainless Steel Round Burner Kovers, Set of 4
COVER YOUR SMALL AND LARGE BURNERS: The Range Kleen 550 set of 4 comes with 2 small (8.5-inches…
As an affiliate, we earn on qualifying purchases.
As an affiliate, we earn on qualifying purchases.
Assembling the Main Components
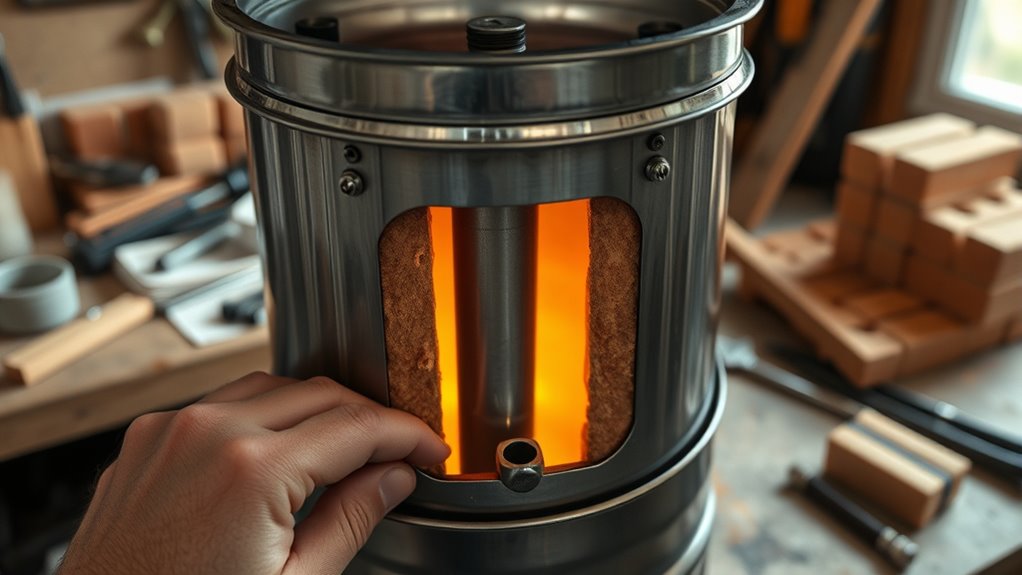
Assembling the main components of your rocket stove requires careful attention to how each part fits together to guarantee proper airflow and stability. Start by securing the combustion chamber, ensuring it’s airtight to maximize fuel efficiency. Attach the vertical feed tube securely, aligning it to promote consistent heat distribution. Connect the base or platform, making sure it’s level and sturdy to support cooking pots. Pay close attention to the gaps between components; proper sealing enhances airflow and combustion efficiency. Use appropriate materials that can withstand high temperatures without warping. When assembled correctly, your stove will burn fuel efficiently and distribute heat evenly, making cooking quicker and more reliable in camping or emergency situations. Proper airtight sealing is crucial for optimal performance and safety. Additionally, incorporating recycled materials into your design can enhance sustainability and durability of your rocket stove. To ensure long-term efficiency, regularly check and verify the production quantities involved in your project to ensure manufacturing consistency and optimal performance.

4 Pcs High Temperature Gasket Paper, Ceramic Fiber Gasket Material Fireproof Insulation Sheet for Pellet Stove, Wood Stove, Kiln, Boiler, Forge, RV Furnace Gaskets DIY Cut, 7" x 10" x1/4" Thick
【What You'll Receive】You'll receive 4 gasket paper sheets, each measures approximately 7'' x 10'' x 1/4'' thick. The…
As an affiliate, we earn on qualifying purchases.
As an affiliate, we earn on qualifying purchases.
Testing and Optimizing Performance

To guarantee your rocket stove performs efficiently, you should begin testing it under real conditions and observe how it burns fuel and distributes heat. Focus on maximizing fuel efficiency by adjusting the airflow or the size of the combustion chamber to ensure complete combustion. Monitor the heat output to see if it reaches your desired temperature quickly and maintains steady heat during cooking. If the stove consumes too much fuel or the heat output is inconsistent, tweak the air intake or insulation to improve performance. Keep notes on different configurations to identify the most effective setup. Testing helps you fine-tune your design, ensuring it’s both economical and reliable for camping or emergency use. Proper optimization enhances your stove’s overall effectiveness and longevity. Incorporating adjustable features like auto functions can further help maintain consistent performance during use. Additionally, understanding anime culture and storytelling techniques can inspire innovative designs and features for your stove, making your DIY project more engaging and unique.
Safety Tips and Maintenance
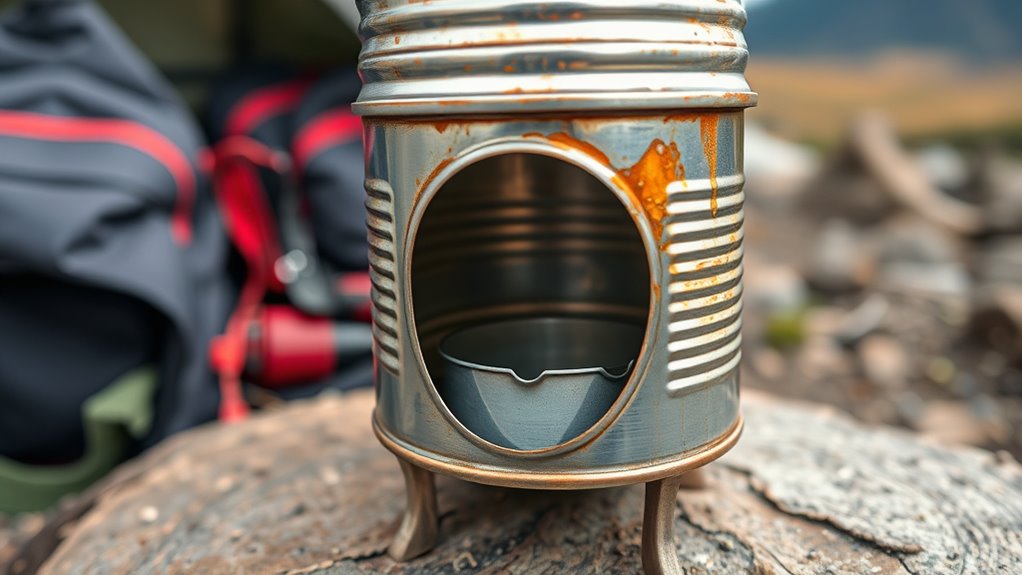
Ensuring your rocket stove remains safe and functional requires regular maintenance and adherence to safety precautions. Always prioritize fire safety by keeping flammable materials away and never leaving the stove unattended while burning. Regular stove cleaning is essential; remove ash and soot buildup to prevent blockages and improve efficiency. Inspect your stove for cracks or damage before each use, repairing any issues promptly. Use proper ventilation when cooking to avoid smoke buildup and ensure safe operation. Keep a fire extinguisher nearby, just in case. When disassembling or storing your stove, ensure it cools completely to prevent burns. Routine checks and cleaning help extend your stove’s lifespan, keep it safe, and ensure reliable performance during your camping trips or emergencies. Additionally, consulting vetted sources can provide valuable insights into proper stove maintenance and safety practices. Recognizing fire safety guidelines can also help ensure compliance and safety during your outdoor cooking activities. Incorporating remote monitoring tools can further enhance safety by alerting you to potential hazards when using your stove in remote locations. Regularly inspecting your stove for potential hazards and addressing issues promptly can prevent accidents and ensure a safe cooking experience.
Frequently Asked Questions
Can I Use Recycled Materials for Building My Rocket Stove?
You can definitely use recycled materials for your rocket stove, but consider recycling options carefully. Focus on durable materials like metal cans, bricks, or concrete blocks that can withstand heat and frequent use. Avoid fragile or flammable items, as material durability is essential for safety and efficiency. Recycling options are plentiful, and repurposing sturdy items not only saves money but helps the environment while building a safe, effective stove.
What Are the Best Fuel Types for a Portable Rocket Stove?
When choosing fuel for your portable rocket stove, opt for dry, lightweight materials like small wood sticks or biomass. These fuels offer good fuel efficiency and produce minimal smoke, reducing environmental impact. Avoid processed or treated materials, as they can be harmful. Using natural, renewable fuels helps you cook effectively while being eco-friendly. Always prioritize dry, easy-to-ignite fuels for ideal performance and minimal environmental footprint.
How Do I Troubleshoot if My Stove Doesn’T Ignite?
You sense the silence when your stove refuses to ignite—an unsettling pause. First, check your ignition troubleshooting steps; verify your fuel is dry and properly placed. Then, examine airflow adjustment—any blockages or gaps could hinder combustion. Light a match again, adjusting airflow as needed. If it still won’t spark, inspect for leaks or debris that could prevent ignition. Stay patient; each tweak brings you closer to a successful fire.
Is It Safe to Operate the Stove Indoors?
You shouldn’t operate your rocket stove indoors due to safety risks. Indoor safety is a concern because these stoves produce carbon monoxide and require proper ventilation. Without good airflow, dangerous fumes can accumulate, posing health hazards. Always use your stove in well-ventilated areas, ideally outdoors, to guarantee safe operation. Never rely on an indoor setting for cooking with a rocket stove unless you have appropriate ventilation and safety measures in place.
How Long Does a Homemade Rocket Stove Typically Last?
Your homemade rocket stove can last a surprising amount of time—think years! With proper durability testing, you’ll see it stand up to regular use. Keep it in top shape by following simple maintenance tips like cleaning ash and checking joints. While it’s built to endure, don’t neglect regular upkeep, and your stove could serve you reliably for countless adventures or emergency situations, making it a true kitchen hero!
Conclusion
Building your own rocket stove isn’t just cost-effective; it’s a reliable way to cook during emergencies or camping trips. Think of it like a miniature campfire, but more efficient—drawing from the idea that simple, well-designed systems can outperform complex machinery. When you understand the principles behind combustion and airflow, you’ll see that a DIY rocket stove isn’t just a project, but a practical tool rooted in science. Now, you’re ready to cook anywhere, anytime.