Wood Stove
Mastering the Damper and Draft: Optimizing Your Wood Stove’s Performance
Navigating the nuances of damper and draft can significantly enhance your wood stove’s efficiency—discover essential tips to master your heating experience.
Mastering the damper and draft in your wood stove is key to optimizing its performance. Start by using seasoned wood with a moisture content below 20% to improve combustion efficiency. Adjust your damper settings to regulate airflow, keeping flue gas temperatures between 400°F and 500°F for ideal performance. Experiment with different damper types like throat or slider dampers to find what works best for your stove. Regular maintenance is essential; clean your flue to prevent creosote buildup and monitor air control settings based on wood type. There's much more to explore to elevate your wood stove's efficiency and comfort.
Key Takeaways
- Use seasoned wood with moisture content below 20% to enhance combustion efficiency and reduce smoke emissions.
- Regularly adjust air control settings to balance primary and secondary air for cleaner combustion and improved heat output.
- Maintain flue gas temperatures between 400°F and 500°F for optimal combustion and to prevent heat loss.
- Clean the chimney and flue annually to prevent creosote buildup, ensuring consistent draft and airflow.
- Utilize a manometer to accurately gauge and manage draft levels for more efficient wood stove operation.
Understanding Wood Stove Basics
When you're looking to optimize your wood stove's performance, understanding the basics is important. First off, using seasoned wood with a moisture content below 20% greatly boosts combustion efficiency. This type of wood can yield up to 12% more energy than fresh-cut wood, leading to cleaner emissions and better heat output.
Additionally, the choice of wood stove can impact performance; for instance, high-efficiency models like the Englander 10-Cpm can generate substantial heat while using less fuel. You also need to pay attention to air control in your stove. Proper management of air intake influences how effectively your wood burns. The combustion zone should reach a minimum temperature of 600°C (1,100°F) to avoid smoldering, which hampers efficiency. Regularly cleaning your flue is essential to prevent creosote buildup that can obstruct airflow.
Understanding the roles of dampers, particularly the flue damper, is important for regulating air flow and optimizing burn quality. By adjusting these dampers, you can enhance your stove's performance and achieve peak efficiency.
Using high-efficiency stoves that utilize prewarmed combustion air can save you up to 30% in fuel costs compared to older models. By mastering these basic principles, you'll get the most out of your wood stove and enjoy a cozy, efficient fire.
Importance of Draft Control
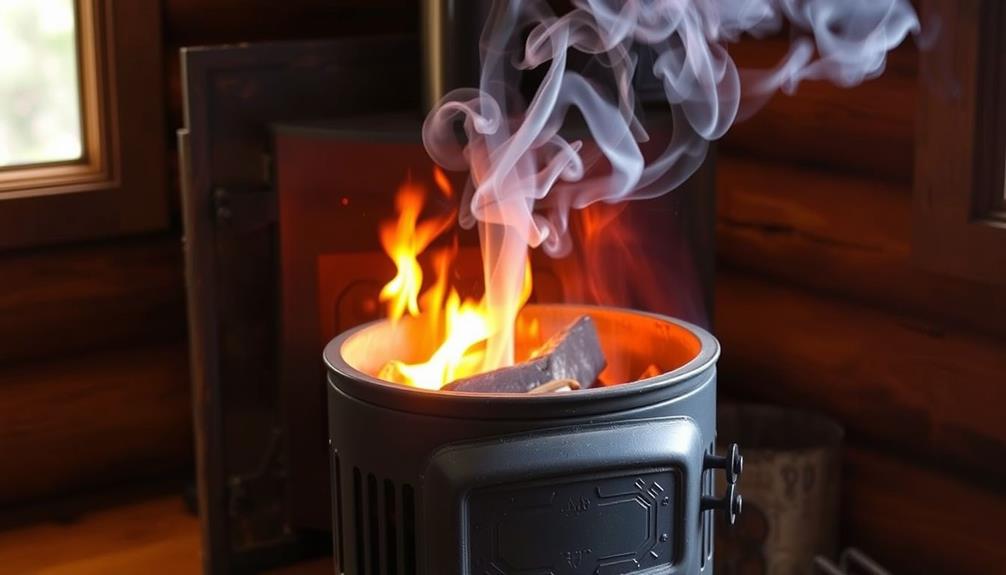
Draft control plays an essential role in your wood stove's efficiency and safety. Proper management of draft notably impacts combustion efficiency, ensuring that your stove burns wood at ideal temperatures. A well-regulated draft allows for consistent air flow, enhancing secondary combustion, which leads to cleaner burns and reduces harmful emissions like carbon monoxide.
Additionally, understanding the principles of thermal energy transfer can help you maximize the heat generated by your stove.
However, it's vital to monitor and adjust your draft carefully. Too much draft can result in heat loss, causing your stove to work harder than necessary. On the flip side, inadequate draft can lead to incomplete combustion, producing smoke that may backflow into your living space, creating a safety hazard.
To achieve the best results, experts recommend maintaining flue gas temperatures between 400°F and 500°F. This range maximizes draft control while minimizing the risk of chimney fires.
You can use tools like manometers to gauge your draft levels accurately, allowing for precise adjustments that enhance your stove's performance.
Types of Dampers
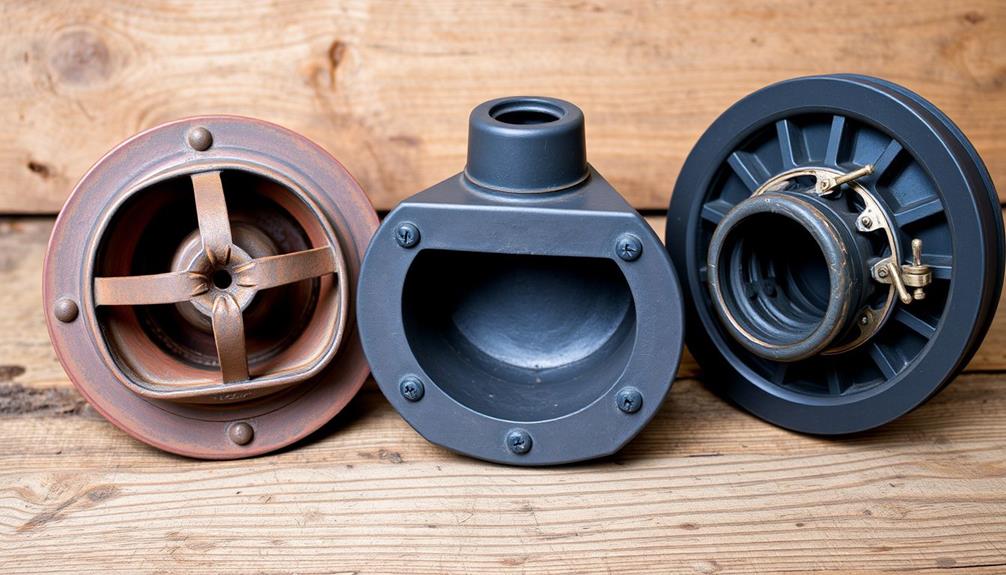
Understanding the various types of dampers can greatly enhance your wood stove's performance. Each damper plays a significant role in managing airflow, guaranteeing efficient combustion, and maintaining heat.
Additionally, optimizing your stove setup can provide benefits akin to the diversification of retirement portfolios by reducing risk exposure from inefficient heating.
Here's a quick overview of the main types of dampers you should know:
- Throat Dampers: Located above the firebox, they regulate airflow in the chimney.
- Top-Sealing Dampers: Installed at the chimney's top, these prevent heat loss when the stove isn't in use.
- Flue Dampers: Control the draft in the stove pipe, improving smoke expulsion and overall combustion efficiency.
- Lower Ash Pan Dampers: Introduce air below the fire for enhanced burn rates.
- Slider Draft Dampers: Manage air above the fire to support secondary combustion.
Understanding these types of dampers is essential for maintaining a balanced air feed.
Properly adjusting your air damper guarantees the right amount of primary air enters for combustion, while secondary air aids in cleaner burning.
This balance prevents issues like glass blackening, ultimately optimizing your wood stove's performance and efficiency.
Optimal Wood Selection
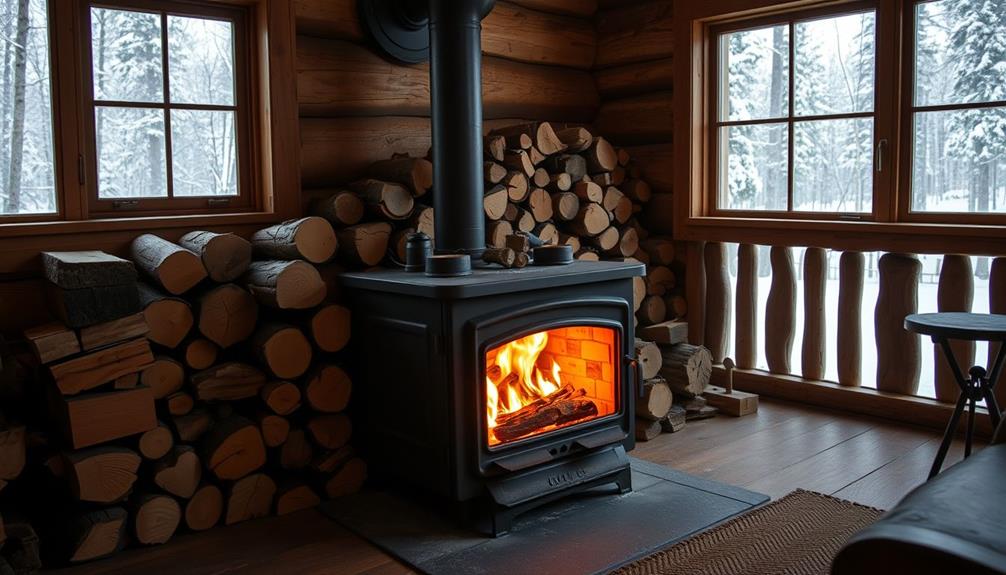
When it comes to fueling your wood stove, the type of wood you choose makes a big difference. Choosing the right wood can't only enhance your stove's efficiency but also contribute to your overall well-being by promoting a mindful lifestyle.
Seasoned wood with a moisture content below 20% not only burns more efficiently but also produces less smoke. You'll find that hardwoods like oak and maple outperform softwoods, giving you more heat and longer burn times.
Holistic lifestyle approach can alleviate menopause symptoms.
Importance of Seasoned Wood
Choosing the right wood for your stove can make all the difference in performance and efficiency. Using seasoned wood—wood that's dried for at least six months—guarantees a moisture content below 20%. This not only boosts heat output but also enhances combustion efficiency.
When you burn properly seasoned wood, you'll enjoy a cleaner burn with less smoke, improving your stove's draft. Additionally, using seasoned wood aligns with eco-friendly practices, similar to the benefits of geothermal energy utilization, which also focuses on reducing emissions.
Here are some key benefits of using seasoned wood:
- Provides 12% more energy than fresh-cut wood
- Reduces smoke production for improved air quality
- Increases overall heat output for better warmth
- Burns longer and hotter, especially hardwoods like oak and maple
- Minimizes harmful emissions, promoting a cleaner environment
Always avoid treated or painted woods, as they can release toxic fumes.
Store your seasoned wood in a sunny, covered area to prevent moisture absorption and guarantee ideal drying conditions. By prioritizing seasoned wood, you'll not only enhance your wood stove's performance but also contribute to a more efficient and eco-friendly heating solution.
Hardwoods Vs. Softwoods
Selecting the right type of wood for your stove is crucial for optimizing heat output and efficiency. Hardwoods and softwoods each have their own strengths and weaknesses that can greatly impact your stove's performance.
Here's a quick comparison:
Wood Type | Characteristics |
---|---|
Hardwoods | Higher density, longer burn times, more heat |
Softwoods | Quick ignition, higher flames, shorter burn |
Energy | 12% more energy when seasoned |
Combustion | Generally cleaner, less smoke/emissions |
Usage | Mix for balance: hardwoods for longer, softwoods for quick heat |
Hardwoods like oak and maple produce more heat and improve combustion efficiency, contributing to cleaner air quality. They can burn longer and produce less smoke, making them ideal for extended use. On the other hand, softwoods like pine ignite quickly, giving you immediate heat but burn faster, requiring more frequent refueling. If you combine both types, you can enjoy the quick ignition of softwoods while benefiting from the longer-lasting heat of hardwoods. This balanced approach guarantees you maximize the efficiency of your wood stove.
Ideal Moisture Content
Understanding the right type of wood is only part of the equation; achieving the perfect moisture content is just as important for maximizing your wood stove's performance. Properly dried wood should have a moisture content of 20% or lower to guarantee efficient combustion and minimize smoke production.
Here are some tips to help you achieve this:
- Season your wood for at least six months, or ideally one to two years.
- Choose hardwoods like oak or maple, which burn longer and hotter.
- Store your wood in a sunny, covered area to promote ideal drying conditions.
- Check the moisture content using a moisture meter before use.
- Avoid using wood with higher moisture content to prevent incomplete combustion.
Techniques for Efficient Operation
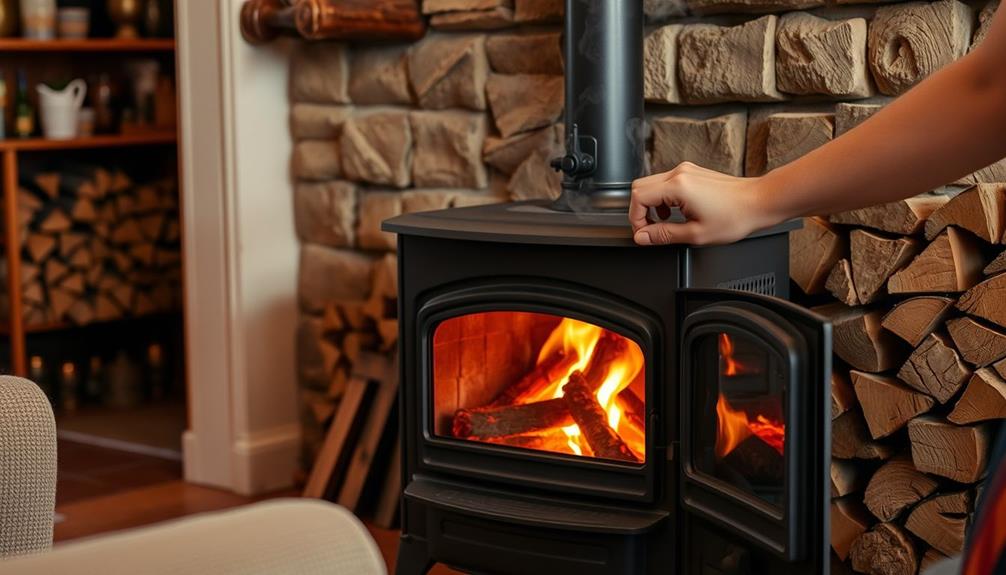
To get the most out of your wood stove, focus on air control strategies, fuel selection, and regular maintenance.
Properly managing clogging remedies can also enhance performance by ensuring your stove operates smoothly without interruptions.
Adjusting the primary air control and choosing seasoned wood can dramatically improve your stove's efficiency.
Air Control Strategies
Effective air control strategies are crucial for maximizing your wood stove's performance and efficiency. Properly managing the damper and air intake can greatly influence your stove's combustion efficiency and heat output. Here are some key techniques to take into account:
– Adjust the damper: A halfway closed damper promotes longer burns, while a fully open damper increases heat quickly.
When reflecting on your wood stove setup, it's also vital to take into account key factors in choosing a home cleaning service for maintaining a clean environment around your stove.
- Balance primary and secondary air: Open primary air for quick ignition but guarantee adequate secondary air to enhance gas combustion for cleaner burns.
- Monitor stovetop temps: Aim for around 500°F to enhance combustion efficiency, as higher firebox temperatures facilitate secondary combustion.
- Use seasoned wood: Choose wood with less than 20% moisture content to prevent hindered heat production and excessive smoke.
- Experiment and adjust: Regularly tweak your air control settings based on external temperatures and draft conditions to achieve peak performance.
Fuel Selection Tips
Selecting the right fuel is vital for maximizing your wood stove's efficiency and heat output. One of the best fuel selection tips is to use seasoned wood with a moisture content below 20%. This can boost your combustion efficiency by up to 12% compared to fresh-cut wood.
When it comes to wood species, hardwoods like oak and maple are superior choices; they burn longer and produce more heat, enhancing your stove's performance. Additionally, just as nutritional benefits of chia seeds can enhance health, choosing the right wood can greatly improve your home's warmth.
Proper stacking of your wood also plays an important role. Stack it tightly for consistent burning, but make certain there's enough space for airflow, as this can greatly impact the burn's efficiency.
Regularly using seasoned wood not only reduces smoke emissions but also helps maintain ideal temperature and conditions in your stove.
Additionally, consider your stove's air control capabilities. Different types of wood may require varying air settings for peak performance. By selecting wood species that match your stove's requirements, you'll further improve your heating experience.
Implement these fuel selection tips to maximize your wood stove's efficiency and enjoy a warmer, more comfortable home.
Regular Maintenance Practices
When it comes to keeping your wood stove running efficiently, regular maintenance practices are key. By focusing on a few essential tasks, you'll enhance your stove's performance and safety.
Understanding the importance of maintaining your equipment is similar to guaranteeing a great camping experience in diverse environments like those found in New England, where seasonal camping opportunities can enhance your adventures.
- Clean the flue and chimney annually to prevent creosote buildup, which can restrict airflow and increase fire risks.
- Lubricate the damper's moving parts to guarantee smooth operation, improving airflow regulation and maintaining a consistent draft.
- Monitor flue gas temperatures; aim for 400-500°F to minimize creosote accumulation and achieve ideal combustion.
- Adjust air control settings based on the wood type. Hardwoods need less air, while softer woods may require more—this helps maintain efficiency.
- Utilize a manometer to measure draft levels, guaranteeing they stay within the manufacturer's recommended range to enhance combustion efficiency and prevent smoke backflow.
Safety Precautions
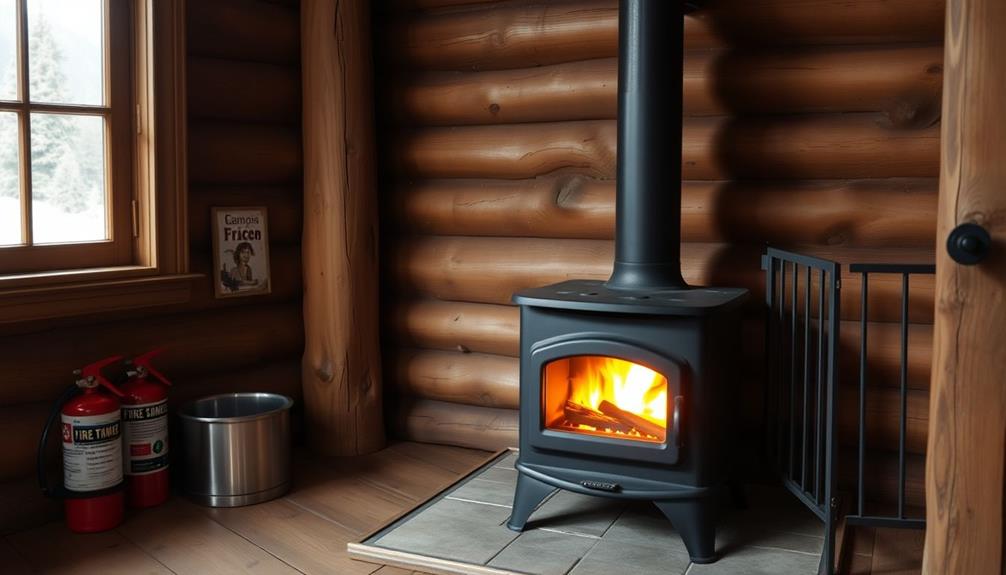
To guarantee a safe and efficient wood stove operation, it's essential to implement important safety precautions. Start by installing smoke and carbon monoxide detectors near your wood stove. This will alert you to any dangerous fumes and help maintain a safe environment. Regularly inspect and clean your chimney to prevent blockages and creosote buildup, which can lead to chimney fires.
Maintain a minimum clearance of 36 inches from combustibles around your wood stove. This distance reduces fire hazards and promotes safe operation. Additionally, consider using a chimney cap to prevent debris, animals, and rain from entering the flue. A chimney cap helps maintain proper ventilation and reduces the risk of blockages that can affect chimney draft.
Familiarize yourself with local regulations regarding wood burning to promote compliance and encourage safe heating practices in your community.
Here's a quick reference table for your safety precautions:
Safety Precaution | Description | Importance |
---|---|---|
Smoke and CO Detectors | Install near the wood stove | Alerts to dangerous fumes |
Regular Chimney Inspections | Clean to prevent blockages and creosote buildup | Reduces chimney fire risk |
Clearance from Combustibles | Keep 36 inches from combustibles | Prevents fire hazards |
Use of Chimney Cap | Prevents debris and animals from entering flue | Maintains proper ventilation |
Know Local Regulations | Understand local wood burning laws | Promotes compliance |
Maintenance Tips
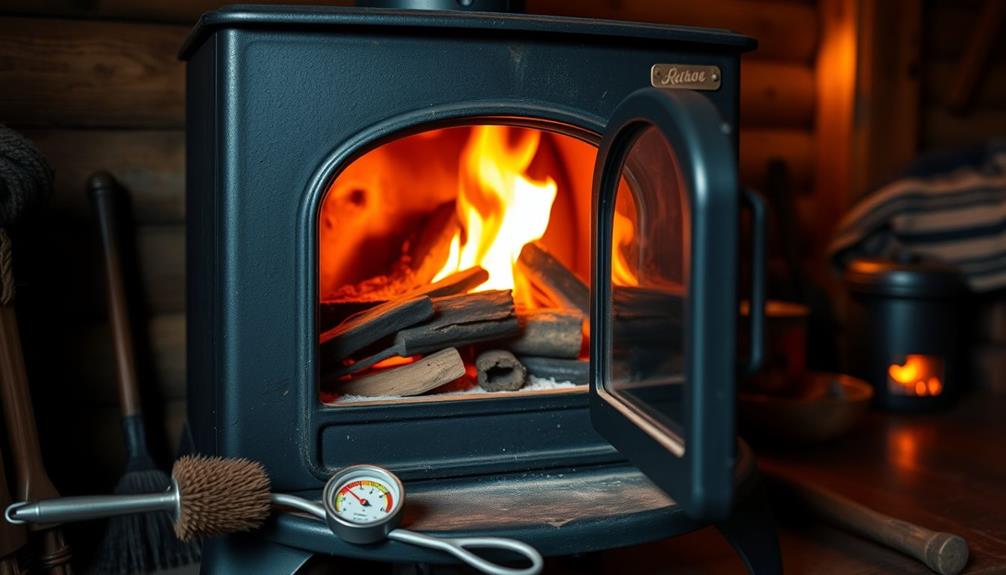
Guaranteeing your wood stove operates efficiently goes hand in hand with proper maintenance. Neglecting maintenance can lead to decreased performance, unsafe conditions, and increased costs.
Here are some vital maintenance tips to keep your wood stove functioning at its best:
- Clean the flue regularly to prevent creosote buildup, which reduces efficiency and poses a fire hazard. Regular cleaning is essential, especially during high usage seasons, to maintain peak performance and safety.
- Inspect and lubricate the damper annually to guarantee smooth operation and prevent rust or wear that can impact airflow. Proper damper function is important for controlling airflow, much like how airflow management is significant for other appliances.
- Monitor indoor climate and ventilation frequently to address any issues that could affect draft performance and air quality.
- Conduct routine checks for blockages or damage in the chimney to maintain peak airflow and avoid backdrafts that disrupt combustion.
- Schedule professional chimney inspections at least once a year to comply with safety standards and identify any potential maintenance needs.
Enhancing Combustion Efficiency
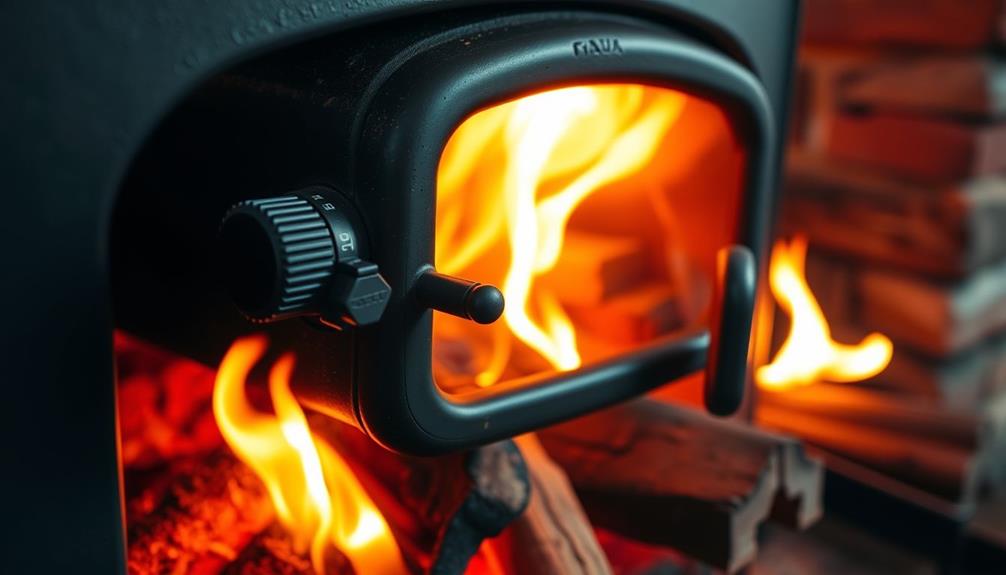
Maximizing your wood stove's combustion efficiency is vital for achieving ideal heat output and reducing emissions. To start, maintain a stovetop temperature around 500°F. This balance guarantees efficient heat production and cleaner burns. Properly seasoned wood, with a moisture content below 20%, plays an important role in achieving complete combustion. Burning wood that's too moist not only creates more smoke but also wastes fuel.
Next, optimize your air control settings. Keeping the primary air damper open until secondary combustion kicks in allows for higher firebox temperatures. This process promotes secondary combustion, effectively burning off gases and enhancing overall burn efficiency. As a result, you'll enjoy longer burn times and reduced fuel consumption.
Regularly monitor your flue gas temperatures and draft levels. High temperatures, ideally between 400-500°F, indicate effective combustion and limit creosote buildup. By maintaining these conditions, you facilitate a more efficient and cleaner burning experience.
Frequently Asked Questions
How to Improve Draft on a Wood Burning Stove?
To improve draft on your wood burning stove, guarantee your chimney's properly sized, use well-seasoned wood, monitor flue gas temperatures, and regularly clean the flue. Adjust air controls based on conditions for peak performance.
How Can You Maximize the Efficiency of a Wood Stove?
Did you know properly seasoned wood can boost your stove's efficiency by up to 30%? To maximize efficiency, use dry wood, monitor temperatures, adjust air dampers, and clean your chimney regularly. You'll enjoy cleaner, hotter fires.
Does Closing the Damper on a Wood Stove Make It Hotter?
Closing the damper can initially make your wood stove hotter by restricting airflow, allowing the fire to burn more efficiently. However, too much closure might lead to incomplete combustion and cooler temperatures over time.
Should I Close the Damper on My Wood Stove at Night?
Like a tight lid on a simmering pot, closing the damper at night can trap heat. You should partially close it, allowing some airflow while keeping an eye on temperatures to avoid smoke and creosote buildup.
Conclusion
By mastering your damper and draft, you're not just optimizing your wood stove's performance, you're enhancing your comfort, conserving fuel, and reducing emissions. You'll enjoy warmer spaces, cleaner air, and a more efficient burn. So, adjust that damper, choose the right wood, and operate with intention. Take charge of your wood stove experience, and let every fire be a demonstration of your skill and knowledge. Let's make each burn cleaner, each flame brighter, and each moment cozier!
Wood Stove
How To Install Door Gasket On A Wood Stove
I have found that a staggering 70% of wood stove owners fail to recognize the crucial importance of having a correctly installed door gasket. Without it, heat can escape and cold air can enter, decreasing the stove’s effectiveness and resulting in discomfort.
In this guide, I’ll walk you through the step-by-step process of installing a door gasket on a wood stove. With a little know-how and the right tools, you can ensure a tight seal and optimal performance for your stove.
Let’s get started!
Key Takeaways
- Properly installed door gaskets are important for wood stove efficiency and preventing heat loss.
- Door gaskets help maintain optimal performance and prevent discomfort caused by drafts.
- Preparing the wood stove by cleaning and inspecting it is essential before installing a new door gasket.
- Installing a new door gasket involves removing the old gasket, measuring and cutting the new gasket, applying adhesive, and testing for a proper seal.
Prepare the Wood Stove for Door Gasket Installation
I’m ready to prepare the wood stove for door gasket installation. Before beginning the installation process, it’s crucial to ensure that the wood stove is clean and free from any debris or residue.
Cleaning the wood stove before installing the door gasket will provide a smooth and secure surface for the gasket to adhere to. Start by removing any ashes or leftover wood from the stove. Use a brush or vacuum to remove any dust or dirt from the stove’s surface.
Next, inspect the stove for any signs of damage or rust. If necessary, sand down any rough areas and apply a heat-resistant paint.
Choosing the right type of door gasket is equally important. Consider factors such as the stove’s make and model, the size of the door, and the temperature resistance of the gasket material.
Remove the Old Door Gasket
To begin, I’ll carefully detach the worn-out gasket from the door frame. The first step in removing the old door gasket is to gather the necessary tools.
You’ll need a flathead screwdriver, pliers, and a utility knife. These tools will help you effectively remove the gasket without damaging the door frame or stove.
Once you’ve the tools ready, start by using the flathead screwdriver to gently pry the gasket away from the frame. Be cautious not to apply too much force, as this can cause the gasket to tear or break.
Next, use the pliers to grip the gasket and slowly pull it away from the frame. If the gasket is stubborn, you can use the utility knife to carefully cut it away.
Measure and Cut the New Door Gasket
Before cutting the new gasket, I’ll measure the length of the door frame to ensure a proper fit. Replacing gasket material is an important step in troubleshooting gasket installation issues.
To begin, gather the necessary tools: a tape measure, a pencil, and a sharp utility knife. Carefully measure the length of the door frame, starting from one corner and ending at the opposite corner. Take note of the measurement and transfer it to the new gasket material.
Using the utility knife, cut the gasket material to the measured length. Remember to cut the material with precision to achieve a tight seal.
Once cut, carefully insert the gasket into the groove of the door frame, ensuring it’s evenly distributed. This will prevent any gaps or leaks, ensuring optimal performance of the wood stove.
Apply Adhesive and Install the New Door Gasket
I carefully apply adhesive to the new gasket material before placing it in the groove of the door frame. This step is crucial in ensuring a secure gasket seal that will prevent any air leakage. The adhesive acts as a bonding agent, creating a strong bond between the gasket material and the door frame.
To apply the adhesive, I use a small brush or applicator to evenly spread the adhesive along the length of the gasket material. It is important to apply a sufficient amount of adhesive to ensure proper adhesion, but not too much that it becomes messy or overflows onto the stove surface.
Once the adhesive is applied, I carefully press the gasket material into the groove of the door frame. I make sure to firmly press it down, ensuring that the gasket is securely seated in the groove. This will help create a tight seal and prevent any air leakage.
In order to help you understand the process better, I have created a table that outlines the steps involved in applying adhesive and installing the new door gasket:
Step | Description |
---|---|
1 | Carefully apply adhesive to the new gasket material |
2 | Spread the adhesive evenly along the length of the gasket |
3 | Press the gasket material into the groove of the door frame |
4 | Ensure the gasket is securely seated in the groove |
Test and Adjust the Door Gasket for Proper Seal
After applying adhesive and securing the gasket in the door frame, I test and adjust it to ensure a proper seal. This step is crucial to avoid common mistakes in installing door gaskets on wood stoves.
One common mistake isn’t properly aligning the gasket with the door frame, which can result in air leaks and decreased stove efficiency. To troubleshoot a faulty door gasket seal, I start by closing the stove door and checking for any gaps or unevenness. I then use my hand to feel for any air escaping from the seal.
If I detect any leaks, I adjust the gasket by tightening or loosening the screws on the door frame. It’s important to remember that a well-sealed door gasket is essential for optimal stove performance and safety.
Frequently Asked Questions
How Often Should the Door Gasket on a Wood Stove Be Replaced?
I inspect the door gasket on my wood stove regularly. Signs that it needs replacing include fraying, gaps, and leaks of smoke. I replace it every year to ensure a proper seal.
What Type of Adhesive Should Be Used to Install the New Door Gasket?
I have researched the pros and cons of different adhesives for door gasket installation and their impact on performance. Also, I have found various types of door gaskets for wood stoves and their suitability for different conditions.
Can I Use a Different Material for the Door Gasket Instead of the Recommended One?
Using alternative materials for the door gasket may compromise the stove’s performance and safety. It is crucial to follow the manufacturer’s recommendations for optimal heat resistance and a proper seal.
How Long Does It Take for the Adhesive to Dry Before I Can Test the Door Gasket?
I can’t believe it! I’ve just finished installing the door gasket on my wood stove. Now I just need to wait for the adhesive to dry before I can test it out. How long will that take? Can I use a different adhesive?
Is It Necessary to Remove the Door From the Wood Stove in Order to Install the New Gasket?
No, it is not necessary to remove the door from the wood stove to install the new gasket. The door gasket on a wood stove can be installed without removing the door, saving time and effort.
Conclusion
In conclusion, installing a door gasket on a wood stove is a simple yet crucial task for ensuring proper sealing and efficient operation.
By following the steps outlined in this article, homeowners can easily remove the old gasket, measure and cut the new one, and apply adhesive for a secure fit.
Testing and adjusting the door gasket will guarantee a tight seal, preventing heat loss and enhancing the overall performance of the wood stove.
Growing up surrounded by the vast beauty of nature, Sierra was always drawn to the call of the wild. While others sought the comfort of the familiar, she ventured out, embracing the unpredictable and finding stories in the heartbeat of nature.
At the epicenter of every remarkable venture lies a dynamic team—a fusion of diverse talents, visions, and passions. The essence of Best Small Wood Stoves is crafted and refined by such a trio: Sierra, Logan, and Terra. Their collective expertise has transformed the platform into a leading authority on small wood stoves, radiating warmth and knowledge in equal measure.
Wood Stove
How Tall Can A Wood Stove Pipe Be Above Roof
With my extensive experience in wood stoves, I frequently ponder the best height for a wood stove pipe above the roof. It is important to grasp the recommended guidelines and clearances from experts in order to address this question effectively.
In this article, I’ll delve into the factors that influence wood stove pipe height and provide tips on how to properly install it above the roof. So, get ready to learn the ins and outs of maximizing the height of your wood stove pipe!
Key Takeaways
- Regulations dictate the height of the chimney for wood stove pipe installation to ensure safe and efficient operation of the wood stove and minimize fire hazards.
- Factors such as roof pitch, nearby structures, and prevailing wind patterns can influence the required height of the wood stove pipe for proper draft and clearance.
- National Fire Protection Association recommends a minimum clearance of 18 inches from the pipe to combustible walls or ceilings, but clearance distances may vary based on local building codes and manufacturer’s guidelines.
- The maximum allowable height for wood stove pipes depends on local building codes, regulations, and factors such as wood stove type, flue pipe size, and roof pitch. Consult local authorities or professional installers for specific requirements.
Regulations on Wood Stove Pipe Height
I should check the regulations on how high my wood stove pipe needs to be above the roof. Installing a wood stove pipe requires careful consideration, as there are specific regulations that dictate the proper height of the chimney. These regulations ensure the safe and efficient operation of the wood stove and minimize the risk of fire hazards.
When determining the height of the chimney, factors such as the roof pitch, nearby structures, and prevailing wind patterns must be taken into account. Additionally, the type of wood stove and its specific requirements should be considered.
Adhering to the regulations for wood stove pipe installation is crucial to maintain proper ventilation and prevent smoke from entering the living space. By following these guidelines, you can enjoy a warm and cozy fire while ensuring the safety of your home.
Factors Influencing Wood Stove Pipe Height
Considering factors such as roof pitch, nearby structures, and prevailing wind patterns is essential in determining the appropriate height for a wood stove pipe. Venting options and chimney installation require careful consideration to ensure safety and efficiency. The table below highlights some key factors to consider when determining the height of a wood stove pipe.
Factor | Importance | Considerations |
---|---|---|
Roof Pitch | High | Steeper roofs may require a taller pipe for proper draft |
Nearby Structures | Medium | Proximity to walls or other obstructions can affect draft and clearance requirements |
Prevailing Wind Patterns | Low | Wind direction can impact the efficiency of the wood stove |
Understanding Clearance Requirements for Wood Stove Pipes
One must understand the clearance requirements for wood stove pipes in order to ensure safe installation and operation. Proper clearance distances are essential to prevent potential fire hazards and ensure optimal performance of the wood stove. Here are some key points to consider:
-
Clearance distances from combustible materials:
-
The National Fire Protection Association (NFPA) recommends a minimum clearance of 18 inches from the pipe to combustible walls or ceilings.
-
This distance can vary depending on local building codes, so always consult the manufacturer’s guidelines and local regulations.
-
Proper ventilation:
-
Wood stove pipes should be installed with proper ventilation to allow for the safe exhaust of combustion byproducts.
-
Ventilation requirements may include the use of a chimney or flue system to ensure the removal of smoke and gases.
Maximum Allowable Height for Wood Stove Pipes
The maximum allowable height for wood stove pipes depends on local building codes and regulations, but it’s important to ensure proper ventilation and safe installation.
When it comes to the maximum height of a wood stove pipe above the roof, safety regulations play a crucial role. These regulations are put in place to prevent potential fire hazards and ensure the efficient operation of the wood stove.
The maximum height is typically determined by factors such as the type of wood stove, the size of the flue pipe, and the pitch of the roof. It’s important to consult with local authorities or a professional installer who can provide guidance on the specific requirements for your area.
Tips for Properly Installing a Wood Stove Pipe Above the Roof
I have found three helpful tips for properly installing a wood stove pipe above the roof, so let me share them with you:
-
First and foremost, it’s crucial to ensure that the wood stove pipe extends at least 2 feet above the highest point of the roof. This is to prevent any potential backdraft or downdraft issues that may arise.
-
Installing a chimney cap is essential to keep debris, animals, and rainwater out of the wood stove pipe. A chimney cap also helps in maintaining proper airflow and preventing any blockages.
-
Regularly inspecting and maintaining the wood stove pipe is vital. Look out for any signs of wear and tear, such as cracks or rust. Keeping the pipe clean and free from creosote buildup is essential for efficient and safe operation.
Conclusion
In conclusion, when it comes to the height of a wood stove pipe above the roof, it’s all about following regulations and understanding clearance requirements.
While there may not be a specific limit on how tall it can be, it’s important to consider factors such as the type of wood stove, the roof pitch, and local building codes.
So, if you’re planning on installing a wood stove pipe above your roof, make sure to do your research and consult with professionals to ensure a safe and efficient setup.
Growing up surrounded by the vast beauty of nature, Sierra was always drawn to the call of the wild. While others sought the comfort of the familiar, she ventured out, embracing the unpredictable and finding stories in the heartbeat of nature.
At the epicenter of every remarkable venture lies a dynamic team—a fusion of diverse talents, visions, and passions. The essence of Best Small Wood Stoves is crafted and refined by such a trio: Sierra, Logan, and Terra. Their collective expertise has transformed the platform into a leading authority on small wood stoves, radiating warmth and knowledge in equal measure.
Wood Stove
How To Pipe A Wood Stove
Alright everyone, let’s get into the details of how to set up a wood stove pipe. Believe me, it might seem challenging, but with the proper knowledge, it is actually quite straightforward.
In this article, I’ll guide you through each step, from selecting the appropriate materials to properly positioning and sealing the pipes.
We’ll even cover essential maintenance tips to keep your wood stove piping in top-notch condition.
So, grab your tools and let’s get started!
Key Takeaways
- Regular chimney cleaning is crucial for efficient and safe operation.
- Proper installation of pipe joints is essential to prevent leaks and gas escape.
- Stainless steel pipes offer durability and resistance to corrosion.
- Double wall pipes provide improved safety and increased efficiency.
Understanding the Basics of Wood Stove Piping
I need to learn the basics of wood stove piping to properly set up my new stove. One important aspect of wood stove piping is the regular cleaning of the chimney. This is crucial to ensure the efficient and safe operation of the wood stove. Over time, soot and creosote can build up in the chimney, which can lead to blockages and increased risk of chimney fires. Regular chimney cleaning, at least once a year, will help prevent these issues and maintain good airflow for proper combustion.
When installing wood stove piping, there are common mistakes that should be avoided. One such mistake is improper sizing of the pipe. It’s important to correctly match the pipe size to the stove’s outlet and the chimney opening. Using an undersized pipe can result in poor draft and inefficient burning, while an oversized pipe can lead to excessive heat loss.
Another mistake to avoid is improper installation of the pipe joints. It’s crucial to ensure that the joints are properly sealed to prevent leaks and the escape of harmful gases. Using a high-temperature sealant or stove pipe tape can help create a tight and secure seal.
Selecting the Right Pipe Materials for Your Wood Stove
One option for selecting the right pipe materials for your wood stove is to use stainless steel, as it offers durability and resistance to corrosion. Stainless steel pipes are known for their strength and ability to withstand high temperatures, making them ideal for wood stove applications. Additionally, stainless steel pipes have a smooth interior surface, which promotes better draft and reduces the buildup of creosote.
When choosing appropriate insulation for your wood stove pipe, it’s important to consider the type of insulation that will work best for your specific needs. There are various types of insulation available, including ceramic fiber insulation, mineral wool insulation, and foil-faced insulation. Each type has its advantages and disadvantages, so it’s essential to do thorough research and consult with professionals to determine the most suitable option for your wood stove pipe.
Advantages of double wall pipes include improved safety and increased efficiency. The double wall construction provides an extra layer of insulation, reducing the risk of heat transfer to surrounding materials and minimizing the chance of accidental fires. Additionally, the insulation helps to maintain higher flue gas temperatures, allowing for more efficient combustion and reducing the amount of creosote buildup.
Properly Positioning and Installing the Stove Pipe
Positioning and installing the stove pipe correctly is essential for ensuring proper ventilation and preventing any potential safety hazards. When installing the stove pipe, it’s important to follow these steps:
- Measure and cut the stove pipe to the required length using a pipe cutter or hacksaw.
- Attach the stove pipe to the flue collar of the wood stove, making sure it fits securely.
- Use high-temperature silicone sealant to create an airtight seal between the stove pipe and the flue collar.
- Secure the stove pipe in place using metal screws or clamps, ensuring it’s properly supported.
- Install a chimney cap or rain cap on top of the stove pipe to prevent water and debris from entering.
Troubleshooting common pipe issues may include checking for any gaps or leaks in the stove pipe, ensuring proper clearance between the pipe and combustible materials, and inspecting for any blockages or obstructions that may hinder proper ventilation.
Regular maintenance and inspection of the stove pipe is crucial to ensure its efficient and safe operation.
Connecting and Sealing the Pipes for Effective Ventilation
To ensure effective ventilation, it is crucial to properly connect and seal the pipes using high-temperature silicone sealant. This step is essential when installing a chimney for a wood stove. Here is a step-by-step guide on how to connect and seal the pipes:
- First, gather all the necessary materials: high-temperature silicone sealant, pipe sections, clamps, and a screwdriver.
- Start by connecting the pipe sections together, ensuring they fit snugly.
- Apply a generous amount of high-temperature silicone sealant to the connecting ends of the pipes.
- Use clamps to secure the pipes together, ensuring a tight connection.
- Allow the silicone sealant to cure according to the manufacturer’s instructions.
- Once cured, inspect the connections for any leaks or gaps.
- If any leaks or gaps are found, apply additional silicone sealant to seal them completely.
- Finally, troubleshoot ventilation by running a smoke test to ensure proper airflow.
Step | Instructions |
---|---|
1 | Gather materials |
2 | Connect pipe sections |
3 | Apply sealant to connecting ends |
4 | Secure pipes with clamps |
5 | Allow sealant to cure |
6 | Inspect connections |
7 | Apply additional sealant if needed |
8 | Troubleshoot ventilation with a smoke test |
Essential Maintenance Tips for Wood Stove Piping
I find it important to regularly clean and inspect the wood stove piping to ensure proper functionality and prevent potential hazards. Inspecting chimneys and cleaning creosote buildup are crucial steps in maintaining a safe and efficient wood stove system. Here’s a step-by-step guide:
- Start by turning off the wood stove and allowing it to cool completely.
- Put on protective gloves and eyewear before beginning the inspection.
- Use a flashlight to visually inspect the chimney for any signs of damage or obstruction.
- Check for creosote buildup by shining the light up the chimney and looking for a shiny, black substance.
- If creosote is present, it needs to be cleaned to prevent chimney fires. Use a creosote sweeping brush or hire a professional chimney sweep.
- Lastly, inspect the piping connections for any leaks or loose fittings. Tighten any loose connections and replace damaged parts if necessary.
Regularly inspecting and cleaning your wood stove piping will ensure its proper functionality and minimize the risk of potential hazards.
Frequently Asked Questions
How Much Clearance Is Required Between the Stove Pipe and Combustible Materials?
Proper clearance requirements for wood stove pipes are essential to prevent fires. It’s crucial to maintain a safe distance between the stove pipe and combustible materials. Common mistakes to avoid when installing wood stove pipes include insufficient clearance and improper insulation.
Can I Use a Different Type of Pipe Material for the Exterior Portion of the Stove Pipe?
Yes, you can use different types of pipe materials for the exterior portion of the stove pipe. However, it is important to consider the pros and cons of each material to ensure proper functionality and safety.
What Is the Best Way to Clean and Maintain the Stove Pipe?
To clean and maintain a wood stove pipe, start by removing any debris or creosote buildup with a chimney brush. Inspect for any damage or leaks, and replace any damaged sections. Regularly check and clean the pipe to ensure proper functioning.
Is It Possible to Install a Wood Stove Pipe Without Professional Help?
I’ve always been curious if it’s possible to install a wood stove pipe without professional help. I decided to investigate and found that with the right tools and knowledge, a DIY wood stove installation is definitely achievable.
Are There Any Specific Regulations or Codes That I Need to Follow When Installing a Wood Stove Pipe?
When installing a wood stove pipe, it’s important to follow specific regulations and codes to ensure safety. This includes understanding the installation process, implementing safety measures, and avoiding common mistakes.
Conclusion
In conclusion, properly piping a wood stove is crucial for effective ventilation and safety. By understanding the basics, selecting the right materials, positioning and installing the stove pipe correctly, and connecting and sealing the pipes, you can ensure optimal performance.
Remember to also follow essential maintenance tips to keep your wood stove piping in top condition. So, get ready to experience the warmth and coziness of your wood stove, like being wrapped in a toasty embrace on a cold winter’s night.
Growing up surrounded by the vast beauty of nature, Sierra was always drawn to the call of the wild. While others sought the comfort of the familiar, she ventured out, embracing the unpredictable and finding stories in the heartbeat of nature.
At the epicenter of every remarkable venture lies a dynamic team—a fusion of diverse talents, visions, and passions. The essence of Best Small Wood Stoves is crafted and refined by such a trio: Sierra, Logan, and Terra. Their collective expertise has transformed the platform into a leading authority on small wood stoves, radiating warmth and knowledge in equal measure.
-
Wood Stove8 months ago
How To Build A Thermoelectric Generator For A Wood Stove
-
Wood Stove4 months ago
What Can I Use As Insulation On Wood Stove Pipes
-
Wood Stove2 weeks ago
How To Use Damper And Draft On Wood Stove
-
Wood Stove8 months ago
How Far Does Wood Stove Have To Be From Wall
-
Wood Stove7 months ago
How To Make A Heat Shield For A Wood Stove
-
Wood Stove1 week ago
When To Open And Close Damper On Wood Stove
-
Wood Stove5 months ago
How To Install A Wood Stove Pipe And Chimney
-
Wood Stove8 months ago
How To Use The Flue On A Wood Stove