Curious about the correct and secure way to install a roof vent for a wood stove? Luckily, all the information you need can be found right here.
In this article, I’ll guide you through the precise steps of assessing your roof structure, choosing the perfect vent location, and preparing the roof for cutting.
We’ll then dive into the nitty-gritty of cutting the hole and installing the roof vent, followed by sealing and insulating for optimal performance.
Let’s get started on this exciting DIY project!
Key Takeaways
- Assess the roof structure and choose an appropriate vent location to ensure proper ventilation and prevent moisture buildup.
- Take safety precautions while cutting the roof, using the right cutting tools and following a precise cutting technique to avoid damaging the roof.
- Use a reciprocating saw or circular saw to cut the hole for the roof vent, then secure the vent tightly with roofing nails or screws to prevent water leaks.
- Seal and insulate the roof vent by applying weatherstripping, filling gaps with spray foam insulation, and considering the use of an insulated vent cap for energy efficiency.

#7 High Temp Silicone Metal Roof Pipe Flashing Boot – Black Roof Vent Boot for Pipe OD 6" to 11" – Roof Vent Cover for Stove Pipe, Chimney, HVAC Ducts & Plumbing Vents with Roofing Screws & Hex Socket
Wide Range of Applications: Roof vent boot seals all pipes on corrugated roofs! Perfect for roof shoes for…
As an affiliate, we earn on qualifying purchases.
As an affiliate, we earn on qualifying purchases.
Required Tools and Materials
I need a hammer and nails for this project.
When it comes to cutting techniques for installing a roof vent wood stove, precision and safety are key.
First, it’s important to choose the right cutting tool, such as a reciprocating saw or a circular saw with a carbide-tipped blade. These tools ensure clean and accurate cuts through the roof material.
Before starting, it’s crucial to take safety precautions. This includes wearing safety goggles and gloves to protect against debris and sharp edges. Additionally, ensure the work area is clear of any obstructions and secure a stable ladder for access.
Always follow the manufacturer’s instructions and guidelines while using the cutting tool to avoid accidents.

PAYA TOOLS 1x PRO Fibre Insulation Reciprocating Saw Blade,Professional Accessory Reciprocating Saw for Mineral Wool,Insulated Pipe and Other Soft Materials,16''(400mm) (1-Pack)
Material: HCS; Length: 16inch(400mm); Designed for cutting fibre insulation.
As an affiliate, we earn on qualifying purchases.
As an affiliate, we earn on qualifying purchases.
Assessing Roof Structure and Choosing Vent Location
One important factor in assessing the roof structure and choosing the vent location is considering the overall dimensions of the roof. When assessing the roof pitch, it’s crucial to determine the slope and angle of the roof to ensure proper ventilation. A steeper roof pitch may require a different vent location than a flatter roof pitch.
Additionally, it’s important to assess the surrounding area and potential obstructions that may impact the vent location, such as nearby trees or other structures. Proper ventilation is essential to maintain airflow and prevent moisture buildup in the attic, which can lead to mold and other structural issues.

SOEKAVIA 8" Round Chimney Caps, Tapered Top Chimney Cap with Screen, All Weather Chimney Caps Roof Top Round Roof Vent, Perfectly Insulated Roof Vent Caps Vent Caps
All-Weather Protection & Enhanced Ventilation: The oversized conical top and 360° grille design block rain, snow, leaves, and…
As an affiliate, we earn on qualifying purchases.
As an affiliate, we earn on qualifying purchases.
Preparing the Roof for Cutting
I’m getting ready to cut through the roof to install the vent for the wood stove. It’s an important step in the installation process, and there are a few things I need to keep in mind to ensure everything goes smoothly and safely.

Here are the steps I’m following:
-
Measuring and marking the vent location: Before I start cutting, I carefully measure and mark the exact location where the vent will be installed. This ensures accuracy and helps prevent any mistakes during the cutting process.
-
Safety precautions while cutting: Safety is paramount when working with power tools and cutting through the roof. I make sure to wear appropriate safety gear, including gloves and protective eyewear. I also take extra care to secure the ladder and create a safe working environment.
-
Choosing the right tools: To cut through the roof, I use a reciprocating saw with a sharp blade suitable for cutting through various roofing materials. This ensures clean and efficient cuts.
-
Precise cutting technique: When cutting, I follow a straight line, making sure not to deviate from the marked location. I apply steady pressure and let the saw do the work, avoiding any sudden movements that could damage the roof.
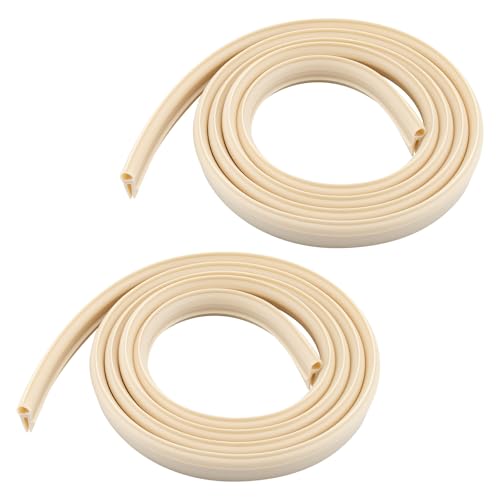
2026 Upgraded BVD0455-01 RV Roof Vent Seal 51" (2 Pack), RV Vinyl Seal Replacement for Roof Vents Fit with Most Roof Vents
This RV vent lid seal measures ⅝” by ⅛” and is 51" long (each pack). Suitable for most…
As an affiliate, we earn on qualifying purchases.
As an affiliate, we earn on qualifying purchases.
Cutting the Hole and Installing the Roof Vent
After measuring and marking the vent location, it’s important to carefully cut the hole and install the roof vent to ensure proper ventilation for the wood stove.
When it comes to cutting techniques, I recommend using a reciprocating saw or a circular saw with a carbide-tipped blade for clean and precise cuts. Before starting the cutting process, it’s crucial to take safety precautions such as wearing protective goggles, gloves, and a dust mask to avoid any potential injuries. Additionally, make sure to secure the ladder properly and have someone assist you during the installation process.
Once the hole is cut, align the roof vent with the hole and secure it tightly using roofing nails or screws. This will prevent any water leaks and ensure the vent stays in place.
Now that the roof vent is installed, let’s move on to the next step of sealing and insulating it for optimum performance.
Sealing and Insulating the Roof Vent
How can I effectively seal and insulate the roof vent to ensure proper insulation and prevent any air leaks?
When it comes to roof vent installation and maintenance, proper sealing and insulation are crucial for energy efficiency and preventing air leaks.
Here are four steps you can take to effectively seal and insulate your roof vent:
-
Use weatherstripping: Apply weatherstripping around the edges of the vent opening to create a tight seal and prevent air infiltration.
-
Insulate with spray foam: Fill any gaps or voids around the vent with spray foam insulation to provide an airtight barrier and enhance thermal efficiency.
-
Install an insulated vent cap: Consider using an insulated vent cap that has built-in insulation to further prevent heat loss or gain through the vent.
-
Check for leaks regularly: Regularly inspect the roof vent and surrounding area for any signs of leaks or damage, and promptly address any issues to maintain the integrity of the seal.
Frequently Asked Questions
What Are the Potential Risks or Dangers of Cutting a Hole in the Roof for a Wood Stove Vent?
Cutting a hole in the roof for a wood stove vent poses potential risks and dangers. It is crucial to safely cut and install the roof vent to prevent structural damage, leaks, and fire hazards.
Can a Wood Stove Vent Be Installed in Any Type of Roof Structure, or Are There Certain Limitations or Requirements?
Roof vent installation depends on the type of roof structure. Certain limitations and requirements exist to ensure proper installation. Factors such as roof pitch, material, and insulation must be considered for a successful wood stove vent installation.
How Can I Ensure That the Roof Vent Is Properly Aligned and Centered With the Wood Stove Inside the House?
To ensure proper alignment and centering of the roof vent with the wood stove, I carefully measure and mark the desired location on the roof, ensuring it lines up with the stove inside the house.
Are There Any Specific Building Codes or Regulations That Need to Be Followed When Installing a Roof Vent for a Wood Stove?
When installing a roof vent for a wood stove, it is crucial to adhere to building code requirements and safety considerations. These regulations ensure proper ventilation and minimize the risk of fire hazards.
Is It Necessary to Hire a Professional or Can I Successfully Cut and Install a Roof Vent for a Wood Stove on My Own?
I can successfully cut and install a roof vent for a wood stove on my own. However, it is recommended to hire a professional for a precise and safe installation. Here are the steps to DIY installation.
Conclusion
In conclusion, when cutting in a roof vent for a wood stove, it’s crucial to carefully assess the roof structure and select the optimal vent location.
Properly preparing the roof for cutting and installing the vent is essential for a successful installation.
Additionally, sealing and insulating the roof vent will help ensure optimal performance and prevent any potential issues.
Following these technical and precise steps will result in a safe and efficient wood stove ventilation system.