Wood Stove
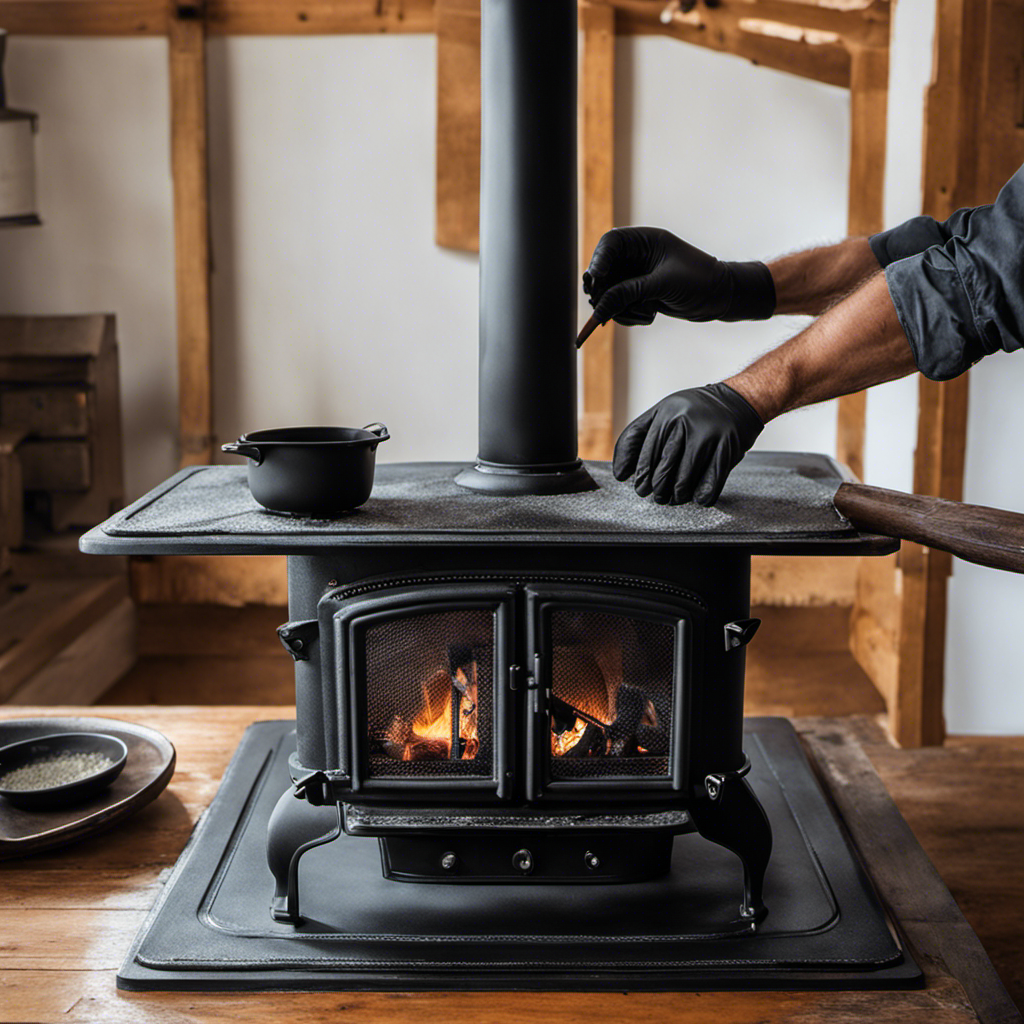
How To Fix Crack In Cast Iron Wood Stove
I’ve found myself causing more cracks in my cast iron wood stove than I care to admit. Nevertheless, with the right knowledge and tools, fixing these cracks can be easier than one might expect.
In this article, I’ll guide you through the step-by-step process of patching up those pesky cracks in your wood stove. From understanding the causes to assessing the severity and gathering the necessary materials, I’ve got you covered.
Let’s get your wood stove back in working order!
Key Takeaways
- Thermal stress from extreme temperatures can cause cracks in a cast iron wood stove.
- Proper maintenance, including regular cleaning, can prevent weakening of the cast iron and reduce the likelihood of cracks.
- Using the correct type of fuel is important to avoid contributing to cracks in the wood stove.
- Assessing the severity of the crack is crucial in determining the appropriate repair option.
Understanding the Causes of Cast Iron Wood Stove Cracks
I’ve been researching the various factors that contribute to cast iron wood stove cracks. Understanding the causes of these cracks is crucial in preventing them from occurring in the first place.
One of the main causes is thermal stress, which happens when extreme temperatures cause the cast iron to expand and contract rapidly. This constant expansion and contraction can lead to cracks over time.
Another factor is improper maintenance, such as failing to clean the stove regularly or using the wrong type of fuel. These issues can weaken the integrity of the cast iron and make it more prone to cracking.
By addressing these causes and taking preventive measures like proper maintenance and using the correct fuel, you can significantly reduce the likelihood of cracks in your wood stove.
Now, let’s move on to assessing the severity of the crack in your wood stove.
Assessing the Severity of the Crack in Your Wood Stove
To accurately assess the severity of the crack in your wood stove, you should carefully examine it with both a flashlight and a magnifying glass. Evaluating the crack size is crucial in determining the repair options available to you.
As an experienced wood stove enthusiast, I understand the importance of thoroughly inspecting any crack to ensure the safety and functionality of your stove. Begin by examining the crack’s length, width, and depth. Look for any signs of widening or spreading, which could indicate a more serious issue.
Additionally, check for any signs of rust or corrosion around the crack, as this could further compromise the stove’s integrity.
With these details in mind, you can then determine whether the crack can be repaired with a simple patch or if a more extensive repair or replacement is necessary.
Gathering the Necessary Tools and Materials for the Repair
I’ll start by gathering up all the tools and materials needed for the repair, such as a putty knife and high-temperature epoxy. It’s important to have everything ready before starting the repair process.
Here are three essential items you’ll need for fixing a crack in a cast iron wood stove:
-
Putty Knife: This tool is crucial for removing any debris or old sealant from the crack. It helps create a clean surface for the epoxy to adhere to.
-
High-Temperature Epoxy: Choosing the right repair method is essential, and high-temperature epoxy is the go-to solution for fixing cracks in cast iron. It withstands the extreme heat produced by the wood stove and provides a durable, long-lasting repair.
-
Heat-Resistant Gloves: Safety should always be a priority. When handling hot surfaces or materials, heat-resistant gloves are necessary to protect your hands from burns.
Taking precautions for preventing future cracks is equally important. Regular maintenance, such as cleaning and inspecting the stove, can help identify potential issues early on. Additionally, using a heat-resistant sealant around vulnerable areas can help prevent cracks from forming in the future.
Step-by-Step Guide to Patching the Crack in Your Cast Iron Wood Stove
One important step in patching the crack in your cast iron wood stove is to thoroughly clean the area around the crack with a putty knife. This is crucial because any debris or dirt can prevent the repair material from properly adhering to the surface.
Once the area is clean, you can proceed with applying the appropriate repair technique. There are various methods you can use, such as using high-temperature epoxy or welding the crack. Each technique has its own advantages and it’s important to choose the one that suits your situation best.
Additionally, it’s essential to take preventive measures to avoid future cracks. Regularly inspecting the stove for any signs of damage, ensuring proper installation, and using the stove according to the manufacturer’s guidelines can help minimize the risk of cracks.
Tips for Maintaining the Integrity of Your Wood Stove After the Repair
After the repair, I’ll make sure to regularly clean and inspect my wood stove to maintain its integrity.
Here are some tips I’ve learned to prevent cracks in cast iron wood stoves and common mistakes to avoid during wood stove repairs:
-
Use the right fuel: Burning wet or unseasoned wood can cause rapid temperature changes, leading to cracks in the cast iron. Make sure to use dry, well-seasoned wood to prevent this.
-
Avoid over-firing: Excessive heat can cause stress on the cast iron, leading to cracks. Follow the manufacturer’s guidelines for proper operation and avoid overloading the stove with too much wood.
-
Proper maintenance: Regularly clean the stove to remove any ash or debris that can accumulate and cause hot spots. Inspect the stove for any signs of damage, such as cracks or loose parts, and address them promptly to prevent further issues.
Frequently Asked Questions
Can I Use Regular Household Glue to Patch the Crack in My Cast Iron Wood Stove?
Yes, I recommend using a high temperature sealant instead of regular household glue to patch the crack in your cast iron wood stove. It will provide a stronger and more durable repair that can withstand the heat.
How Long Will the Repair Last Before I Need to Patch the Crack Again?
Repair longevity of a crack patch in a cast iron wood stove depends on several factors. With proper maintenance and regular inspections, a well-done repair can last for several years before needing to be patched again.
Can I Continue Using My Wood Stove While the Crack Is Being Repaired?
I wouldn’t recommend using a wood stove with a crack. There are risks involved, such as potential further damage or even a fire hazard. It’s best to address the crack before continuing use.
Are There Any Safety Precautions I Need to Take During the Repair Process?
During the repair process, it’s crucial to prioritize safety precautions. Be aware of potential hazards and take necessary measures such as wearing protective gear, working in a well-ventilated area, and ensuring proper insulation to prevent accidents.
Can I Prevent Cracks From Forming in the Future by Using a Specific Type of Wood or Fuel?
To prevent future cracks in a cast iron wood stove, it’s important to consider wood selection and maintenance practices. Using well-seasoned hardwood and regularly cleaning and inspecting the stove can help minimize the risk of cracks.
Conclusion
Well, congratulations! You’re now equipped with the knowledge and skills to fix that pesky crack in your cast iron wood stove. Who’d have thought that such a seemingly daunting task could be tackled with ease?
Remember, prevention is key, so make sure to maintain the integrity of your wood stove after the repair.
Now go forth and enjoy the warmth of your crack-free stove, all thanks to your newfound expertise. Stay toasty, my friends!
Wood Stove
What Does Closing The Damper On A Wood Stove Do
As a committed user of wood stoves, I have come to understand the significance of mastering damper control.
But what exactly does closing the damper do?
In a nutshell, it’s a key component in controlling the airflow and heat output of your wood stove.
By adjusting the damper, you can maximize efficiency, ensure a safe burning process, and even save on fuel costs.
So, let’s delve into the fascinating world of damper control and discover its incredible benefits.
Key Takeaways
- Closing the damper restricts airflow, reducing heat output and burn rate
- Closing the damper can lead to incomplete combustion and increased smoke emission
- Adjusting the damper maximizes the efficiency of the wood stove
- Closing the damper ensures safety by preventing the build-up of harmful gases like carbon monoxide
The Purpose of the Damper
I think the purpose of the damper is to control the airflow in the wood stove.
The damper plays a crucial role in improving combustion by regulating the amount of oxygen that enters the firebox. When the damper is opened, it allows more air to flow into the stove, resulting in a hotter and more efficient burn.
This increased airflow helps to ignite the wood more quickly and completely, leading to better combustion and reduced smoke production. On the other hand, closing the damper restricts the airflow, which can lead to incomplete combustion.
This can result in the production of more smoke and the release of harmful pollutants into the environment. Therefore, it’s important to properly adjust the damper to ensure optimal combustion and minimize smoke emission.
Controlling Airflow and Heat Output
Sometimes, opening the damper and adjusting the airflow can greatly increase the heat output from the wood stove. The damper is a crucial component in controlling the temperature and reducing smoke in a wood stove. By opening the damper, more oxygen is allowed into the firebox, resulting in a more efficient burn and a higher heat output. This increase in airflow helps to achieve a hotter fire, which is essential for heating larger spaces or maintaining a consistent temperature.
On the other hand, closing the damper restricts the airflow, reducing the heat output and slowing down the burn rate. This can be useful when trying to maintain a lower temperature or when there’s an excessive amount of smoke. By understanding how to adjust the damper, you can maximize the efficiency of your wood stove and ensure optimal heat output.
Now, let’s delve into the topic of maximizing efficiency with the damper.
Maximizing Efficiency With the Damper
To maximize efficiency with the damper, adjusting the airflow and managing the burn rate are key. The damper plays a crucial role in controlling the combustion process in a wood stove. By adjusting the damper, you can regulate the amount of air entering the stove, thereby affecting the burn rate and heat output.
It’s important to find the right balance between airflow and burn rate to achieve optimal efficiency. Too much airflow can lead to increased fuel consumption, while too little airflow can result in reduced heat output and increased smoke emission.
Impact on Burning Process
Using the damper to adjust the airflow has a significant impact on the burning process, affecting both the burn rate and heat output of the wood stove. Here are four key aspects to consider:
-
Effects on wood consumption: By adjusting the damper, you can control the amount of oxygen supplied to the fire. A closed damper restricts airflow, resulting in slower combustion and reduced wood consumption.
-
Impact on smoke production: Proper damper adjustment ensures a balanced air-to-fuel ratio, leading to cleaner and more efficient combustion. Opening the damper allows for better oxygen flow, minimizing smoke production and promoting a cleaner burn.
-
Burn rate control: The damper plays a crucial role in regulating the burn rate. By adjusting the airflow, you can control the speed at which the wood burns, allowing for longer burn times or quick bursts of intense heat.
-
Heat output adjustment: The damper’s position determines the heat output of the wood stove. A fully open damper allows for maximum heat release, while a partially closed or closed damper reduces heat output.
Ensuring safety with a closed damper is crucial to prevent the build-up of harmful gases, such as carbon monoxide.
Ensuring Safety With a Closed Damper
While ensuring safety with a closed damper, I can prevent the build-up of harmful gases, such as carbon monoxide. Regular damper maintenance is of utmost importance to ensure the efficient and safe operation of a wood stove.
The damper plays a crucial role in controlling the airflow, which affects the combustion process and heat output. It’s essential to clean the damper regularly to remove any accumulated soot or debris that may obstruct its proper functioning. Additionally, checking for any signs of damage or wear is vital to prevent any potential leaks or malfunctions.
When using a closed damper, it’s important to avoid common mistakes such as blocking the flue entirely, as this can lead to inadequate ventilation and the accumulation of dangerous gases. Always ensure proper ventilation and follow the manufacturer’s guidelines to ensure a safe and efficient wood stove operation.
Frequently Asked Questions
How Do I Know if the Damper on My Wood Stove Is Open or Closed?
To determine if the damper on my wood stove is open or closed, I can visually inspect it. The damper affects the stove’s efficiency and adjusting it optimizes performance. The damper’s position also impacts the room’s temperature.
Can Closing the Damper Too Much Cause Smoke or Fumes to Enter the Room?
Closing the damper too much on a wood stove can affect its efficiency by restricting airflow and reducing the heat output. It can also lead to carbon monoxide buildup, which can be dangerous.
Will Closing the Damper Completely Extinguish the Fire in the Wood Stove?
Closing the damper completely will not extinguish the fire in the wood stove. It’s important to understand that the damper controls the airflow, and closing it only restricts the oxygen supply, not the fire itself.
Can Closing the Damper Too Much Damage the Wood Stove or Chimney?
Closing the damper too much can damage the wood stove or chimney. Proper damper maintenance is crucial to avoid problems. It’s important to understand the importance of proper damper usage to ensure safe and efficient operation of the wood stove.
What Are the Signs That the Damper Needs to Be Replaced or Repaired?
When the damper on a wood stove needs replacing or repairing, there are clear signs of damage. It’s crucial to address these issues promptly to ensure proper ventilation and prevent further problems.
Conclusion
In conclusion, closing the damper on a wood stove is essential for controlling airflow and heat output. It maximizes efficiency by ensuring that the heat is directed towards the desired area and not lost through the chimney.
Like a conductor directing an orchestra, the damper regulates the burning process, allowing for a steady and controlled flow of heat.
Moreover, a closed damper helps maintain safety by preventing the escape of sparks or embers.
Growing up surrounded by the vast beauty of nature, Sierra was always drawn to the call of the wild. While others sought the comfort of the familiar, she ventured out, embracing the unpredictable and finding stories in the heartbeat of nature.
At the epicenter of every remarkable venture lies a dynamic team—a fusion of diverse talents, visions, and passions. The essence of Best Small Wood Stoves is crafted and refined by such a trio: Sierra, Logan, and Terra. Their collective expertise has transformed the platform into a leading authority on small wood stoves, radiating warmth and knowledge in equal measure.
Wood Stove
How To Install A Wood Stove In A 2 Story House
I have always fantasized about enjoying relaxing evenings by a crackling fire, but living in a two-story house made it seem impossible. That all changed when I finally discovered the proper way to install a wood stove.
In this guide, I’ll walk you through the process step-by-step, ensuring safety and efficiency every step of the way. From assessing the space to maintaining the stove, you’ll have all the knowledge you need to turn your dream into a reality.
Get ready to bring warmth and comfort to every corner of your home.
Key Takeaways
- Measure the dimensions of the space for the wood stove installation (height, width, depth).
- Evaluate the accessibility of the location for venting and chimney installation.
- Choose a compact and efficient wood stove model that fits properly and safely in the designated space.
- Regularly inspect and maintain the wood stove and chimney to ensure safety and efficient operation.
Assessing the Space and Location
I’m considering the available space and ideal location for installing a wood stove in my two-story house. To begin, I need to measure the dimensions of the space where I plan to install the stove. This includes the height, width, and depth of the area. By accurately measuring the dimensions, I can ensure that the wood stove will fit properly and comply with safety regulations.
Next, I need to evaluate the accessibility of the location. This involves assessing whether the area is easily accessible for venting and chimney installation. I also need to consider the proximity to combustible materials and ensure that there’s enough clearance around the stove for safe operation.
Preparing the Chimney and Venting System
To ensure proper ventilation, I’ll need to inspect and clean the chimney before proceeding with the installation. Cleaning the chimney is crucial to prevent any blockages or buildup that could hinder the flow of smoke and gases.
I’ll start by removing any debris, such as leaves or bird nests, from the chimney. Then, using a chimney brush and rods, I’ll thoroughly clean the interior walls of the chimney to remove any creosote or soot buildup.
Once the chimney is clean, I’ll move on to insulating the vent pipe. Insulating the vent pipe helps to reduce heat loss and increase the efficiency of the wood stove. I’ll use high-temperature insulation wrap and secure it around the vent pipe using metal tape.
With the chimney cleaned and the vent pipe insulated, the wood stove installation can proceed seamlessly.
Choosing and Installing the Wood Stove
After researching different options, I decided on a compact and efficient model for my home heating needs. The wood stove I chose not only provides sufficient heat but also ensures optimal efficiency. Here are some key factors to consider when it comes to wood stove maintenance and efficiency:
Regular Cleaning: Proper maintenance involves regular cleaning of the stove, including removing ashes and debris. This helps to improve airflow and prevent the buildup of creosote.
Proper Wood Selection: Choosing the right type of wood is crucial for maintaining efficiency. Hardwoods, such as oak or maple, burn longer and produce more heat compared to softwoods like pine.
Efficient Burning Techniques: Learning how to properly operate the air vents and control the burn rate can significantly increase the stove’s efficiency. Balancing the air intake and adjusting the damper accordingly helps to achieve optimal combustion.
Insulation: Ensuring proper insulation around the stove and chimney can prevent heat loss and maximize efficiency. Using fire-resistant materials and sealing any gaps or cracks helps to retain heat within the designated area.
Ensuring Proper Safety Measures
When it comes to ensuring proper safety measures, it’s important to regularly inspect the wood stove and chimney for any signs of damage or blockage. Safety precautions are essential to prevent fire accidents and keep your home and family safe.
Start by checking the wood stove for any cracks, leaks, or loose parts. Make sure the door seal is intact and the hinges are secure.
Next, examine the chimney for any obstructions such as bird nests or debris. Use a flashlight to inspect the flue for creosote buildup, which can increase the risk of chimney fires. Clean the chimney regularly to remove any creosote deposits. Additionally, install a chimney cap to prevent animals from entering and blocking the chimney.
Maintaining and Operating the Wood Stove
I find it important to regularly clean and inspect my wood stove to ensure proper maintenance and safe operation. Neglecting cleaning and maintenance can lead to reduced energy efficiency and potential safety hazards.
Here are some key steps to keep your wood stove in top condition:
Clean the stove regularly: Remove ashes and debris from the firebox and clean the glass door with a recommended cleaner. This helps maintain optimal airflow and prevents blockages.
Check the chimney: Inspect the chimney for any obstructions or creosote buildup, which can lead to chimney fires. Hire a professional chimney sweep annually to ensure proper cleaning.
Monitor the gaskets: Check the door gaskets for any signs of wear or damage. Replace them if necessary to maintain a tight seal and prevent heat loss.
Maintain the airflow: Clean the air intake and exhaust vents to ensure proper airflow. This promotes efficient combustion and maximizes energy efficiency.
Regular cleaning and maintenance of your wood stove won’t only prolong its lifespan but also improve its energy efficiency, keeping your home warm and cozy while reducing environmental impact.
Frequently Asked Questions
What Are the Building Codes and Regulations for Installing a Wood Stove in a 2-Story House?
Building code requirements and safety regulations for installing a wood stove in a 2-story house are crucial. Compliance with these guidelines ensures proper installation, reducing fire hazards and maintaining the structural integrity of the house.
How Much Does It Typically Cost to Install a Wood Stove in a 2-Story House?
Cost estimation for installing a wood stove in a 2-story house can vary based on factors like materials, labor, and additional requirements. The installation process involves careful planning, preparation, and compliance with building codes.
Can a Wood Stove Be Installed on Any Floor of a 2-Story House?
Yes, a wood stove can be installed on any floor of a 2-story house. However, it is important to consider wood stove safety and ensure proper ventilation to prevent the risk of fire or carbon monoxide poisoning.
Are There Any Special Considerations for Installing a Wood Stove in a Bedroom or a Bathroom in a 2-Story House?
Special considerations must be taken into account when installing a wood stove in a bedroom or bathroom. Ventilation requirements are crucial to ensure proper air circulation and prevent potential hazards. Safety should always be the top priority.
Can a Wood Stove Be Installed in a House With an Existing Fireplace?
Yes, a wood stove can be installed in a house with an existing fireplace. The advantages of wood stoves include efficient heating, cost savings, and a cozy ambiance. Proper installation is crucial for safety and optimal performance.
Can I Use an Outdoor Wood Stove Inside My Two-Story House?
Using a build outdoor wood stove inside a two-story house can be a safety hazard. These stoves are designed for outdoor use and may produce dangerous fumes when used indoors. It is important to follow the manufacturer’s guidelines and consult with a professional before attempting to use outdoor stoves inside.
Conclusion
In conclusion, installing a wood stove in a two-story house requires careful assessment of the space and location.
Proper preparation of the chimney and venting system is also crucial.
Selection and installation of the wood stove should be done with consideration for both functionality and aesthetic.
Implementation of safety measures is essential to prevent accidents and ensure the well-being of everyone in the house.
Regular maintenance is necessary to keep the wood stove operating efficiently and safely.
Just like a warm hearth brings comfort and coziness to a home, a well-installed wood stove can provide efficient heating and a charming ambiance.
By following these steps and ensuring safety, you can enjoy the benefits of a wood stove in your two-story house.
Growing up surrounded by the vast beauty of nature, Sierra was always drawn to the call of the wild. While others sought the comfort of the familiar, she ventured out, embracing the unpredictable and finding stories in the heartbeat of nature.
At the epicenter of every remarkable venture lies a dynamic team—a fusion of diverse talents, visions, and passions. The essence of Best Small Wood Stoves is crafted and refined by such a trio: Sierra, Logan, and Terra. Their collective expertise has transformed the platform into a leading authority on small wood stoves, radiating warmth and knowledge in equal measure.
Wood Stove
How To Clean A Cast Iron Wood Stove
I have a technique that will simplify the process of cleaning your cast iron wood stove. You can forget about the hassle of scrubbing and scraping because I will provide all the necessary guidance and suggestions to help your stove appear as good as new.
From prepping the stove to removing ash and debris, I’ll guide you through each step with ease.
So grab your cleaning supplies and let’s dive into the world of cast iron wood stove maintenance!
Key Takeaways
- Remove stubborn stains with warm water and mild dish soap
- Gather necessary tools and materials such as a wire brush, bucket, gentle dish soap, gloves, and safety goggles
- Remove ash and debris from the stove using a heat-resistant ash bucket, small brush or broom, and a vacuum cleaner with a HEPA filter
- Deep clean the cast iron surface using a soft cloth or sponge, mild dish soap, water, and a non-abrasive scrub brush
Preparing Your Cast Iron Wood Stove for Cleaning
I need to make sure my cast iron wood stove is properly prepared before I can begin cleaning it. There are a few pre-cleaning steps that are essential to ensure a thorough and effective cleaning process.
The first step is to remove any stubborn stains that may have accumulated on the surface of the stove. To do this, I use a mixture of warm water and mild dish soap. I dip a soft cloth into the soapy water and gently scrub the stained areas. For particularly tough stains, I may need to use a small scrub brush, being careful not to scratch the surface of the cast iron. Once the stains are removed, I rinse the stove thoroughly with clean water to remove any soap residue.
In addition to removing stains, it’s important to check for any loose or damaged parts on the stove. I inspect the door gasket, hinges, and handles to ensure they’re in good condition. If there are any issues, I make note of them and plan to address them after the cleaning process.
Gathering the Necessary Tools and Materials
To start, I’ll need a wire brush, a bucket, and some gentle dish soap. These cleaning supplies are essential for effectively cleaning a cast iron wood stove. Before I begin, it’s important to gather all the necessary tools and materials to ensure a thorough cleaning process.
Here’s a table to guide you on the cleaning supplies and protective gear you’ll need:
Cleaning Supplies | Protective Gear |
---|---|
Wire brush | Gloves |
Bucket | Safety goggles |
Gentle dish soap | Apron |
Now that we have everything we need, let’s discuss their importance. A wire brush is essential for removing any debris or build-up on the surface of the stove. It helps in loosening the stubborn dirt and soot, making it easier to clean. A bucket will be useful for holding water and any cleaning solution you decide to use. As for the gentle dish soap, it is crucial for effectively removing grease and grime without damaging the cast iron surface.
In terms of protective gear, wearing gloves will protect your hands from any harsh chemicals or hot surfaces. Safety goggles are important to shield your eyes from any debris or cleaning solutions that may splash. Lastly, an apron will help protect your clothing from any potential stains or mess during the cleaning process.
Now that we have all our tools and protective gear ready, we can move on to the actual cleaning process.
Removing Ash and Debris From the Stove
Removing the ash and debris from the stove is an important step in maintaining its cleanliness and efficiency. Here are four easy steps to help you effectively remove the ash and debris from your cast iron wood stove:
Prepare your tools: Before starting, gather a heat-resistant ash bucket, a small brush or broom, and a vacuum cleaner with a HEPA filter. These tools will make the cleaning process much easier and efficient.
Let the stove cool down: Make sure the stove is completely cool before attempting to remove the ash and debris. This will prevent any accidental burns or injuries.
Sweep the debris: Using a small brush or broom, gently sweep the loose debris and ash into a pile in the center of the stove. Be cautious not to scratch or damage the stove’s surface.
Vacuum the ash: Carefully use a vacuum cleaner with a HEPA filter to remove the remaining ash and debris. Use the crevice tool attachment to reach into corners and tight spaces. Be thorough in your vacuuming to ensure all the ash is removed.
By following these steps, you can effectively remove the ash and debris from your cast iron wood stove, ensuring its cleanliness and efficiency.
Once you’ve completed this step, you can move on to deep cleaning the cast iron surface.
Deep Cleaning the Cast Iron Surface
After removing the ash and debris, I found that deep cleaning the surface of my stove restored its shine and eliminated any lingering odors. Cast iron stoves can accumulate stubborn stains over time, but with the right cleaning techniques, you can bring back their original luster.
To restore the shine and remove any stubborn stains, follow these steps:
Gather your materials: You’ll need a soft cloth or sponge, mild dish soap, water, and a non-abrasive scrub brush.
Create a cleaning solution: Mix warm water with a small amount of mild dish soap in a bucket or sink.
Dip the cloth or sponge into the solution and gently scrub the surface of the stove. Pay extra attention to areas with stubborn stains. Avoid using abrasive cleaners or scrub brushes as they can damage the surface.
For tough stains, make a paste using baking soda and water. Apply the paste to the stained area and let it sit for a few minutes. Then, scrub gently with the non-abrasive brush.
Maintaining and Preventing Rust on Your Wood Stove
Maintaining the shine and preventing rust on my stove is important, so I always make sure to dry the surface thoroughly after cleaning.
In order to keep my wood stove in top condition, I follow these four steps:
Season the cast iron: Before using the stove for the first time, it’s crucial to season the cast iron. This creates a protective layer that helps prevent rust. Simply apply a thin coat of vegetable oil to the entire surface and bake it in the oven at a low temperature for about an hour. Repeat this process every few months to maintain the seasoning.
Clean and dry after each use: After each use, I clean the stove using a stiff brush or scraper to remove any ash or debris. Then, I wipe it down with a damp cloth and dry it thoroughly to prevent moisture from causing rust.
Use a rust inhibitor spray: To provide extra protection against rust, I occasionally spray a rust inhibitor specifically designed for cast iron surfaces. This helps to keep the stove rust-free and in good condition.
Store in a dry place: When the stove isn’t in use, I store it in a dry area. Moisture is the enemy of cast iron, so it’s important to keep it away from damp environments to prevent rust from forming.
Frequently Asked Questions
Can I Use Regular Household Cleaning Products to Clean My Cast Iron Wood Stove?
Yes, you can use regular household cleaning products to clean your cast iron wood stove. However, there are alternative cleaning methods that are specifically designed for this type of stove.
It’s important to note that using regular household cleaning products may have potential risks. These risks include damaging the cast iron or leaving behind residue that could affect the performance of the stove.
Therefore, it’s recommended to use specialized cleaners that are specifically formulated for cast iron wood stoves. These cleaners will ensure proper maintenance and longevity for your stove.
How Often Should I Clean My Cast Iron Wood Stove?
How often should I clean my cast iron wood stove?
It’s important to maintain regular cleaning to ensure optimum performance and longevity of your stove.
The frequency of cleaning depends on how frequently you use it. As a general rule, it’s recommended to clean your cast iron wood stove at least once a month during the heating season.
This will help prevent the buildup of soot, ash, and creosote, ensuring efficient and safe operation.
Let me now tell you the best cleaning methods for cast iron wood stoves.
Is It Safe to Use Abrasive Scrubbers or Steel Wool on the Cast Iron Surface?
Using abrasive scrubbers or steel wool on the cast iron surface of a wood stove isn’t recommended. These cleaning tools can scratch the surface and remove the seasoning that helps to prevent rust and preserve the cast iron.
Instead, opt for non-abrasive cleaning solutions and soft brushes or cloths to gently remove stains.
Regular maintenance and proper care are key to keeping your cast iron wood stove in great condition.
Can I Use Water to Clean the Inside of My Cast Iron Wood Stove?
Sure, I can answer that.
When it comes to cleaning the inside of a cast iron wood stove, using water is generally not recommended. Water can cause rusting and damage to the stove.
Instead, there are other cleaning methods specifically designed for cast iron wood stoves. These methods involve using a wire brush, ash vacuum, or dry cloth to remove any ash or debris.
It’s important to avoid abrasive scrubbers or steel wool that can scratch the cast iron surface.
What Should I Do if There Are Stubborn Stains or Rust on My Cast Iron Wood Stove?
When dealing with stubborn stains or rust on a cast iron wood stove, it’s important to have effective rust removal methods and alternative cleaning solutions at hand.
I’ve had my fair share of experiences with this issue, and let me tell you, it can be quite challenging.
However, with the right techniques and products, you can restore your stove to its former glory.
Is the cleaning process different for a wood stove with a T in the back compared to a regular cast iron wood stove?
The cleaning process for a wood stove with a T in the back is slightly different from a regular cast iron wood stove. To clean the T in the back efficiently, it’s important to use a specialized brush to reach those tight spaces, while the regular cast iron stove may require a different cleaning approach.
Conclusion
In conclusion, by following these simple steps, you can easily clean and maintain your cast iron wood stove.
Remember, a well-maintained stove not only ensures efficient heating, but also adds a touch of rustic charm to your home.
So, grab your tools, roll up your sleeves, and let your wood stove shine like a diamond in the rough!
Growing up surrounded by the vast beauty of nature, Sierra was always drawn to the call of the wild. While others sought the comfort of the familiar, she ventured out, embracing the unpredictable and finding stories in the heartbeat of nature.
At the epicenter of every remarkable venture lies a dynamic team—a fusion of diverse talents, visions, and passions. The essence of Best Small Wood Stoves is crafted and refined by such a trio: Sierra, Logan, and Terra. Their collective expertise has transformed the platform into a leading authority on small wood stoves, radiating warmth and knowledge in equal measure.
-
Wood Stove9 months ago
How To Build A Thermoelectric Generator For A Wood Stove
-
Wood Stove5 months ago
What Can I Use As Insulation On Wood Stove Pipes
-
Wood Stove1 month ago
How To Use Damper And Draft On Wood Stove
-
Wood Stove3 days ago
How Far Does Wood Stove Have To Be From Wall
-
Wood Stove8 months ago
How To Make A Heat Shield For A Wood Stove
-
Wood Stove1 month ago
When To Open And Close Damper On Wood Stove
-
Wood Stove9 months ago
How To Use The Flue On A Wood Stove
-
Wood Stove5 months ago
How To Install A Wood Stove Pipe And Chimney